
Introduction
The moment you walk through your front door, your home either welcomes you or ambushes you.
Most entryways ambush people. Shoes scattered across the floor. Backpacks dumped against the wall. Keys missing. Coats piled on one hook that is slowly pulling out of the drywall. You just got home and you already feel behind.
Here is the thing. This is not a “you” problem. It is a system problem. Or more accurately, a missing system problem.
A mudroom fixes that. Not a Pinterest-perfect mudroom with custom cabinetry and $400 hooks. A real one. One that is built around how your household actually moves, what you actually carry, and what your space actually allows.
In this guide, you will get 19 mudroom ideas that work in 2026. Some cost almost nothing. Some take a weekend. A few require a contractor. But every single one is actionable and specific. No vague advice. No filler.
By the end, you will know exactly what to build, buy, or rearrange to turn your entryway from a daily headache into a space that actually works for you.
Why Every Home Needs a Mudroom (Even If You Think You Have No Space)
A mudroom does not have to be a room.
That surprises a lot of people. They picture a large back hallway in a farmhouse with built-in cubbies and a dog shower. And sure, that version exists. But a mudroom is really just a designated transition zone between the outside world and the rest of your home.
It can be a 3-foot section of wall in an apartment hallway. It can be a converted coat closet. It can be a corner of your garage. The size does not matter. The system does.
The National Association of Home Builders has listed mudrooms among the top most-wanted home features in new construction surveys for several years running. Homeowners want them because they work. When every item that comes through your door has a place to land, the chaos stops spreading into the rest of your house.
There is also a real psychological reason to care about this. Research in environmental psychology shows that cluttered spaces raise cortisol levels, which is your stress hormone. Walking into a messy entryway does not just feel annoying. It physically puts your body on alert. A clean, organized entry does the opposite. It signals to your brain that things are under control.
You do not need a big space. You need a plan.
Now here are the 19 mudroom ideas that actually deliver on that promise.
19 Mudroom Ideas That Combine Style With Serious Storage
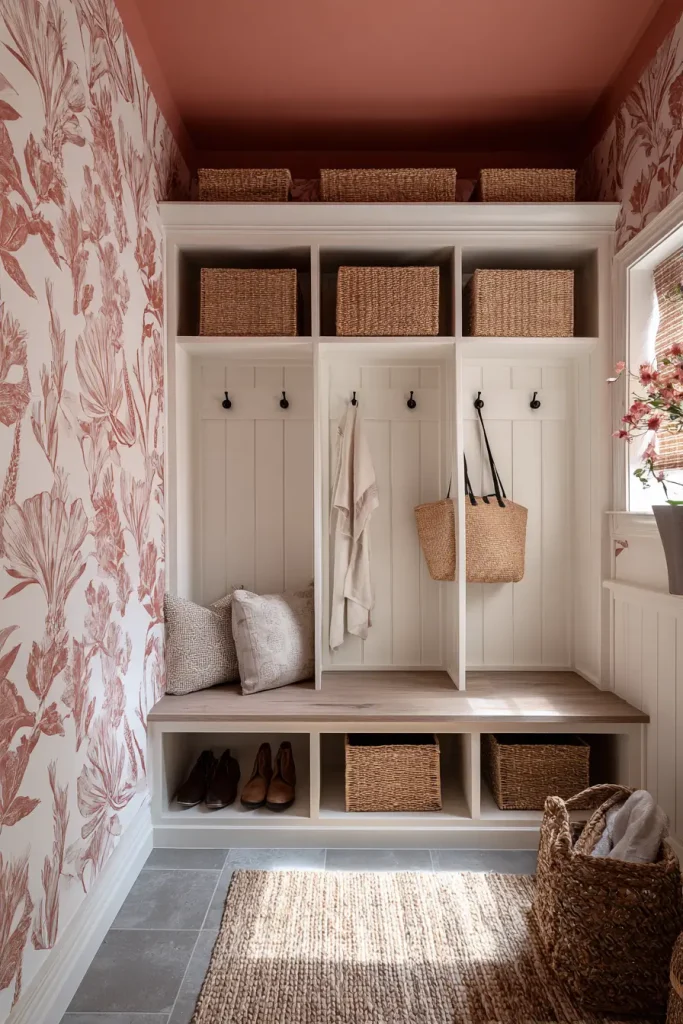
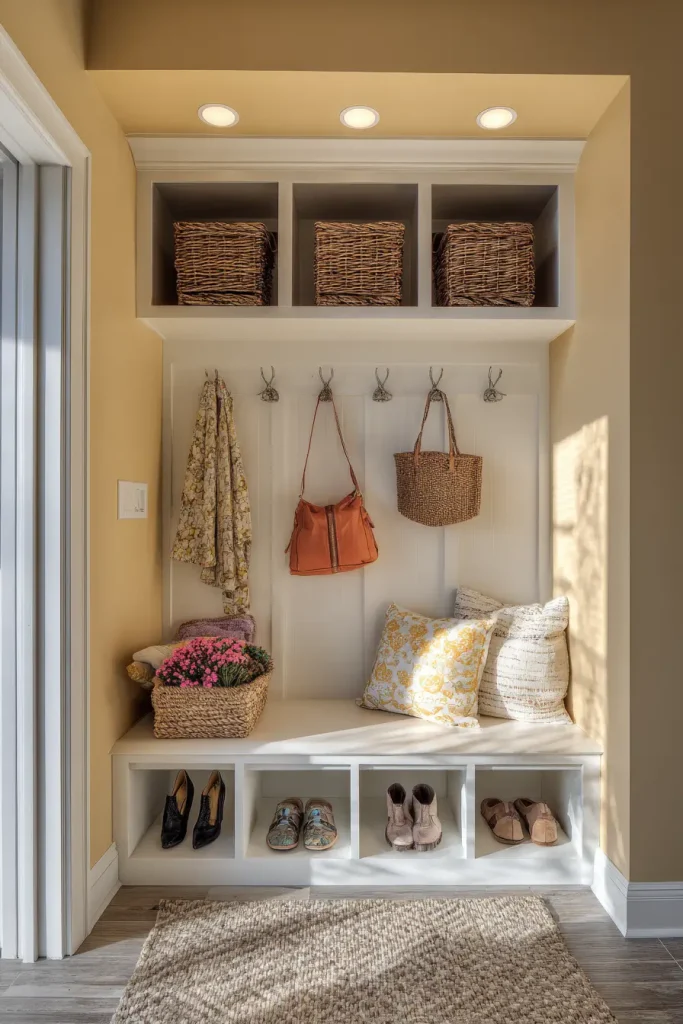
1. Build a Custom Cubby System for Each Family Member
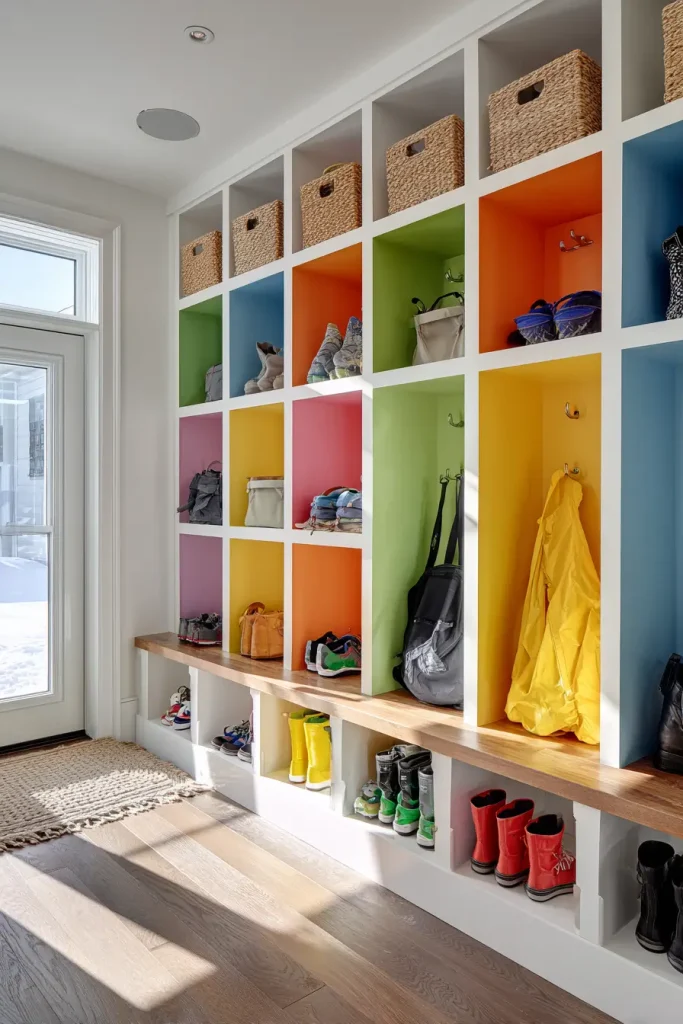
One cubby per person. That is the rule.
When every person in your household has their own designated spot, the “that is not my stuff” argument disappears. Each person owns their corner. Each person is responsible for it. This one shift changes how the whole space functions.
You do not need custom cabinetry to make this work. IKEA KALLAX units are one of the most popular DIY mudroom hacks right now for exactly this reason. They are modular, affordable, and come in sizes that work in tight spaces. A 4-foot-wide wall can fit a two-column KALLAX unit with plenty of room for hooks above.
Use open cubbies for the things people grab every day. Bags, shoes, hats. Use closed cubbies or boxes for seasonal stuff. And for kids, add a name label or use a color-coded system so there is zero confusion about what belongs where.
Pro tip: Keep one empty cubby on purpose. That overflow space prevents the whole system from collapsing when life gets busy.
Difficulty: Easy to moderate. Cost: $80 to $300 depending on materials.
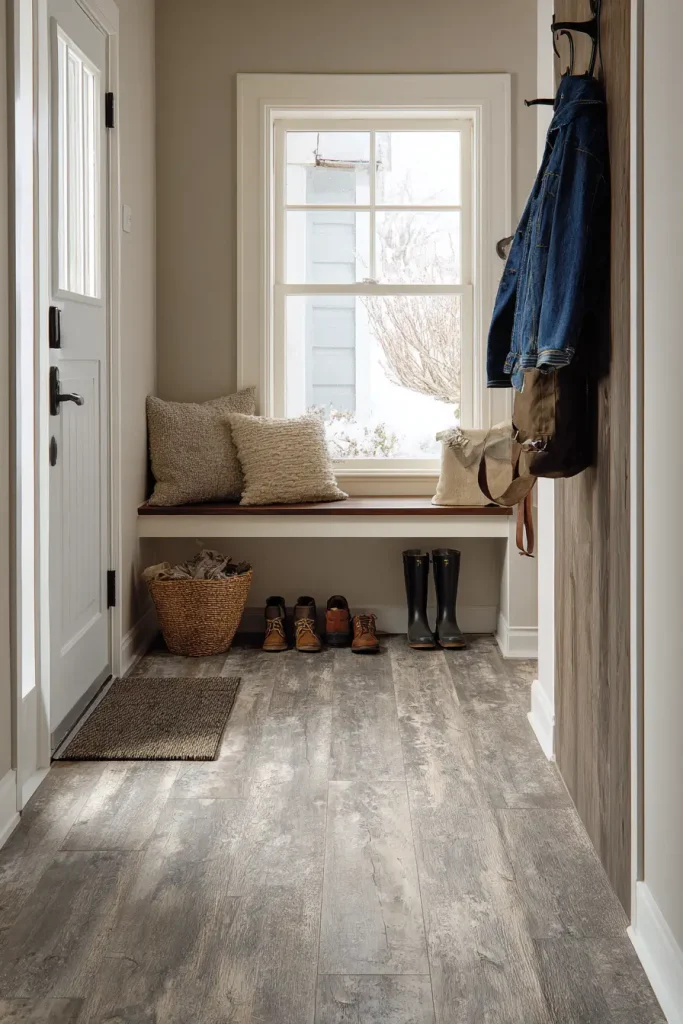
2. Install a Bench With Hidden Storage Underneath
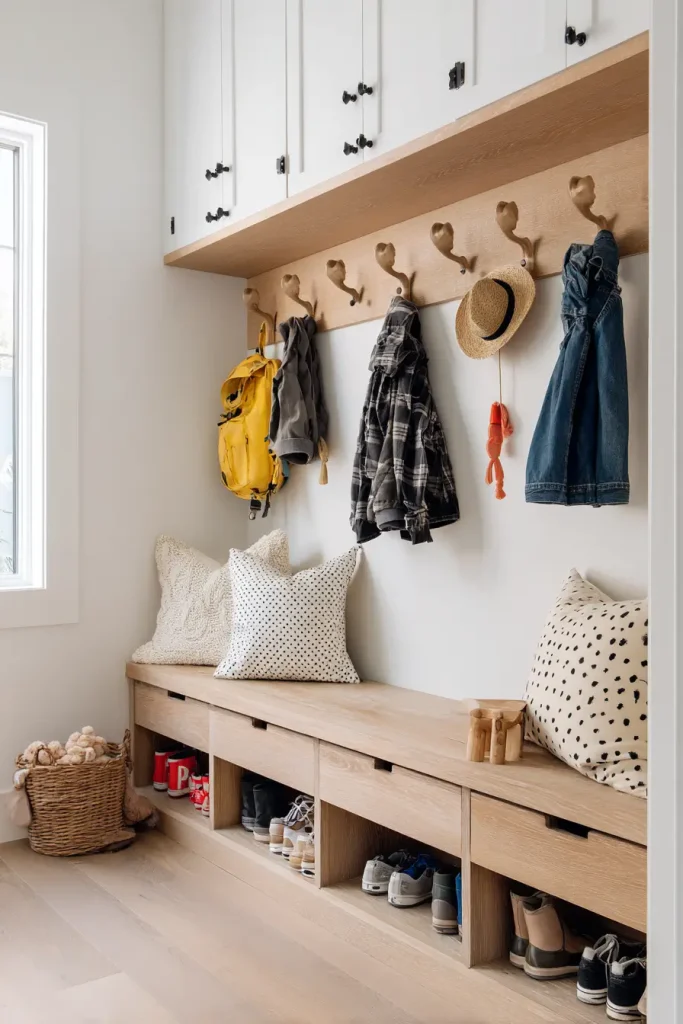
A bench does two jobs at once. It gives you somewhere to sit while putting shoes on, and it hides mess underneath.
That combination is what makes it one of the most practical mudroom investments you can make. You are not just adding seating. You are adding concealed storage that keeps things off the floor without requiring anyone to think about it.
You have two main options. Lift-top benches open like a chest and work great for bulky items like sports gear or extra shoes. Drawer-based benches are easier to access quickly, which matters in a busy morning rush. Neither is wrong. Pick based on what you store.
One measurement to remember: 16 to 18 inches deep. That is the minimum for a bench to feel functional and comfortable.
Place hooks directly above the bench at two heights. One set for adults. One lower set for kids. Now you have a complete station in one spot.
Pro tip: Shaker-style benches from Home Depot hold up well to daily use and look good without trying too hard. If you want to build one, 2×10 lumber is your best friend.
Difficulty: Easy (purchased) to moderate (DIY). Cost: $120 to $500.
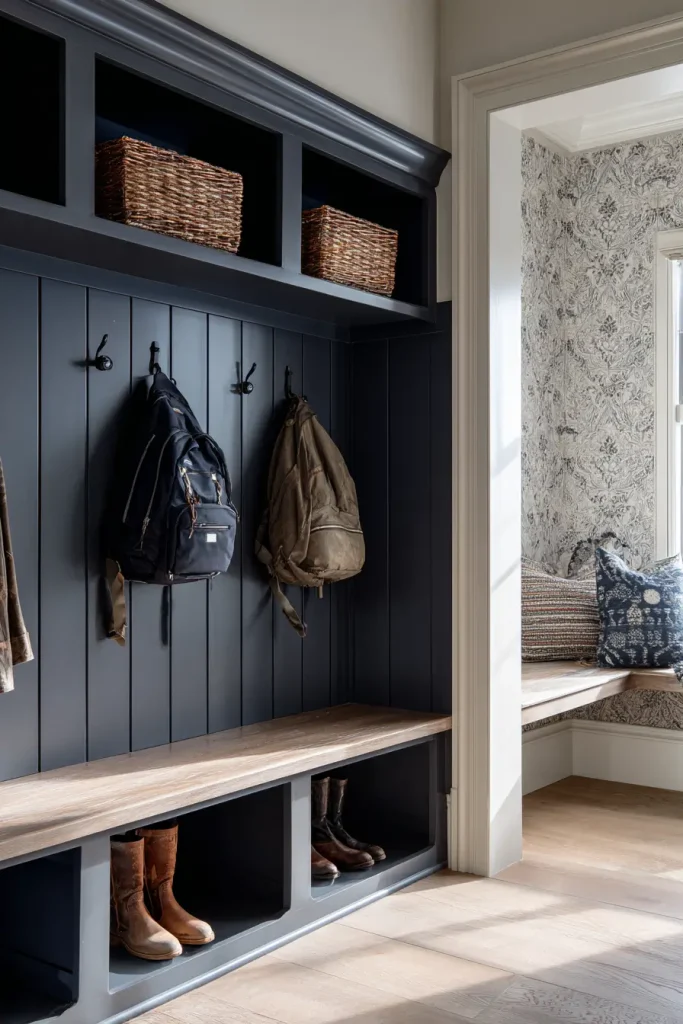
3. Go Vertical With Floor-to-Ceiling Wall Storage
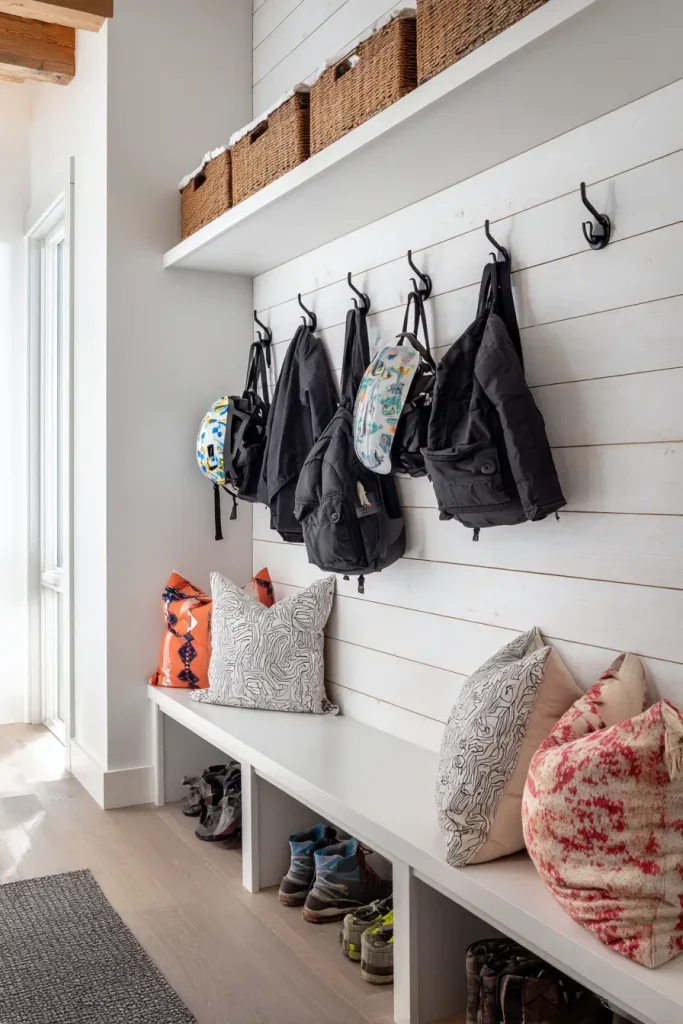
Small mudroom? Stop thinking horizontally. Go up.
When floor space is limited, the wall is your storage. Floor-to-ceiling systems use every inch of vertical height and leave the floor open, which actually makes the space feel bigger, not smaller.
Shiplap is a popular choice here because it looks good and gives you a solid mounting surface for hooks across the entire wall. Board and batten is another option trending heavily right now. Pair either with black iron hooks at different heights: low hooks for bags and backpacks, middle hooks for coats, top hooks for hats and seasonal items.
Heavy-duty hooks matter here. Use ones rated for at least 25 pounds each. Lightweight hooks bend, pull out, and fail fast in a high-traffic space.
Stagger the heights on purpose. If every hook is at the same level, coats and bags overlap and people stop using the system because it is frustrating.
Pro tip: Install a narrow floating shelf at the very top for helmets, bins, or items you reach for less often.
Difficulty: Moderate. Cost: $50 to $200 depending on hook quality and wall finish.
4. Add a Charging Station Built Right Into the Mudroom
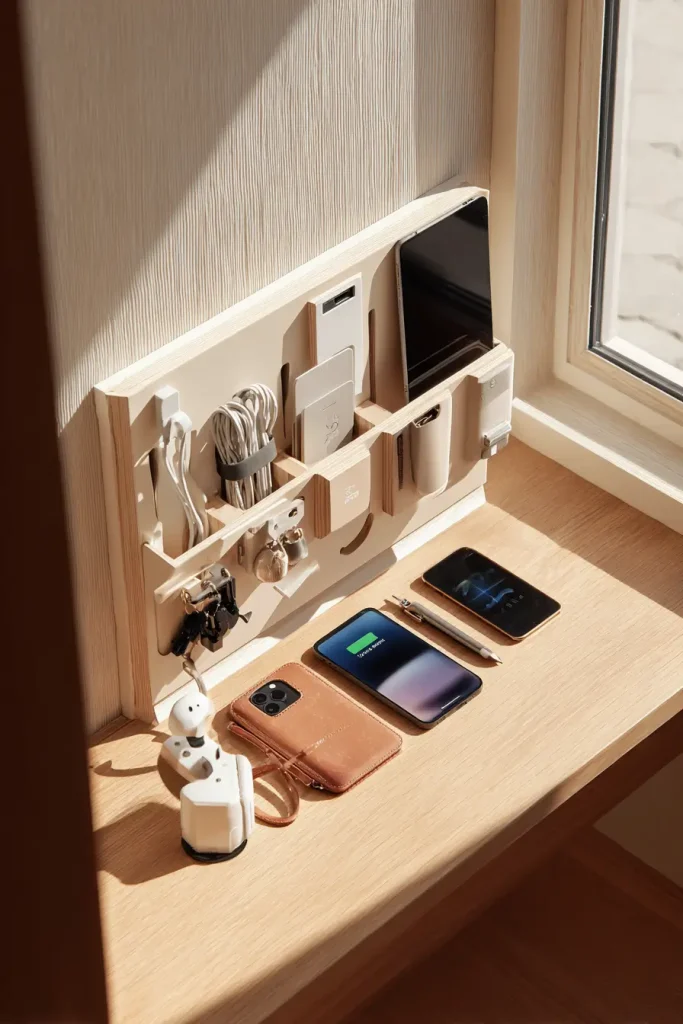
Here is a small change that makes a big difference in daily life.
A dedicated charging station in the mudroom means phones, tablets, and earbuds come off your body and go directly to a plug the moment you walk in. They are off the kitchen counter. Off the couch. Out of your pocket. And they are charged and ready when you leave again.
Pick one drawer or shelf and designate it for charging only. Install an outlet strip with USB-C ports inside or just behind it. Use cable management clips to keep cords from turning into a mess. Mount a small key hook directly beside the charging shelf so your keys and your phone land in the same spot every time.
This is one of those ideas that sounds minor until you have it. Then you cannot imagine the alternative.
Pro tip: USB-C outlet strips with built-in surge protection are available on Amazon for around $25 to $40. Install one inside a shelf unit and run the cord through a small drilled hole in the back.
Difficulty: Easy. Cost: $25 to $60.
5. Use Wainscoting to Protect Your Walls and Add Style
A mudroom wall takes abuse. Backpacks scrape it. Wet boots splash it. Muddy hands touch it constantly. Regular painted drywall does not hold up well.
Wainscoting solves this. It is a paneled treatment that covers the lower portion of your wall, typically 32 to 36 inches high. It protects the surface that gets hit most often, and it looks intentional and finished rather than patched and tired.
Paint it in semi-gloss. That finish is easier to wipe clean than flat or eggshell. For color, white and off-white are classic. Dark navy or forest green wainscoting with a lighter wall above is a combination showing up everywhere in 2025 and 2026.
If you want a designer look without a designer budget, add wallpaper above the wainscoting. The contrast between the paneled lower half and a bold patterned upper half makes the space look like it was professionally done.
Difficulty: Moderate to hard DIY, or hire a trim carpenter. Cost: $200 to $800 installed.
6. Install a Pegboard Wall for Storage You Can Rearrange Anytime
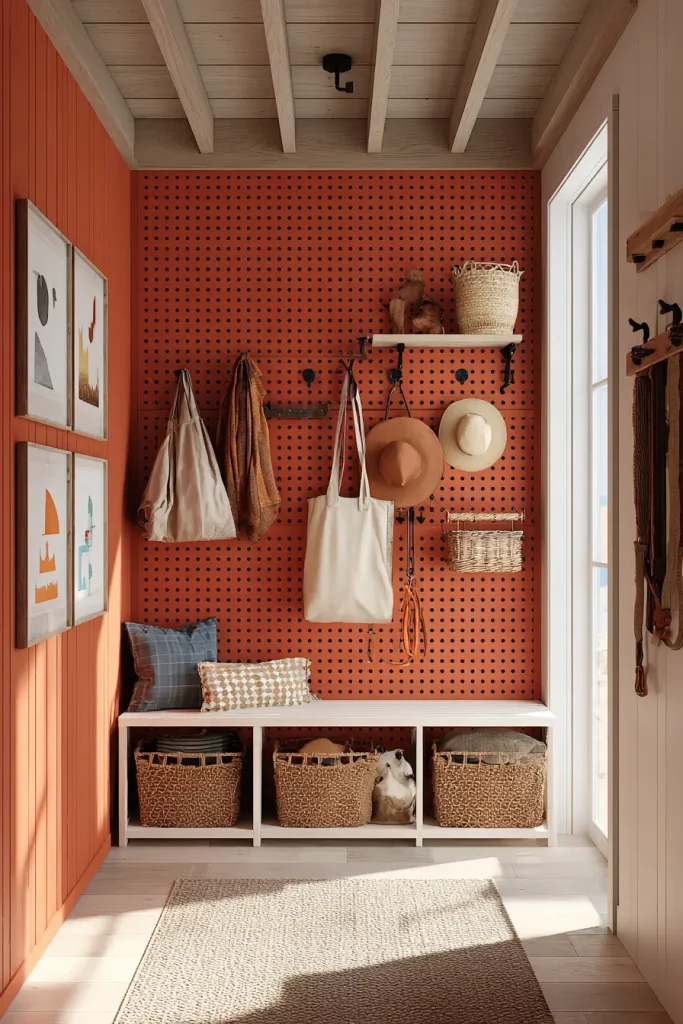
Most storage systems are permanent. Once you put them up, they stay.
A pegboard is different. You can move every hook, shelf, and bin on it without touching a single screw. That matters because your storage needs change. What works when your kids are in elementary school does not work when they are in high school with different gear.
A 4×4 sheet of pegboard from Home Depot costs under $30. Paint it in an accent color so it looks like a design choice rather than a garage leftover. Black, dark green, and warm terracotta are all working well in mudrooms right now.
Load it with hooks for bags and leashes, small wire baskets for sunglasses and mail, a shelf for hats, and a bin at the bottom for dog stuff or gardening gloves. The whole thing costs under $100 and takes about two hours to install.
Pro tip: Mount the pegboard on 1×2 wood strips first. This creates a small gap behind the board so the hooks can actually go in. Skip this step and the hooks will not fit.
Difficulty: Easy. Cost: $30 to $80.
7. Create a Shoe Storage System That People Will Actually Use
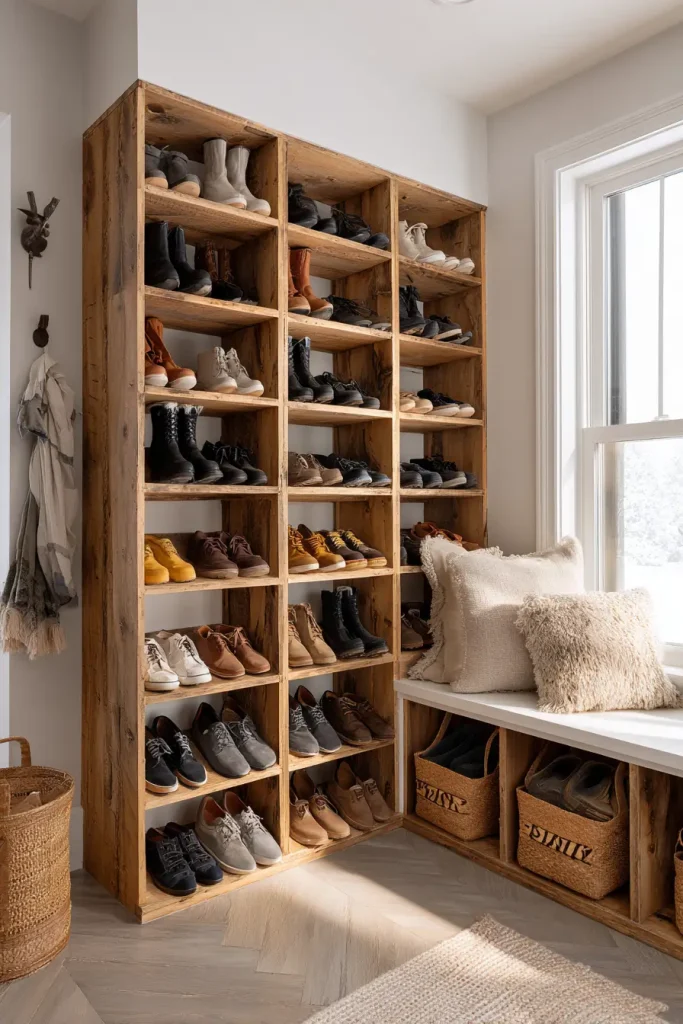
Most shoe storage fails for one reason: inconvenience.
If putting a shoe away requires more than two seconds of effort, it will not happen. Especially with kids. Especially in the morning rush. The system has to be faster and easier than dropping shoes on the floor.
Angled shoe shelves hold more pairs than flat shelves in the same amount of space. Built-in cubbies with a small lip keep shoes from falling forward. Both options are easier to use than a traditional shoe rack with thin bars that tip everything over.
The average American household owns roughly 19 pairs of shoes. You cannot store all of them at the door. The key is to keep only current-season shoes visible and accessible. Everything else goes in a closet, in boxes, or under beds.
Give each person two to three shoe slots in the mudroom. That is it. The limitation is actually helpful because it forces regular editing of what is at the door.
Pro tip: Slanted wooden shoe shelves are easy to build with 1×8 boards and basic tools. DIY versions cost about $40 in materials.
Difficulty: Easy to moderate. Cost: $40 to $150.
8. Bring In a Statement Light Fixture
Lighting is the most skipped step in mudroom design. And it shows.
Dark entryways feel unwelcoming. They also make it harder to find things, see what you are grabbing, and do a last check before you head out. Good lighting fixes all of that.
A statement pendant or lantern does more than light the space. It signals that this area was thought about. It makes the space feel finished. That matters because how a space looks affects how people treat it.
For fixtures, warm LED bulbs in the 2700K to 3000K range give the space a welcoming glow rather than a harsh office feel. If your hands are always full when you walk in, a motion sensor light switch is worth the upgrade. You can replace a standard switch with one for around $20.
Pro tip: If you cannot hardwire a new fixture, plug-in pendant lights exist and look great. No electrician needed.
Difficulty: Easy to moderate. Cost: $40 to $200.
9. Add Wallpaper for a Designer Look on a Budget
A mudroom is a small space. That works in your favor when it comes to wallpaper.
A single accent wall or a full room of wallpaper requires far less material than a bedroom or living room. That means you can spend more per roll and get something genuinely beautiful without it costing a fortune.
Peel-and-stick wallpaper quality has improved dramatically. The options available in 2026 look nearly identical to traditional wallpaper and are much more forgiving to install and remove. For renters, this is especially useful.
Grasscloth textures and botanical prints are trending right now and work well in mudrooms because they bring warmth to a utilitarian space. Bold geometric patterns also do well here because the room is transitional. You pass through it, you do not live in it, so a strong pattern does not feel overwhelming.
Pro tip: Apply wallpaper only above a chair rail or above wainscoting for an elevated look with minimal effort.
Difficulty: Easy (peel-and-stick) to moderate (traditional). Cost: $50 to $200 for a small space.
10. Use Baskets and Bins as the Backbone of Your System

You can have the most beautiful shelving in the world. Without bins, it will still look like chaos within a week.
Baskets and bins do one essential job: they group like items so you can find them without searching. One bin for sports gear. One for dog stuff. One for scarves and gloves. One for incoming mail. The label matters because it tells everyone in the house where things go, not just where you put them.
Wicker and rattan baskets look warm and organic. Wire baskets work well for ventilated storage like shoes or wet gear. Fabric bins are soft and easy to pull off shelves. The material is less important than the size. Standardize your bin sizes. When all bins match, the shelf looks calm and organized even when the bins are stuffed full.
One bin per category is the rule. If a category needs two bins, it needs to be edited down, not expanded.
Target’s Threshold storage line and IKEA’s SKUBB bins are reliable and affordable. Neither will let you down.
Difficulty: Easy. Cost: $20 to $80.
11. Design a Dedicated Station for Your Dog
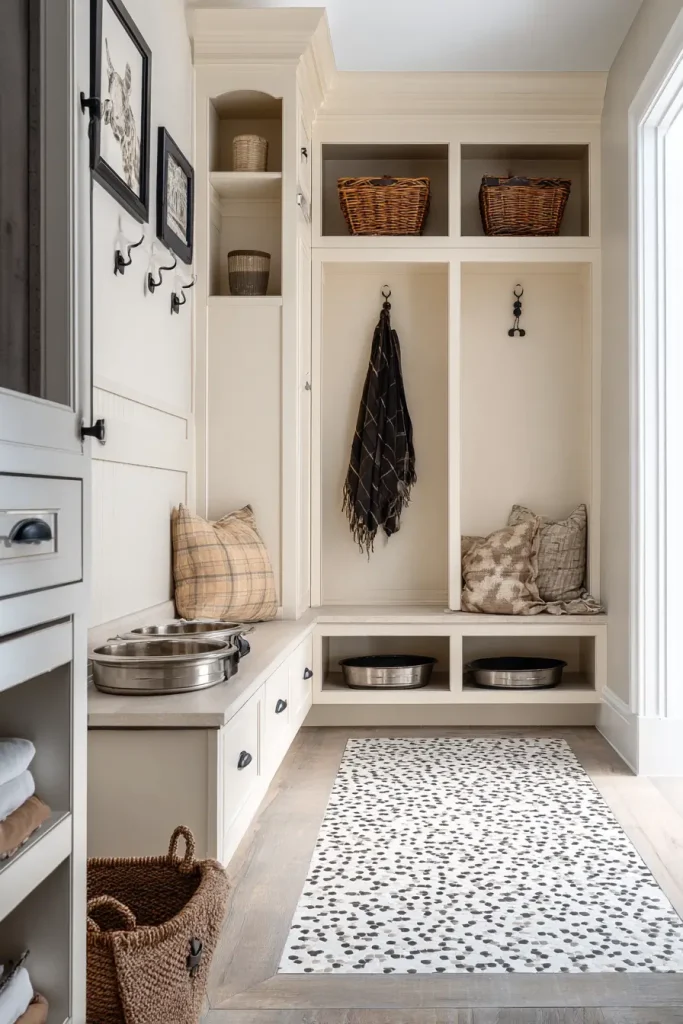
66% of U.S. households own a pet. Most mudrooms ignore them completely.
A dog-dedicated station fixes the daily friction of walks, wet paws, and scattered gear. It does not need to be large. Even a single shelf and two hooks make a real difference.
Put leash hooks at adult height so you grab them without bending. Add a small cubby or basket for treats, poop bags, and the dog’s medical documents if you keep those handy. A small towel bar with two or three designated paw-drying towels saves your floors on rainy days.
If your space allows, a raised food bowl station with a mat underneath keeps feeding off the kitchen floor and keeps the mudroom feeling purposeful.
Pro tip: Label the dog’s cubby or basket clearly. It sounds obvious, but it stops every family member from using the dog’s storage bin for random items.
Difficulty: Easy. Cost: $30 to $150.
12. Build a Mini Command Center Into One Wall Panel
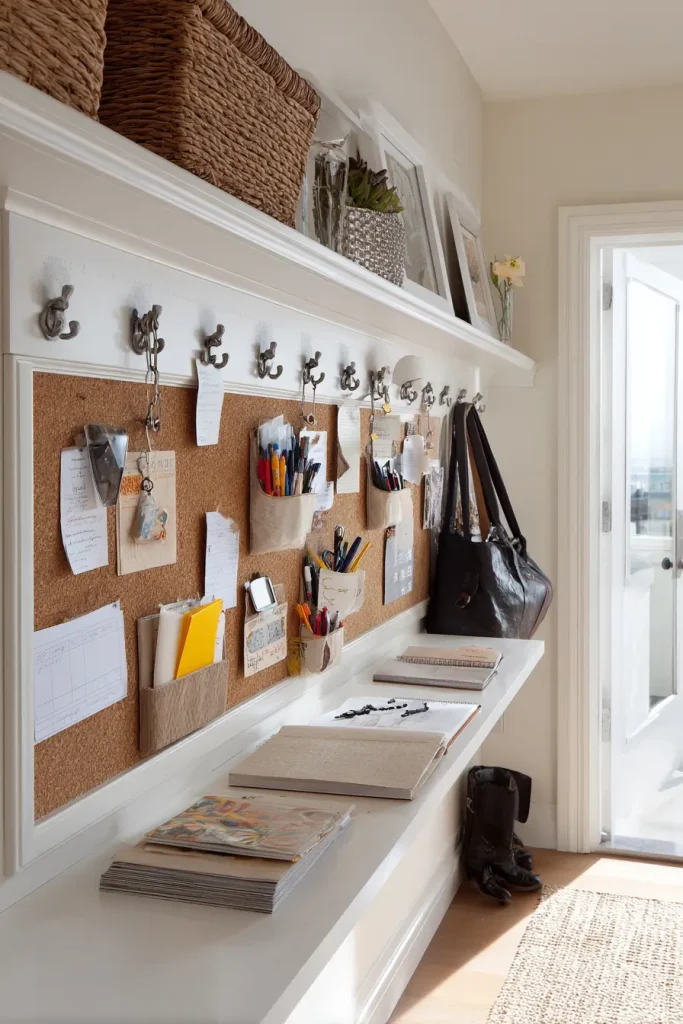
If your family runs on schedules, this idea earns its space immediately.
A command center is a wall-mounted combination of a message board, calendar or whiteboard, mail shelf, and hooks, all in one spot. It is where permission slips land before they disappear. Where the school schedule lives. Where you write the reminder your family will actually see because they walk past it five times a day.
Mount a corkboard or whiteboard panel at eye level. Add a narrow shelf below it for incoming mail and items that need attention. Keep a pen or marker clipped directly to the board so no one has to look for one.
Pair it with two to three hooks on the same panel for keys, dog leashes, or lanyards. This turns one wall into a fully functional family hub.
Pro tip: Use a weekly dry-erase calendar instead of a paper one. It takes 30 seconds to update and never runs out of pages.
Difficulty: Easy. Cost: $30 to $100.
13. Try a Locker-Style System for Kids
Kids do better with simple, visual systems.
A locker-style setup works because it mirrors what kids already do at school. They know the routine. They arrive, open their locker, hang up their bag, and go. Replicate that at home and you eliminate the daily negotiation about where things belong.
Each child gets a full vertical column. Hook at the top for their coat or backpack. Shelf in the middle for shoes, a hat, or a lunchbox. Bin at the bottom for sports gear or extra shoes. A second hook at the bottom for a backpack if the top one is full.
Pottery Barn Kids makes ready-made locker systems that look polished. Custom builders can replicate the look with plywood and paint for less. Either works.
Pro tip: Let kids pick the color of their locker section. When they feel ownership over it, they are more likely to use it properly.
Difficulty: Easy (purchased) to moderate (DIY). Cost: $150 to $600.
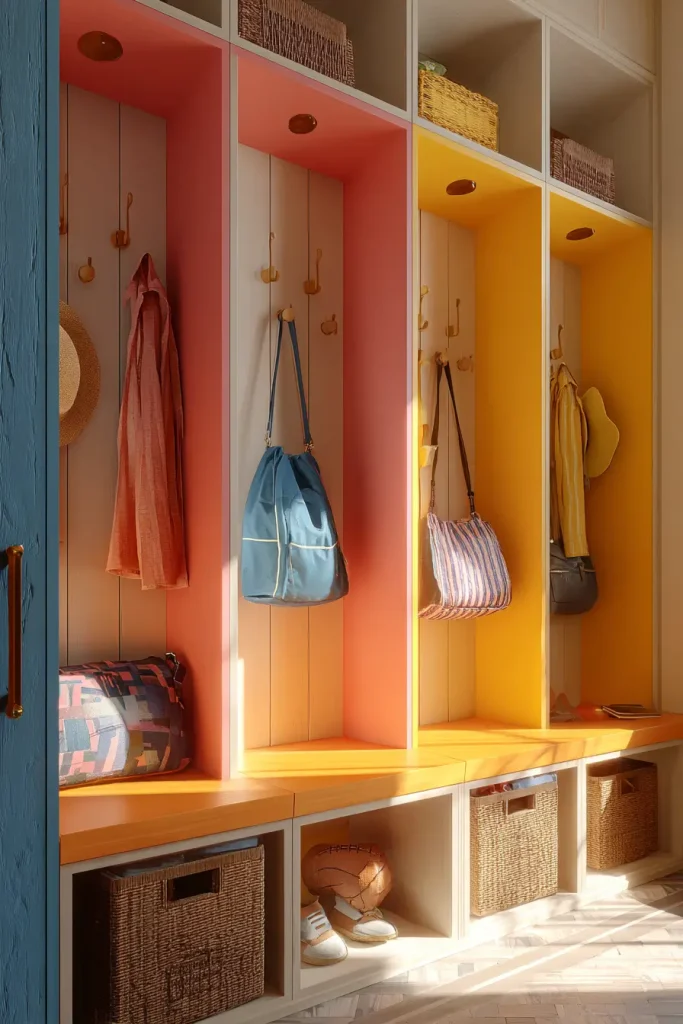
14. Use Color to Zone Your Mudroom Without Building Anything
Color is one of the fastest ways to bring order to a mudroom.
When each family member has a designated color, the system runs itself. Blue bins and blue hooks belong to one person. Red belongs to another. No one has to ask where their stuff is. No one has to argue about whose coat is blocking whose hook.
Color zoning also helps define the mudroom boundary when the space opens into another room. A contrasting wall color, an accent tile, or even a painted floor section visually tells everyone where the mudroom starts and ends. This keeps the organization contained.
This idea works especially well in open-concept homes where the entry flows directly into the kitchen or living space. The color creates a psychological border even without physical walls.
Difficulty: Easy. Cost: $10 to $50 for bins and hooks.
15. Install Flooring That Can Handle Real Life
Carpet in a mudroom is a mistake. It holds moisture, traps odors, and is nearly impossible to keep clean when wet boots and muddy shoes are the daily reality.
The three best options for mudrooms in 2026 are tile, luxury vinyl plank (LVP), and sealed concrete. All three are water-resistant, easy to clean, and durable enough for heavy daily traffic.
LVP in particular has exploded in popularity in residential spaces over the last several years. It feels warmer underfoot than tile, installs quickly, and costs less than hardwood or stone.
One detail most people miss: grout color. If you go with tile, choose a mid-tone gray grout. White grout shows every bit of dirt. Dark grout makes the floor look permanently shadowed. Mid-gray hides dirt without looking grim.
Add a recessed floor mat right at the door entry. It catches moisture and debris before it travels further into your home.
Pro tip: Look for textured tile surfaces rather than smooth ones. Smooth tile gets slippery when wet.
Difficulty: Moderate to hard. Cost: $200 to $800 for a typical mudroom space, DIY.
16. Add Open Shelving Above the Bench for Extra Storage
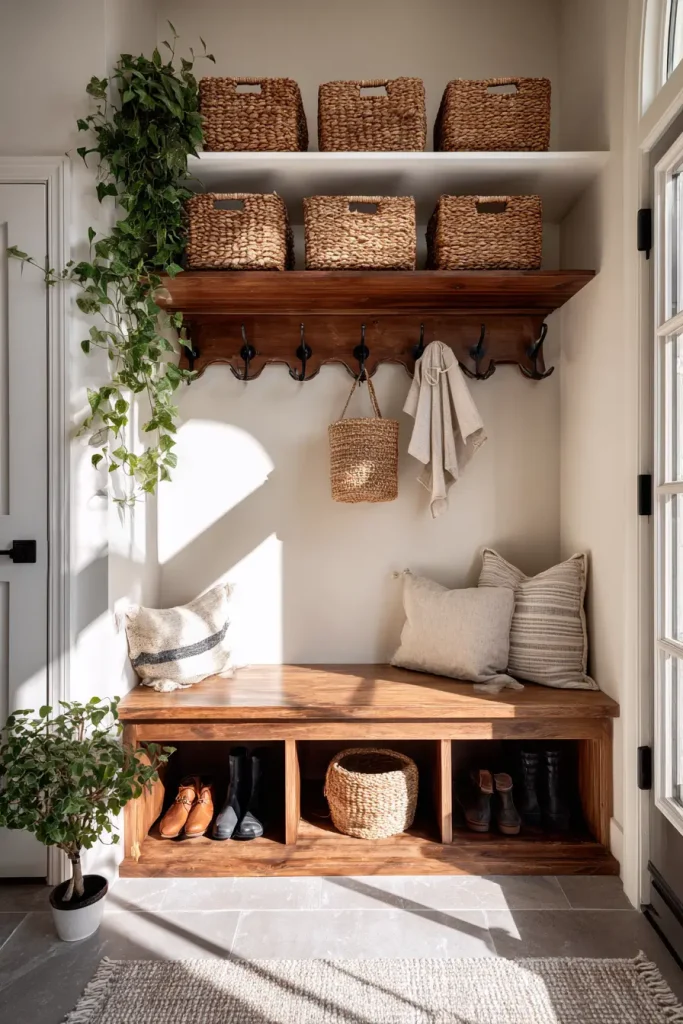
The wall space above a bench is almost always wasted. It should not be.
Open shelves installed above bench height give you a second layer of storage without touching the floor. Use this space for seasonal items, overflow bins, extra shoes, or the things you need occasionally but not every day.
The rule for upper shelves: keep anything you reach for daily at eye level or below. Upper shelves are for things you access weekly or seasonally. When upper shelves hold daily items, you end up with unsafe reaching and items getting pulled down onto the bench.
Put everything on upper shelves inside baskets. Open piles on upper shelves always look messy. Baskets keep it clean.
Add one small trailing plant on an upper shelf if you want. A pothos or a small fern adds warmth and a bit of life to a space that can otherwise feel purely functional.
Difficulty: Easy. Cost: $30 to $100.
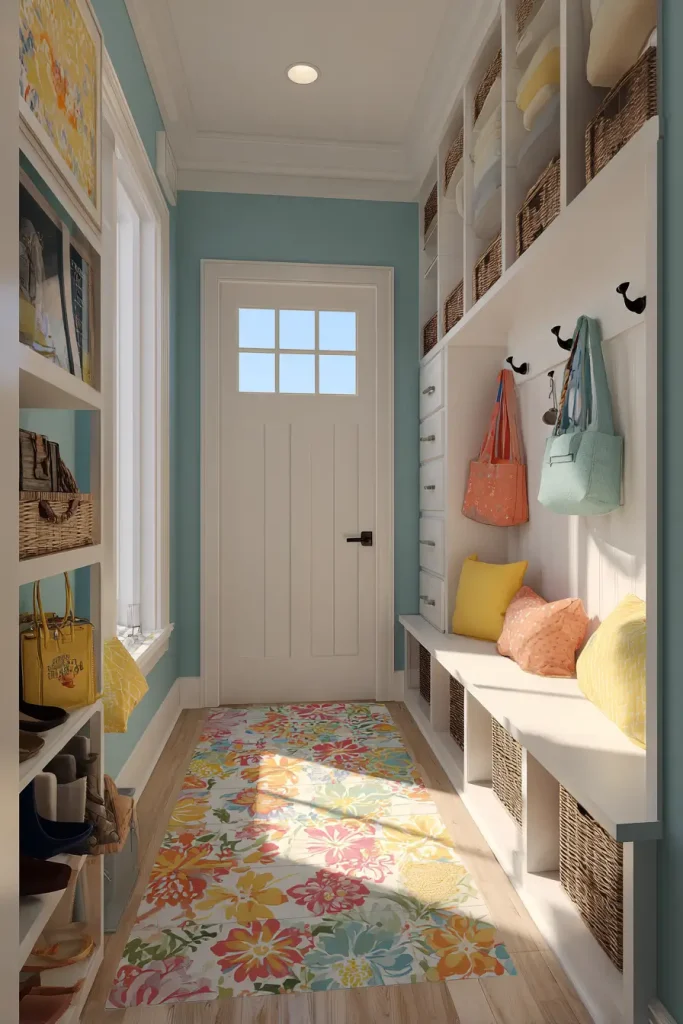
17. Convert a Coat Closet Into a Full Mudroom
This is the best budget-friendly mudroom transformation available to most people.
Most homes have a coat closet near the front door. Most coat closets are badly organized and half-empty. Removing the doors and installing an organizer system inside converts that same footprint into a real, functional mudroom.
Without doors, the closet becomes an open drop zone. People actually use it because there is no barrier between them and the storage. Take down the old single rod and shelf. Install a floor-to-ceiling organizer system with hooks, cubbies, and a bench if the depth allows.
Add lighting inside. Plug-in LED puck lights or a battery-powered strip light transforms a dark closet corner into a space that feels intentional. Most people do not think about this step and then wonder why no one uses the closet.
A DIY closet-to-mudroom conversion costs roughly $200 to $800. Hiring a contractor typically runs $1,500 to $4,000. The DIY version, done carefully, looks just as good.
Pro tip: Paint the inside of the closet a different color than the walls around it. This visually defines the space and makes it feel more like a proper mudroom.
Difficulty: Moderate. Cost: $200 to $800 DIY.
18. Bring In a Mirror for a Smarter Exit
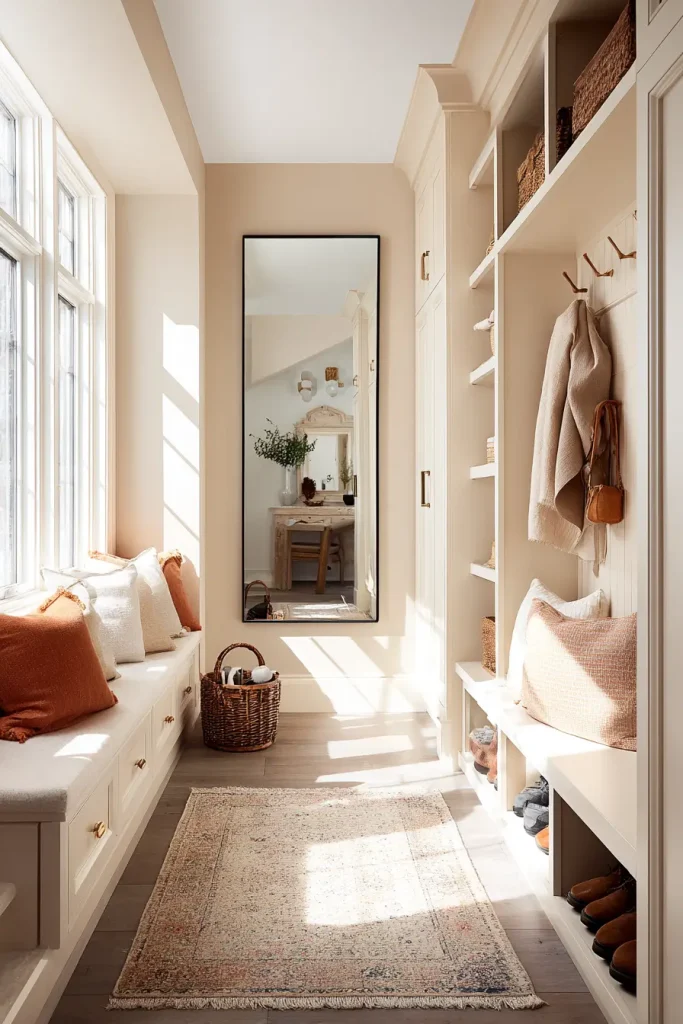
A mirror in the mudroom is not a vanity feature. It is a practical one.
A final check before you leave catches the collar that is up, the tag sticking out, the spinach situation you did not know about. More practically, it is a natural spot to pause before walking out the door. That pause is where you remember the permission slip, the umbrella, or the item sitting on the bench that you nearly forgot.
Mirrors also reflect light. In a small or narrow entryway, a mirror makes the space feel noticeably larger without changing anything structural.
Mount it at door height so it functions as a full-length check. If space is tight, a long narrow mirror mounted vertically takes up almost no horizontal room while still doing the job.
Pro tip: Hang the mirror on the wall you face when putting on shoes. That placement makes it most useful and most used.
Difficulty: Easy. Cost: $30 to $150.
19. Use Smart Home Features to Make Your Mudroom Work Harder
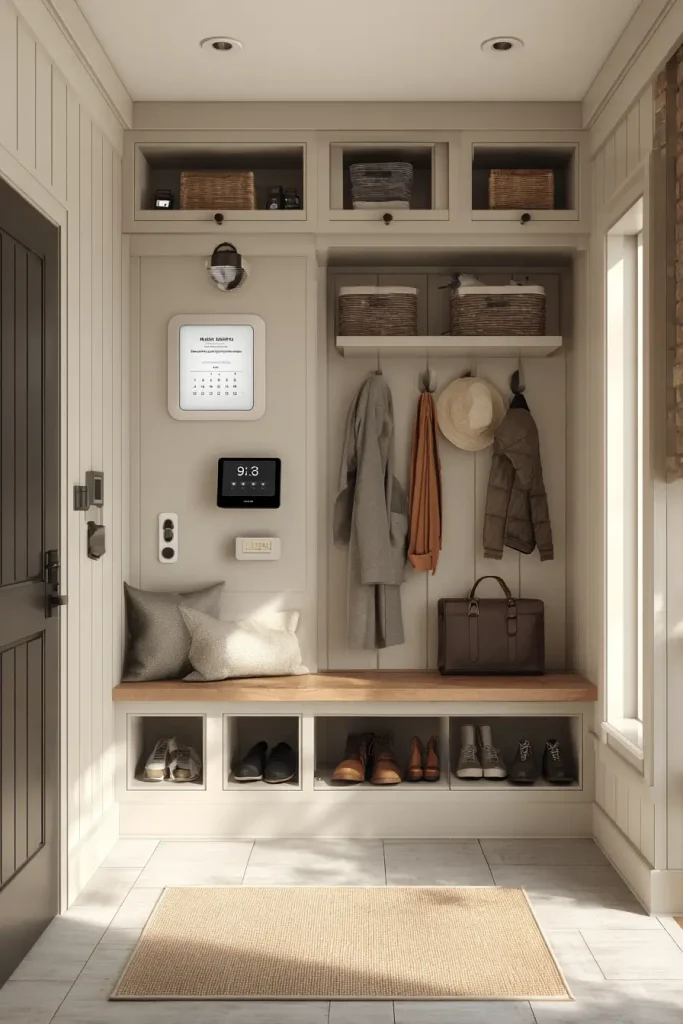
This is where a basic mudroom becomes a genuinely smart one.
A smart lock eliminates the daily anxiety about whether you locked the door. You can check and lock it from anywhere on your phone. That alone is worth the upgrade for a lot of people.
A small smart display mounted in the mudroom, like an Echo Show, shows the weather, your calendar, and any reminders the moment you walk in or out. You know if you need an umbrella. You know what time your first meeting is. You see any messages without picking up your phone.
Motion-activated lights inside cabinets and cubbies mean the storage you cannot see is still easy to access. Open a door and the light comes on. Close it and it turns off.
None of these need to be expensive. Many smart home accessories in 2026 cost under $50 and install in minutes. Start with one, see how it changes your routine, and add from there.
Pro tip: Set a simple automation: when your smart lock locks at night, it triggers your mudroom light to turn off. Small automations save small but daily friction.
Difficulty: Easy. Cost: $30 to $200 depending on devices.
How to Plan Your Mudroom Before You Buy Anything
The most common mudroom mistake is shopping before planning.
People see something they like on Pinterest, buy it, and then discover it does not fit their wall, does not match how they actually use the space, or does not hold what they actually bring through the door. Then they start over. That is expensive and frustrating.
Start with a measurement. Get the exact width, height, and depth of the space you are working with. Write it down. Every purchasing decision starts here.
Then do an honest audit. What do you actually bring through that door every single day? Shoes, yes. Bags, yes. But also: sports gear, pet items, mail, reusable bags, umbrellas, work equipment? Make a real list. Do not make an ideal list. Make the list of what actually lands there now.
Match your storage choices to that list. If you have three dogs and two kids in sports, you need more hooks and more floor-level storage than a single adult who works from home. The right mudroom looks different for every household.
Set a realistic budget before you start. DIY mudrooms can be built for under $300 with careful planning and IKEA systems. Semi-custom setups with purchased furniture typically run $500 to $1,500. Full custom built-ins with professional installation range from $3,000 to $10,000 or more.
Finally, choose a style that connects to the rest of your home. A farmhouse mudroom in a modern home will always feel out of place. Keep the finishes, colors, and hardware consistent with what is already there.
If a storage piece does not serve something you actually bring through that door, leave it out.
Common Mudroom Mistakes to Avoid
Even people who love organizing get this wrong.
Too many hooks, not enough flat surface. Hooks are great. But you also need somewhere to set things down while you get organized. A bench, a shelf, or even a small table gives people a landing spot. Without it, everything ends up on the floor anyway.
Skipping lighting entirely. A dark mudroom is a mudroom no one will use properly. Good lighting is not optional. It changes how the space feels and how functional it actually is.
Choosing style over durability. That beautiful woven jute rug looks great on day one. After two weeks of wet boots, it looks terrible and smells worse. Choose materials rated for high traffic and moisture in this space specifically.
Not assigning ownership. When the mudroom belongs to everyone, it belongs to no one. Assign specific zones, hooks, bins, and cubbies to specific people. The moment something belongs to someone, that someone is responsible for it.
Organizing for an ideal version of your life. If you have never once sorted your mail the moment you walk in, do not build your mudroom around a dedicated mail sorting station. Build around what you actually do. The system that matches your real behavior is the one that will hold up.
Every one of these mistakes is fixable. And most of them cost nothing to correct except a bit of honest thinking.
Conclusion
A mudroom is not a luxury. It is a system.
You do not need a big house. You do not need a big budget. You need a plan that matches how your household actually moves, what you actually carry, and what your space actually allows.
These 19 ideas cover every budget, every size, and every kind of household. Some of them take an afternoon. Some take a weekend. A few require help. But all of them work when you build them around real life instead of an ideal one.
Pick one idea from this list and do something with it this week. Start with hooks. Start with bins. Start with a bench. Start with removing your closet doors. Just start somewhere.
With the right mudroom storage ideas in place, coming home stops feeling like walking into a problem. It starts feeling like arriving somewhere you actually want to be.
- 17 Bedroom Ideas for Couples in Small Apartments - March 13, 2026
- 18 Kitchen Ideas for Families Who Cook Every Single Day - March 13, 2026
- 18 Small Bathroom Ideas for Renters With No Damage Solutions - March 13, 2026