You Open the Pantry. Nothing Makes Sense.
You need the pasta. You know you bought it. But now it is buried behind three cans of soup, a bag of chips falling over, and a box of something you do not even remember buying.
So you dig. You move things around. You finally find it. But by then you are frustrated, dinner is late, and the pantry looks worse than when you started.
This happens to most people. Not because they are lazy. But because no one ever showed them a real system.
The average household throws away around $1,500 worth of food every year. A lot of that waste happens because food gets pushed to the back, forgotten, and eventually expired. A better pantry fixes that.
These 17 pantry organization ideas are simple, practical, and they actually work in real homes. Not just in photos. You do not need to spend a lot of money. You do not need a walk-in pantry. You just need a plan.
Pick a few ideas that fit your space. Start this weekend. You will notice the difference fast.
Why Most Pantries Turn Into a Mess (And Stay That Way)
Before we get to the ideas, it helps to know why pantries fail in the first place.
Most people organize by asking one question: “Where does this fit?” That is the wrong question.
The right question is: “How do I cook, and where will I actually look for this?”
When you organize by what fits instead of how you cook, things end up in random spots. And when grocery day comes, you put new items wherever there is space. Old items get pushed back. You forget what you have. You buy duplicates. Things expire.
There is also no shared system. You know where things are. But your partner, your kids, or your roommate does not. So they put things back in different spots. Slowly, the system falls apart.
Professional kitchens solve this with something called FIFO: First In, First Out. New stock goes behind old stock. The older item always gets used first. Nothing gets forgotten.
You can use the same idea at home. It does not require anything fancy. Just a bit of intention.
Here is the honest truth: containers alone do not fix a pantry. A system does. The ideas below will help you build one.
Start Here: Do a Full Pantry Cleanout Before Anything Else
This step is not exciting. But skip it and everything else will be harder.
Pull every single item out of your pantry. Put it all on your kitchen table or counter. Yes, all of it.
Now check expiry dates. Throw away anything expired. Be honest about what you will actually eat. If that can of chickpeas has been in there for two years and you keep skipping it, donate it.
Group what is left into categories on the counter. Cans together. Pasta and grains together. Baking supplies together. Snacks together.
Most people are surprised by what they find during this step. Three open bags of flour. Four half-used boxes of pasta. Two identical jars of cumin. This is exactly why duplicate buying happens. The pantry hides things.
Once everything is grouped and spread out, you can see what you actually have. Now you know what containers you need, how much space each category takes, and what you were buying twice without realizing it.
This cleanout takes about 30 to 45 minutes. It is the most important step in this whole guide.
Do not skip it.
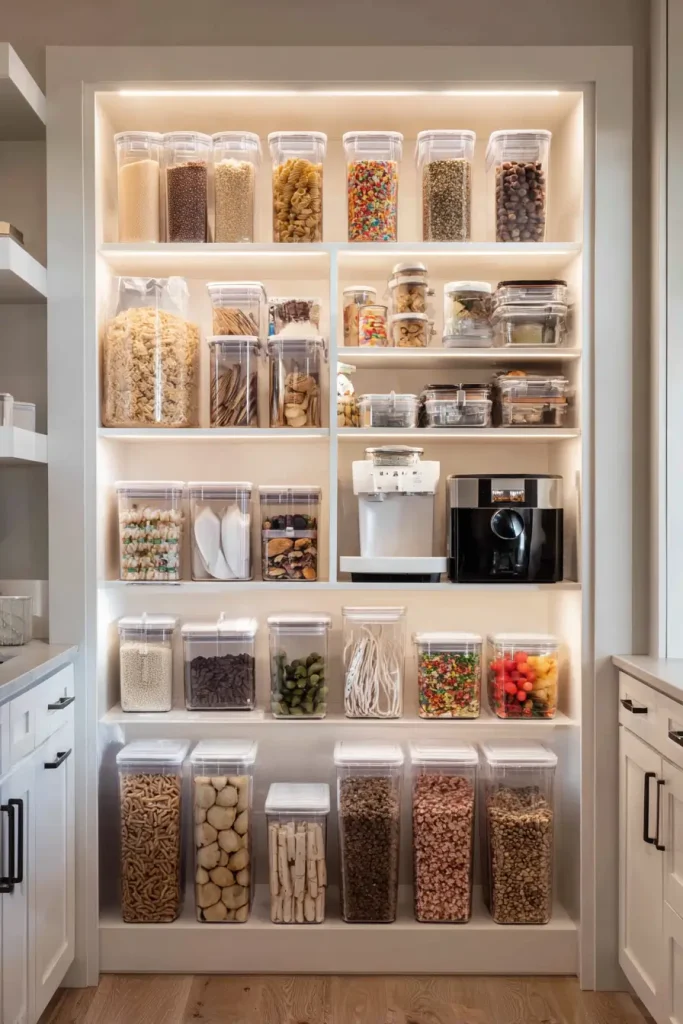
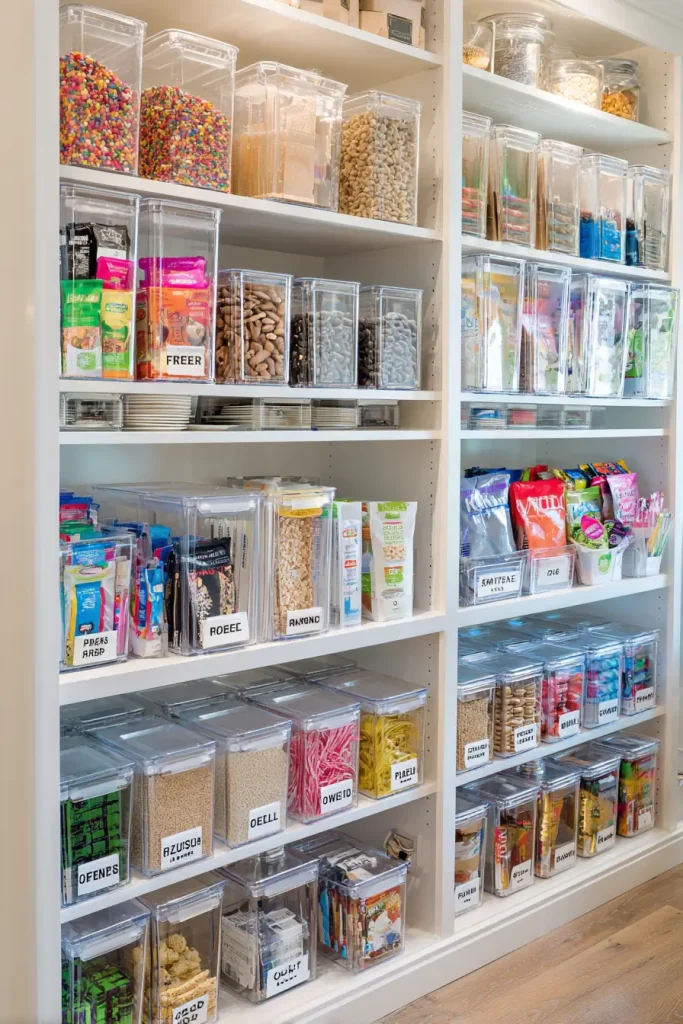
Idea 1: Use Clear Bins to Group Your Categories
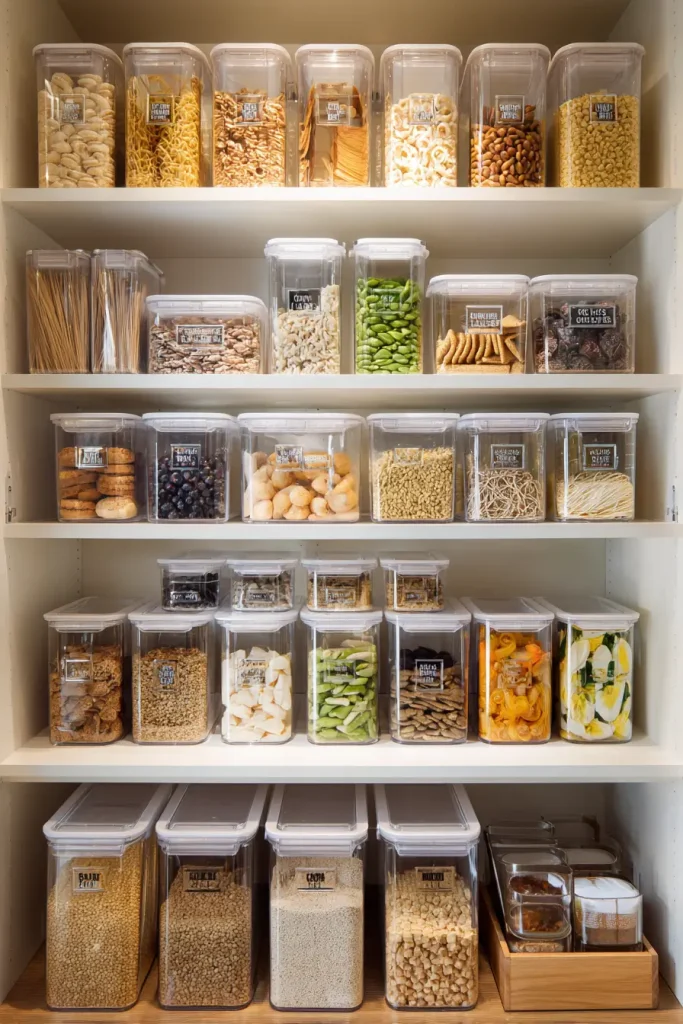
Clear bins are the foundation of an organized pantry. They work because you can see what is inside without touching anything.
Group your items by category. One bin for snacks. One for baking supplies. One for canned goods. One for grains and pasta. One for breakfast items. Label the front of each bin, not the lid.
When you buy something new, it goes into the right bin. When you need something, you grab the bin. Simple.
Clear bins also create a visual boundary. Snacks stay in the snack bin. They do not spread across three shelves. That boundary is what keeps the pantry from going back to chaos.
Use bins that are all the same size if possible. It looks cleaner and stacks more easily.
OXO Good Grips bins and basic clear bins from IKEA are both popular choices. They are affordable and come in sizes that fit most pantry shelves.
One idea that works well for families: give each person their own snack bin. Everyone knows which bin is theirs. No more missing snacks or accusing each other of eating the last granola bar.
Idea 2: Label Everything, Not Just the Containers
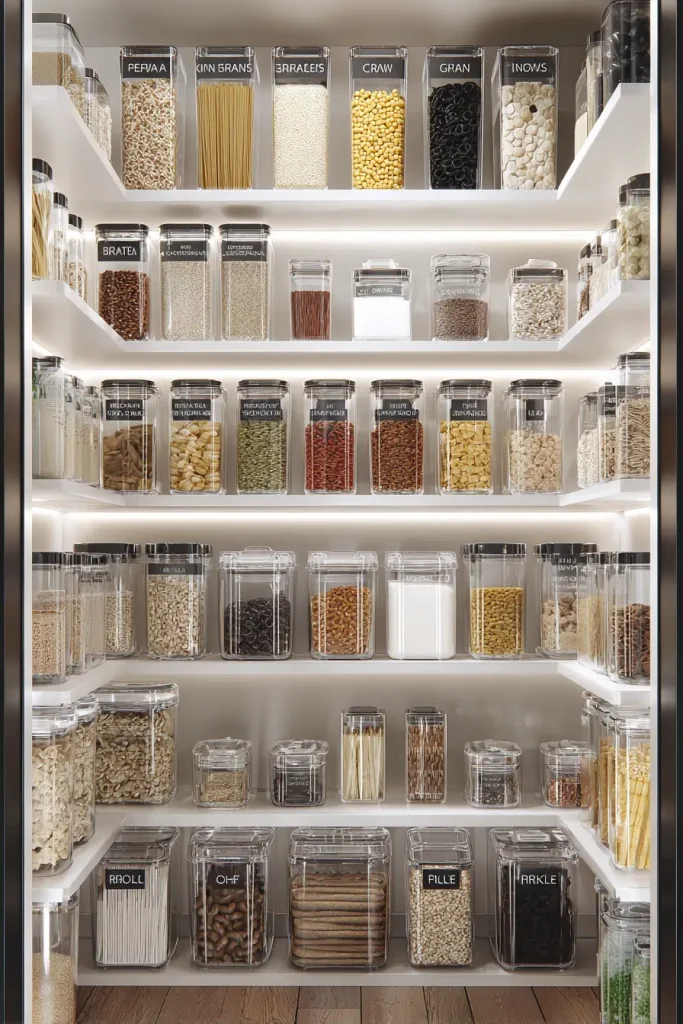
Labels sound basic. But most people only label the containers. That is not enough.
Label the shelf itself. A small strip of tape or a label strip on the shelf edge tells anyone in the house exactly where things belong. This is what makes the system last. When someone else is putting groceries away, they know where things go without asking you.
Use a label maker for clean, consistent labels. The Brother P-Touch is a reliable, affordable option. Cricut machines also work well if you want custom designs.
Label by category on the bin (“PASTA AND GRAINS”) and by specific item on the container (“Brown Rice” or “All-Purpose Flour”).
Update labels when your needs change. If you stop baking in summer, relabel that bin for something you are actually using.
The goal is that anyone in your house can find something and put it back without your help. That is when the pantry truly runs itself.
Idea 3: Put a Door Organizer on the Back of Your Pantry Door
The back of your pantry door is free real estate. Most people ignore it completely.
An over-the-door rack can hold spices, small snacks, foil and wrap boxes, condiment packets, and more. That is a significant amount of storage you are adding without touching a single shelf.
Before you buy one, measure the gap between your door and the nearest shelf. Some deep shelves leave very little clearance. You want to make sure the rack clears everything when the door swings closed.
Look for racks with adjustable shelves so you can fit different size items. SimpleHouseware and Spectrum Diversified both make solid over-the-door options that are widely available.
If you rent and cannot drill into anything, look for tension mount or hook-over-the-door versions. No holes needed. No damage to walls or doors.
This is one of the fastest upgrades you can make. It takes about 10 minutes to install and immediately adds usable space.
Idea 4: Add a Lazy Susan to Deep or Corner Shelves
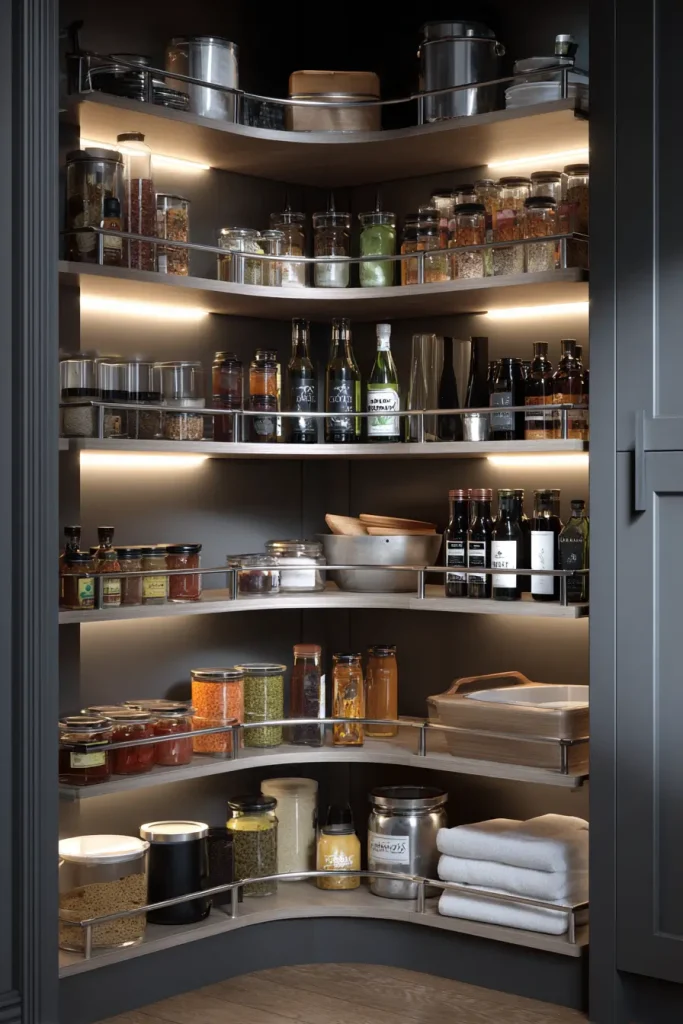
Deep shelves create dead zones. Items get pushed to the back and stay there for months. Sometimes years.
A lazy Susan (a spinning turntable) fixes this completely. Everything sits on the turntable. You spin it. The item you need comes to you.
Use a tiered lazy Susan for spices and small bottles. They fit more and let you see everything at a glance. Use a flat single-level lazy Susan for oils, vinegars, sauces, and condiments.
Look for versions with a non-slip base. Nobody wants a jar of olive oil spinning off and hitting the floor.
Lazy Susans work best in shelves that are 14 inches deep or more. If your pantry has a corner or any deep cabinets, this is one of the most useful things you can add.
The Amazon Basics turntable is a consistent best-seller and costs under $15. It does not need to be fancy to work.
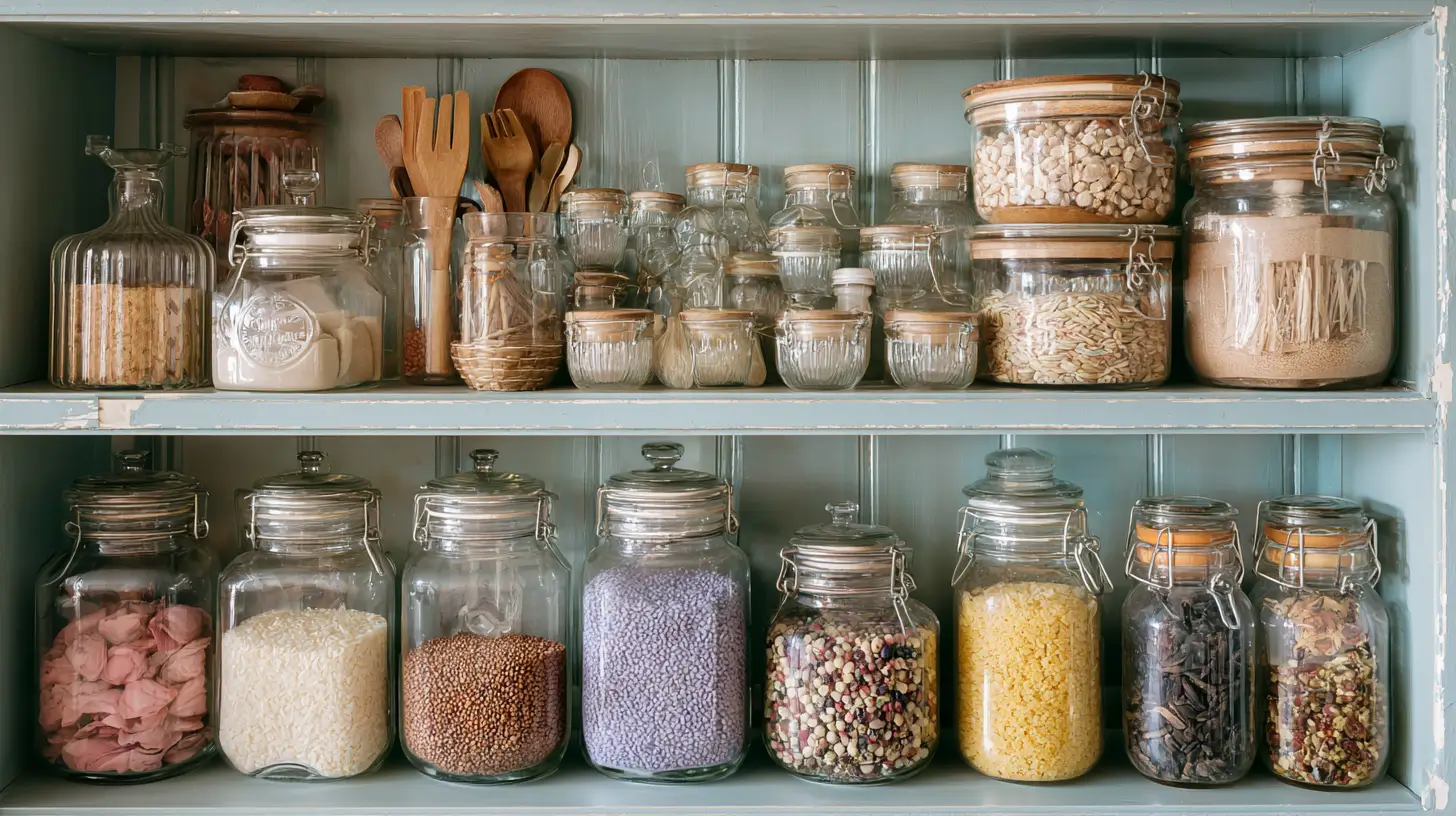
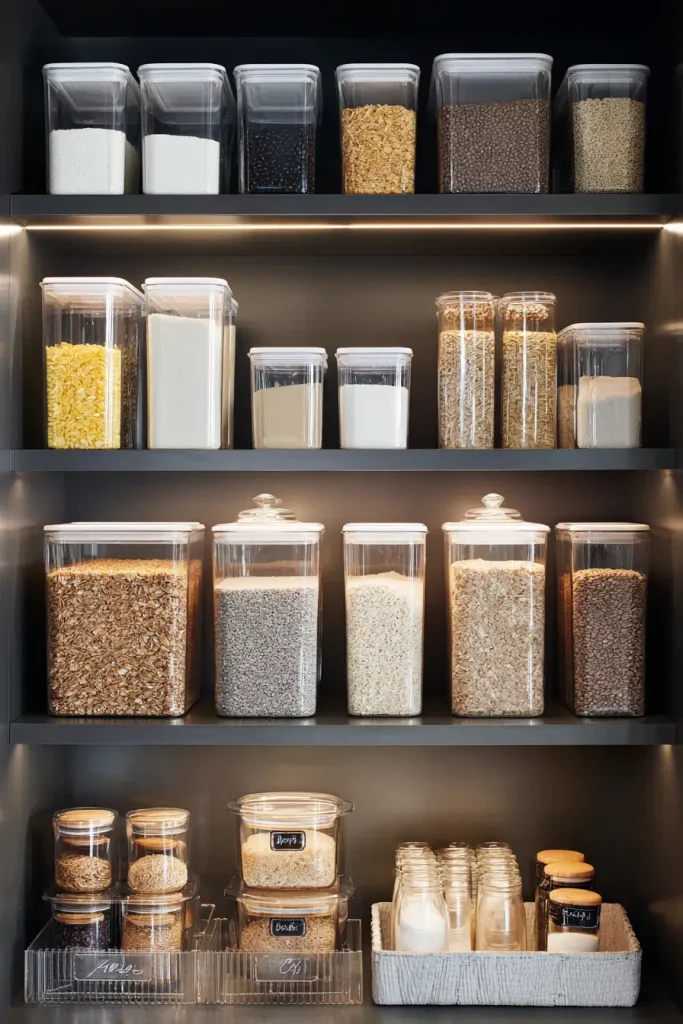
Idea 5: Move Dry Goods Into Uniform Airtight Containers
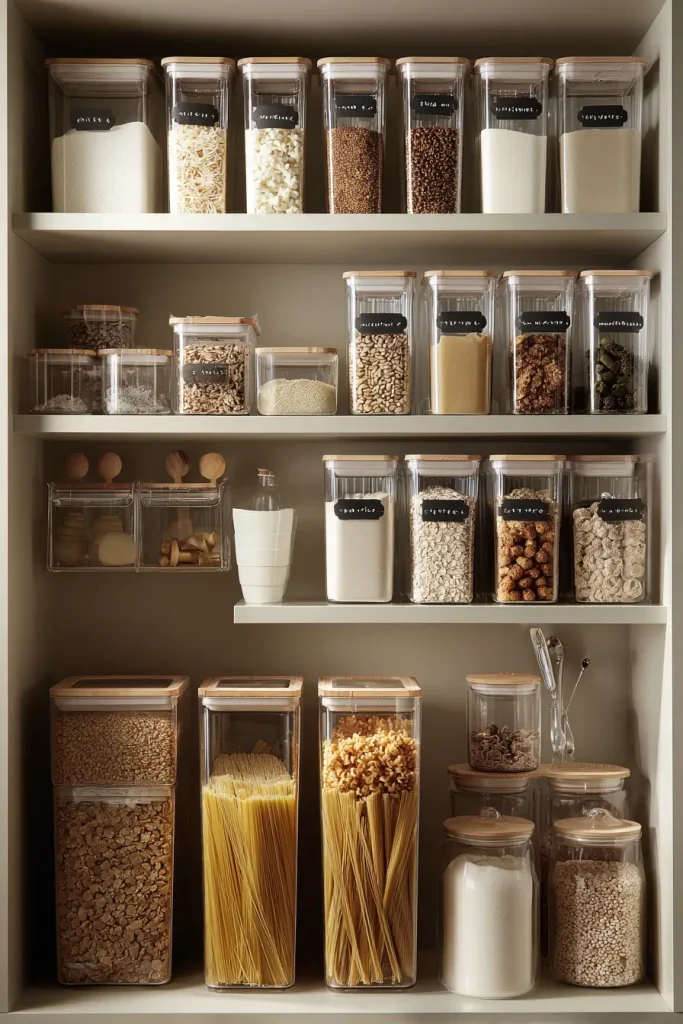
Flour comes in a paper bag that rips. Oats come in a cardboard tube. Rice comes in a plastic bag that splits when you grab it. All of these make a mess and waste space.
Transfer your dry goods into matching airtight containers. Flour, sugar, oats, rice, pasta, cereal, coffee, and anything else that comes in flimsy packaging.
Airtight containers keep food fresh longer. Dry goods in good airtight containers can stay fresh two to three times longer than in their original packaging.
Matching containers also let you stack. They line up neatly. They maximize shelf space both vertically and horizontally.
Write the expiry date on the bottom of each container with a marker when you fill it. That way you always know how old the contents are.
OXO Pop containers are consistently the top-rated option. They have a push-button lid that creates an airtight seal. Cambro square containers are also excellent and used in professional kitchens.
A standard pantry for four people usually needs 12 to 16 containers to cover the main dry goods.
Idea 6: Organize by Meal Type, Not Just Food Type
Most people organize by food type: all cans together, all grains together, all spices together. That works okay. But organizing by meal type works better.
Create zones based on how you actually cook:
A breakfast zone with oats, cereal, pancake mix, nut butters, syrups, and granola. A dinner staples zone with pasta, canned tomatoes, broth, and grains. A baking zone with flour, sugar, baking soda, baking powder, and chocolate chips. A snack zone for everything in between.
Put the zones you use most at eye level. Put heavy or bulk items at the bottom. Put things you use rarely on the top shelf.
If you have kids, put the snack zone at their height. They can get their own snack without opening every bin on every shelf.
When everything for breakfast is in one spot, mornings go faster. When everything for a specific recipe is in one zone, cooking feels easier. You spend less time searching and more time actually making food.
Idea 7: Use Shelf Risers to Double Your Surface Space
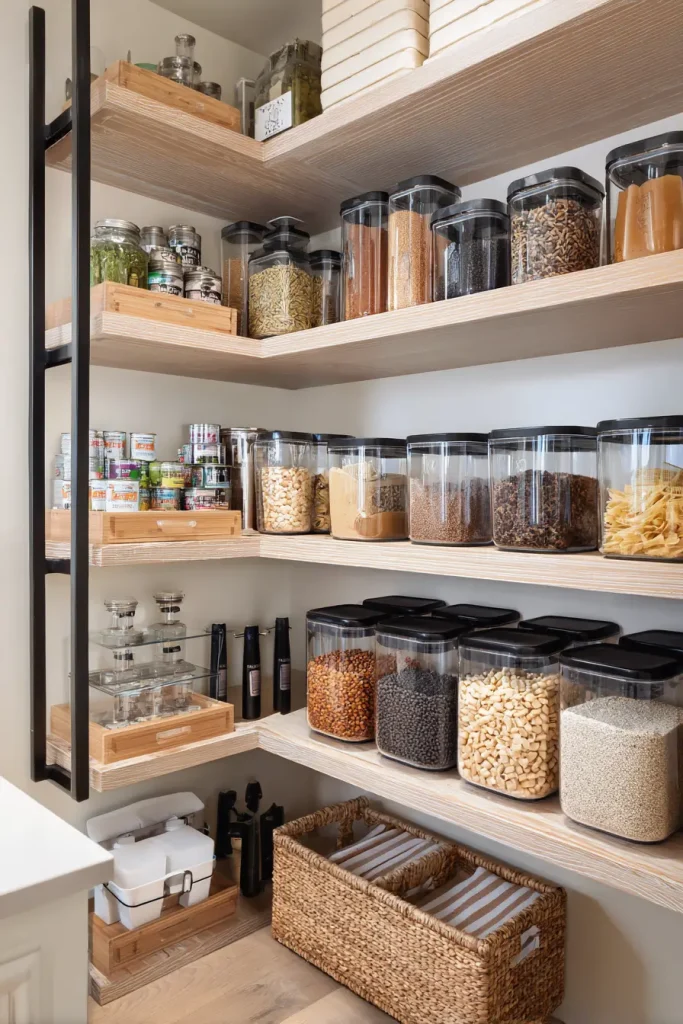
Most pantry shelves have a big empty gap between the top of your items and the shelf above. That space is being wasted.
Shelf risers sit on your existing shelf and create a second level. You put items on top of the riser and items underneath it. One shelf becomes two.
They work especially well for cans, spice jars, and short containers. You can see everything without moving anything.
Bamboo and metal risers are both widely available at Target, Walmart, and Amazon for under $20. You do not need to screw or mount anything. They just sit on the shelf.
Think of it this way: one shelf with risers holds as much as two shelves without them. If your pantry is running out of room, try this before assuming you need a bigger pantry.
Idea 8: Decant Bulk Purchases Right When You Get Home
Buying in bulk saves money. But it creates chaos if you just shove the giant bag into the pantry and forget about it.
The fix is simple: decant immediately. When you get home from a bulk store run, transfer everything into labeled containers before you put it away.
Write two dates on each container. The date you filled it, and the best-by date from the original packaging. Use a dry-erase marker on glass, or a regular marker on the container bottom.
Always put new stock behind old stock. This is the FIFO rule again. Older items get used first. Nothing gets buried and forgotten.
Pair this with a basic pantry inventory list. A free note on Google Keep or Apple Notes works fine. List what you have and roughly how much. Check it before grocery shopping. You will stop buying things you already have.
This habit alone can cut your grocery bill noticeably over a few months.
Idea 9: Use Magazine Holders for Boxes and Flat Packages
Boxed items are hard to store. Foil boxes, parchment paper, plastic wrap, baking mixes, and pouches all fall over constantly. They take up more space than they should because they tip sideways.
Magazine holders solve this. Stand the boxes upright inside the holder, just like magazines in a rack. They stay put. They are visible from the front. You can pull one out without knocking over everything else.
Metal or plastic holders are easiest to wipe clean if something spills.
IKEA KNUFF magazine holders are a popular choice for this. They are cheap, sturdy, and come in a few colors. You can also find similar options at dollar stores or office supply shops.
Label the front of each holder so you know what category is inside without reading every box.
This works especially well in narrow pantries where items fall over easily.
Idea 10: Mount a Whiteboard Inside Your Pantry Door
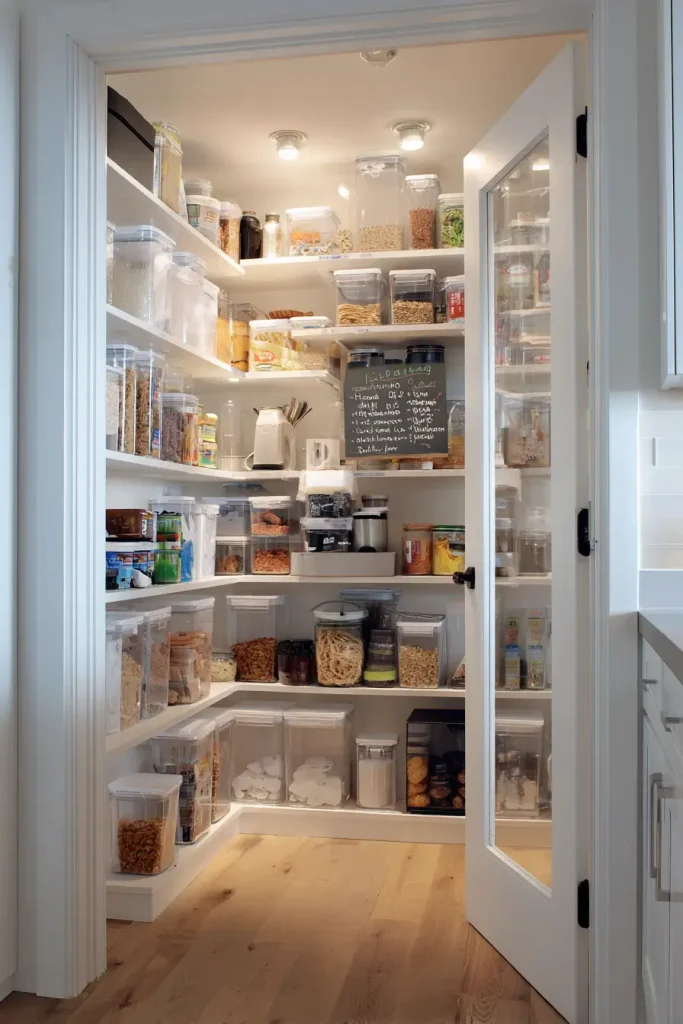
You open the pantry to cook. You notice you are almost out of olive oil. By the time you sit down to write your grocery list, you have forgotten.
A small whiteboard mounted inside the pantry door fixes this. When you notice something running low, you write it down right there. Your grocery list builds itself.
You can also use the board for your weekly meal plan. Write Monday through Sunday with what you are making each night. Now when you open the pantry, you know exactly what you need.
Command strips hold small whiteboards without putting holes in the door. Look for chalk marker boards instead of traditional chalk. They are cleaner to use and easier to read.
This is a low-cost, low-effort idea that saves a surprising amount of time. And it keeps the whole household on the same page.
Idea 11: Use Stackable Can Dispensers for Canned Goods

Canned goods are one of the hardest things to keep organized. They roll. They stack badly. The one you need is always at the bottom.
A can dispenser solves all of this. You load cans in the top. Gravity rolls them forward. The oldest can comes out the front. New cans go in the back. This is automatic FIFO rotation.
A single can dispenser holds 6 to 12 cans in the footprint of about 2 cans sitting flat. That is a major space saving.
Kamenstein and Prepworks both make well-reviewed can dispensers. They work with most standard 10 to 15 oz cans.
You can see at a glance how many cans you have left. No more pulling out five cans to find the one you want. No more expired cans because they got buried.
If you buy canned goods regularly, this is one of the best investments you can make in your pantry.
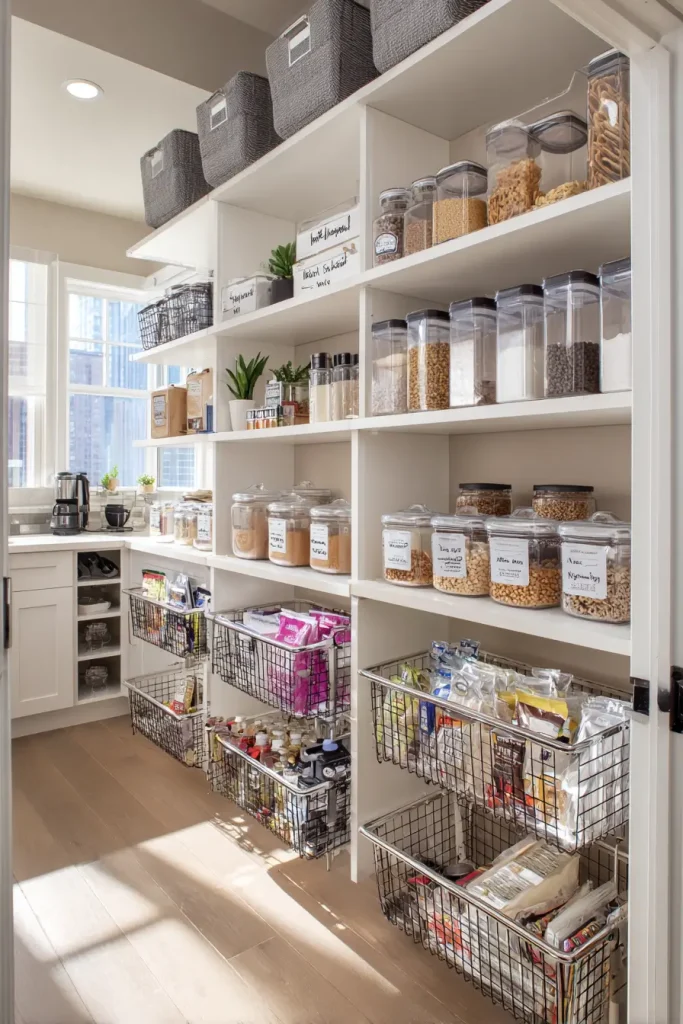
Idea 12: Add Pull-Out Drawers to Your Lower Shelves
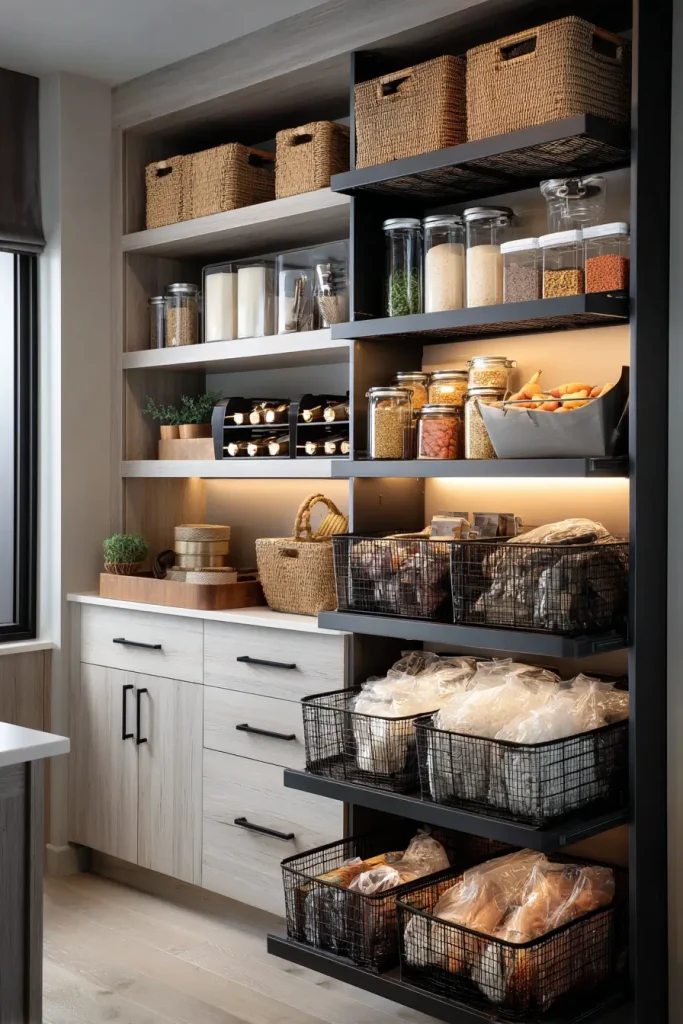
The bottom shelves of a pantry are dark, low, and hard to reach. Most people shove things in there and forget about them.
Pull-out drawer inserts change that completely. You pull the drawer forward and everything comes into view. No crouching. No reaching to the back. No guessing what is in there.
They are great for storing root vegetables, heavy items like bags of rice, or bulky things like a slow cooker or large pots.
Wire basket versions do not require installation. They just sit on the shelf and pull forward. Rev-A-Shelf makes more polished built-in versions for permanent pantry upgrades.
If you want a DIY option, drawer runners plus wire baskets from any home improvement store cost very little and work just as well.
This idea is especially useful for anyone who has lower back issues or finds bending to low shelves difficult.
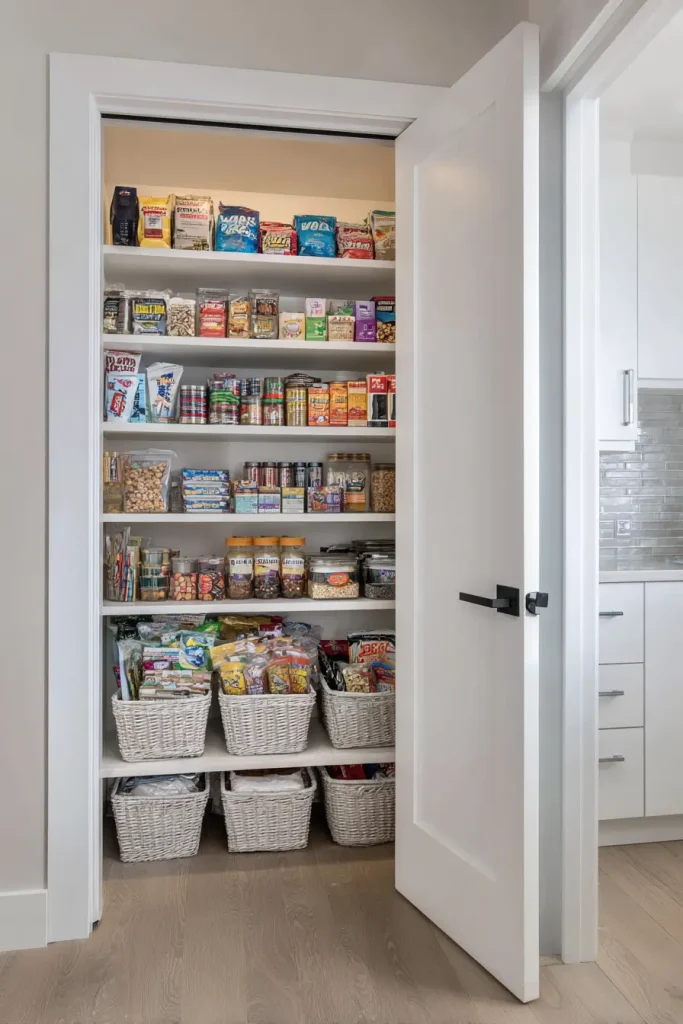
Idea 13: Give Snacks One Dedicated Basket
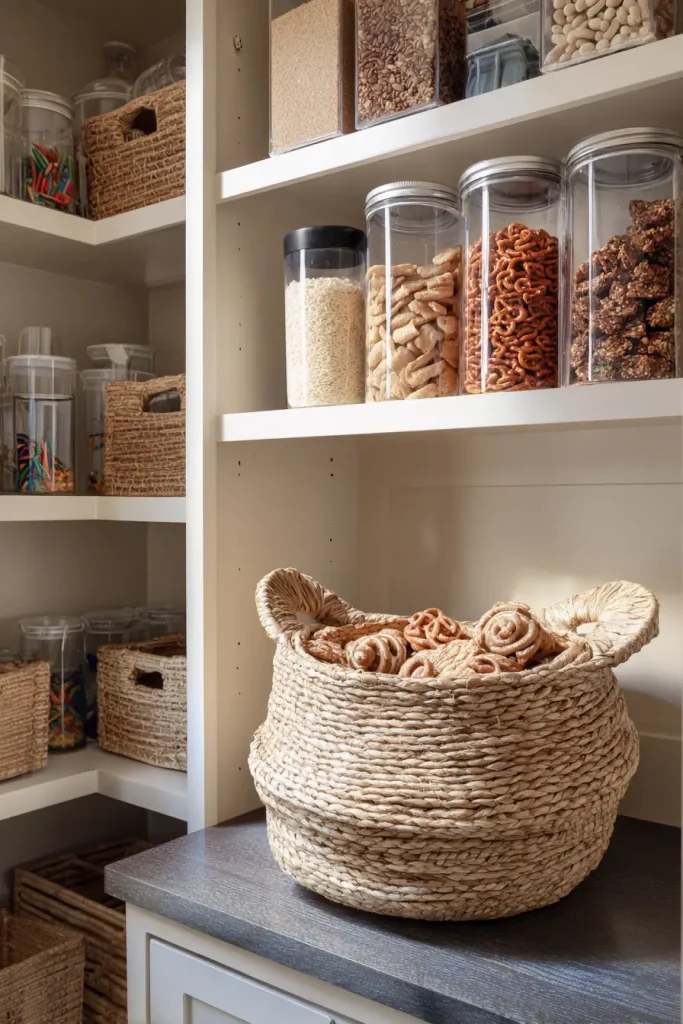
Snacks are the number one cause of pantry disorder. Chips here. Granola bars there. Trail mix on a different shelf. Nobody can find anything, so everyone just opens every door and shifts things around.
One snack basket fixes this. One location. Everything snack-related goes in the basket. Everyone in the house knows exactly where to look.
A simple rule: if it does not fit in the basket, it does not come into the pantry this week. This also naturally limits how many snacks pile up.
Woven baskets or fabric bins both work well. They add a bit of warmth to the pantry and are easy to pull out and browse through.
Rotate snacks weekly when you do your grocery run. Move older snacks to the front. Put new ones in the back.
This is one of the simplest ideas on this list. It also makes one of the biggest visible differences.
Idea 14: Store Baking Sheets and Trays Vertically
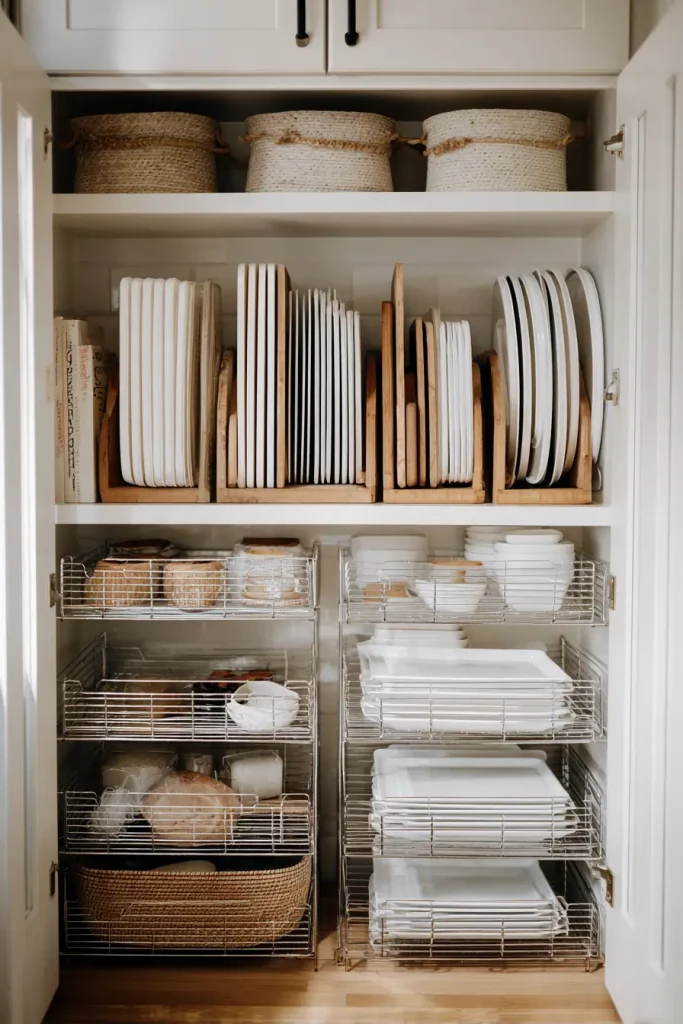
Flat items stacked flat are a nightmare. You pull out one baking sheet and three others come with it. Cutting boards tip over. Lids slide everywhere.
Storing these items vertically changes everything. Instead of stacking, you file them like folders. Pull out the one you want without touching the others.
The easiest DIY version: tension rods placed 3 to 4 inches apart on a shelf. Slide pans between the rods. Done. This costs less than $5.
Wire dividers from The Container Store also work well and look cleaner.
This works for baking sheets, cutting boards, pan lids, cooling racks, and pizza stones. Anything flat that used to slide around now has its own slot.
This idea works in both pantry shelves and lower kitchen cabinets. If you have ever knocked over a stack of pans reaching for one thing, this idea is for you.
Idea 15: Color-Code Zones for Shared Households
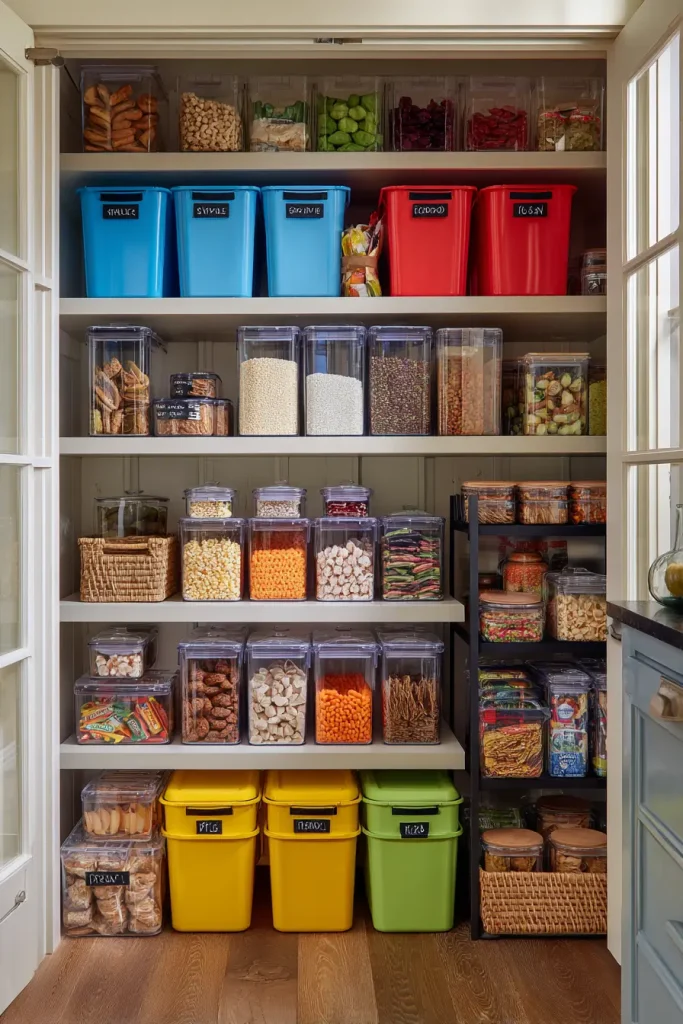
In a house with multiple people, things get moved. Items end up in the wrong spot. People blame each other. The pantry becomes a source of small daily frustration.
Color coding is a simple fix. Assign a bin color to each person or each category.
Blue bins for one person. Red bins for another. Green for shared cooking supplies. Yellow for kids’ items.
You can also color-code by dietary needs. If someone in your house is gluten-free, their items go in a specific color bin. No confusion, no cross-contamination risk.
This idea pairs perfectly with labeling. The color tells you whose zone it is. The label tells you exactly what goes there.
This is not about being rigid. It is about making the pantry easy for everyone to use, not just the person who set it up.
Idea 16: Hang Baskets Under Your Shelves
Look at the underside of your pantry shelves. That space is empty right now. It does not have to be.
Under-shelf hanging baskets clip onto the shelf above and hang down. They add a whole extra layer of storage with zero installation.
Use them for light items: tea bags, seasoning packets, snack bars, or small condiment packets. Heavy items will not work as well here.
Wire and acrylic versions both clip on easily and hold their grip. A set of two to four baskets costs under $15 on Amazon.
This idea works especially well in small pantries where every inch matters. You are essentially adding shelf space that was always there but never used.
Take a look at your shelves right now. If there is a gap of 4 or more inches under any shelf, you have room for one of these.
Idea 17: Do a 10-Minute Pantry Reset Every Week
Every system eventually gets messy. Life gets busy. Things get put back in the wrong spot. Items run out and do not get added to the list.
A weekly reset keeps all of it from building up.
Pick one time each week and stick to it. Sunday evening works well for most people because it sits just before the grocery run. Set a 10-minute timer.
During the reset:
Check for anything expired or nearly empty. Return misplaced items to their correct bins. Move older items to the front. Update your whiteboard grocery list. Note what needs restocking.
Ten minutes. That is it.
The easiest way to make this stick is to attach it to something you already do. Make it part of Sunday meal prep. Do it while waiting for coffee to brew. Habit stacking, as James Clear describes in Atomic Habits, works because you are not building a new routine from scratch. You are adding a small task to one you already have.
The goal here is not a perfect pantry. It is a pantry that is easy enough to maintain that it never becomes overwhelming again.
Your Pantry Does Not Need to Be Perfect
It just needs to work for you.
You do not need to buy everything on this list. You do not need to start all 17 ideas at once. Pick three that match your biggest problems and start there.
Clear bins, labels, and zones will take you 80% of the way. Everything else is an upgrade you can add when you are ready.
Do the cleanout this weekend. Buy two bins. Label a shelf. That is a real start.
A pantry that works saves you time every single day. It saves you money because you stop throwing away food you forgot you had. And it removes one small but constant source of daily stress.
These pantry organization ideas work whether you have a walk-in pantry or a single cabinet. The size of the space does not matter. The system does.
Start with one idea. Build from there.

- 17 Classy Living Room Ideas for a Cozy Elegant Look - April 23, 2026
- 16 Dark Moody Living Room Ideas That Feel Rich and Warm - April 22, 2026
- 14 Elegant Bedroom Trends for 2026 You’ll Love - April 22, 2026