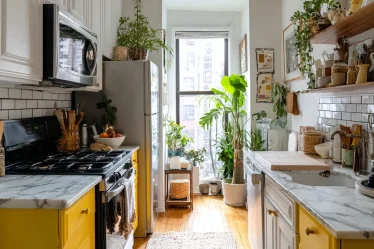
You just got the keys. You’re standing in your kitchen. And you have no idea where to start.
Do you buy appliances first? Pick paint colors? Figure out storage? Every decision feels expensive. And every mistake feels permanent.
Here’s the truth: most new homeowners waste money in the first 90 days. Not because they’re careless. Because nobody gave them a clear starting point.
This guide gives you that starting point. You’ll get 18 practical kitchen ideas that work in 2026. No fluff. No expensive advice. Just a clear plan you can follow step by step.
1. Build Your Priorities List First
You’re excited. That’s normal. But excitement leads to impulse buys. And impulse buys lead to regret.
Before you spend a single dollar, sit down and write out what you actually need. Not what looks nice on Pinterest. What you need to function on day one.
Use this simple three-bucket system:
Need Now — Things you can’t live without this week. A fridge. A way to cook. Basic cleaning supplies under the sink.
Need Soon — Things you’ll want in the first month. A pantry system. A dish drying setup. Proper cabinet organization.
Want Later — The nice-to-haves. A backsplash. New hardware. Pendant lights. These can wait until you’ve lived in the space.
This system forces you to slow down. It stops you from buying a $400 stand mixer before you even own a cutting board.
Also measure everything before you buy anything large. A couple in a 1,000 sq ft home once ordered a full-size refrigerator without checking the doorway width. It didn’t fit. That mistake cost them a delivery fee, a return fee, and three weeks without a fridge.
According to Houzz research, the average kitchen setup budget for new homeowners is around $6,200. That sounds like a lot. But it disappears fast when you buy things out of order.
Quick Win: Open a Google Sheet right now. Make three columns: Need Now, Need Soon, Want Later. Fill in at least five items per column before you buy anything.
2. Choose a Layout That Fits How You Actually Live
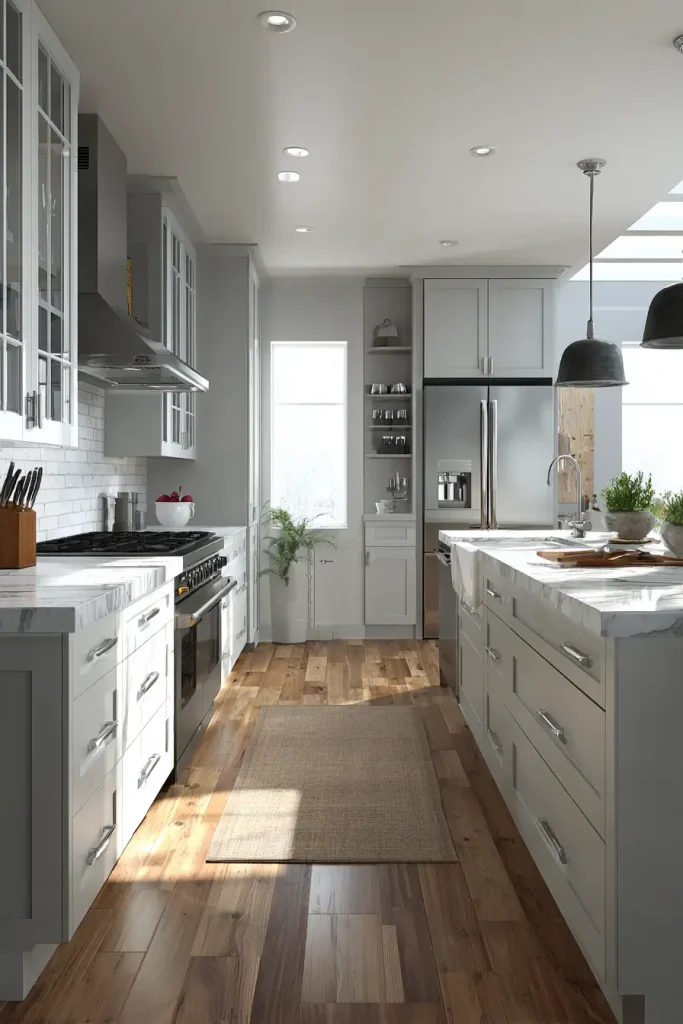
Your kitchen layout controls everything. It decides how much you enjoy cooking. It decides how much space you waste. It decides whether two people can move around without bumping into each other.
There are five basic kitchen layouts. Here’s what each one is good for:
Galley — Two parallel counters facing each other. Best for narrow spaces. Very efficient if it’s just one or two people cooking.
L-Shape — Two walls meeting at a corner. Works well in most homes. Gives you a natural prep zone and cooking zone.
U-Shape — Three walls. Lots of counter space. Great if you cook a lot. Needs a bigger room to work well.
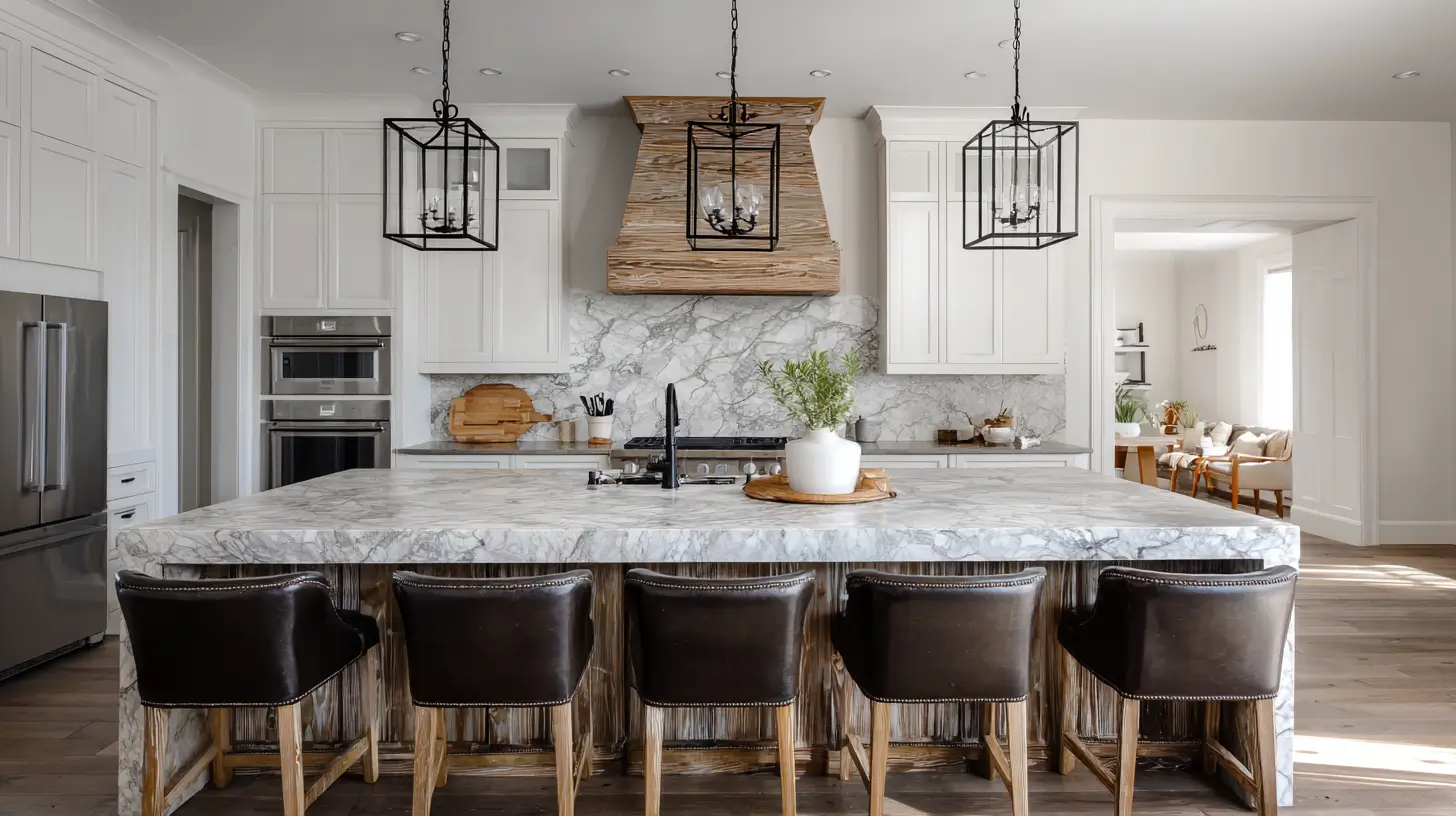
Island — Any layout plus a center island. Adds prep space and seating. Only works if you have enough room to walk around it comfortably.
One-Wall — Everything on one wall. Common in small apartments or open-plan spaces.
You’ve probably heard of the kitchen work triangle. It’s the idea that your sink, stove, and fridge should form a triangle. This reduces how much you walk back and forth while cooking. The National Kitchen and Bath Association still recommends it in their current design guidelines.
The most common layout mistake? Adding an island that blocks traffic flow. Before you commit to an island, walk through the space. Make sure there’s at least 42 inches of clearance on all sides.
Use RoomSketcher (free at roomsketcher.com) to test your layout digitally before moving anything.
Quick Win: Sketch your current kitchen footprint on paper. Mark where your sink, stove, and fridge are. Then draw lines between them. That’s your triangle. Is it logical or are you zigzagging across the kitchen every time you cook?
3. Set a Budget You Won’t Blow Past
Most new homeowners have a budget. Most of them blow it. Not all at once. A little at a time, across dozens of small decisions.
A common rule in home design is the 5 to 15 percent rule. Spend between 5% and 15% of your home’s value on your kitchen. So if your home cost $300,000, your kitchen budget should sit somewhere between $15,000 and $45,000 for a full setup or renovation. For just setting up a basic functional kitchen, you can do it for far less.
According to Angi’s 2024 cost data, the average kitchen setup from scratch runs between $4,000 and $12,000 depending on your choices.
Here’s how to split that budget:
- Appliances: 40% of your total budget
- Cabinets and storage: 30%
- Countertops and fixtures: 20%
- Decor and extras: 10%
New homeowners almost always forget hidden costs. Things like:
- Delivery and installation fees (often $150 to $400 per appliance)
- Disposal fees for old items
- Permit costs if you’re doing electrical or plumbing work
- Tax on large purchases
Where to save: Cabinet hardware, light fixtures, decor, backsplash tiles.
Where to spend more: Refrigerator, kitchen faucet, countertops. These get used daily. Cheap versions wear out fast and cost more to replace.
Quick Win: Before buying anything, open YNAB or a Google Sheet and write down every planned purchase with its real cost including delivery and tax. See the total before you commit.
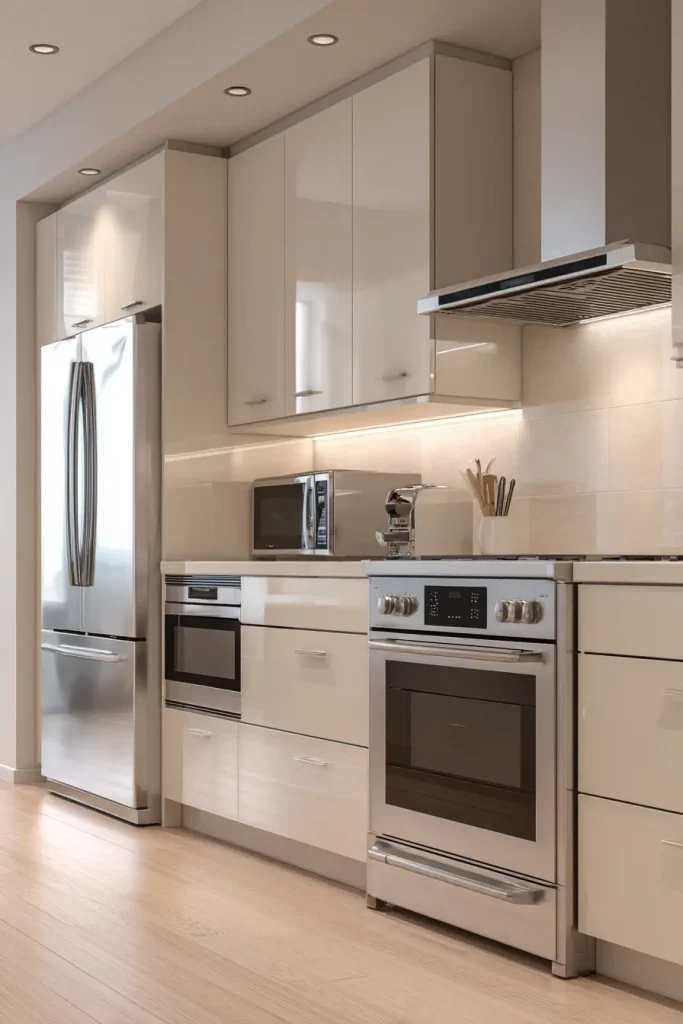
4. Buy Appliances in the Right Order
There’s a correct order to buying kitchen appliances. Most people don’t know it exists.
Start with the refrigerator. It’s the biggest appliance. It determines how much space is left for everything else. Measure your space first. Standard fridges are 30 to 36 inches wide and 68 to 70 inches tall. Confirm the dimensions before you order.
Then get your range or oven. This is your second most critical appliance. Gas vs electric depends on what your home is set up for. If you’re not sure, check whether you have a gas line in the kitchen.
After that: microwave or range hood (more on hoods in idea #14). Then dishwasher. Then small appliances as you need them.
What not to buy right away: air fryers, espresso machines, stand mixers, rice cookers, waffle irons. These are nice. But buy them after you’ve cooked in the space for a few months. You’ll know what you actually use.
Where to find good deals on appliances in 2026:
- Best Buy open-box section — discounts of 15 to 30% on floor models
- Costco appliance bundles — often includes free delivery and extended warranty
- Facebook Marketplace — great for lightly used small appliances
Energy Star certified appliances use at least 15% less energy than standard models. According to the EPA, an Energy Star certified fridge saves around $220 over its lifetime compared to a non-certified model. That adds up.
Quick Win: Before buying your fridge, measure the opening three times. Height, width, and depth. Then check the fridge’s dimensions on the product page. Add one inch on each side for ventilation clearance.
5. Plan Storage Before You Unpack a Single Box
Here’s a mistake almost every new homeowner makes. They unpack everything and shove it into whatever cabinet is closest. Then they spend the next year opening the wrong cabinet every single time.
Before you unpack, plan your zones.
Cooking zone — Near the stove. Pots, pans, cooking utensils, spices, oils.
Prep zone — Near your biggest counter space. Cutting boards, knives, mixing bowls.
Cleaning zone — Under and around the sink. Dish soap, sponges, cleaning products, trash bags.
Pantry zone — Dry goods, canned food, snacks, baking supplies.
Once you know the zones, assign cabinets to each. Then organize inside those cabinets before anything goes in.
A few products worth using from day one:
- OXO Pop containers — Airtight, stackable, great for dry goods
- Lazy Susans — For deep corner cabinets where things get lost
- Pull-out drawer organizers — For utensils and small items
- Command hooks inside cabinet doors — For measuring cups, bag clips, small tools
The one-in-one-out rule is worth starting right now. Every time something new comes into your kitchen, something old leaves. This stops clutter from building up slowly without you noticing.
The Home Edit’s zone method is shown in detail in their Netflix show and book. Clean My Space on YouTube also has a practical kitchen organization video with over 2 million subscribers.
Quick Win: Before you put a single item in a cabinet, stand in your kitchen and point to where each zone should live. Write it down. Tape a small label inside each cabinet for the first month until it becomes habit.
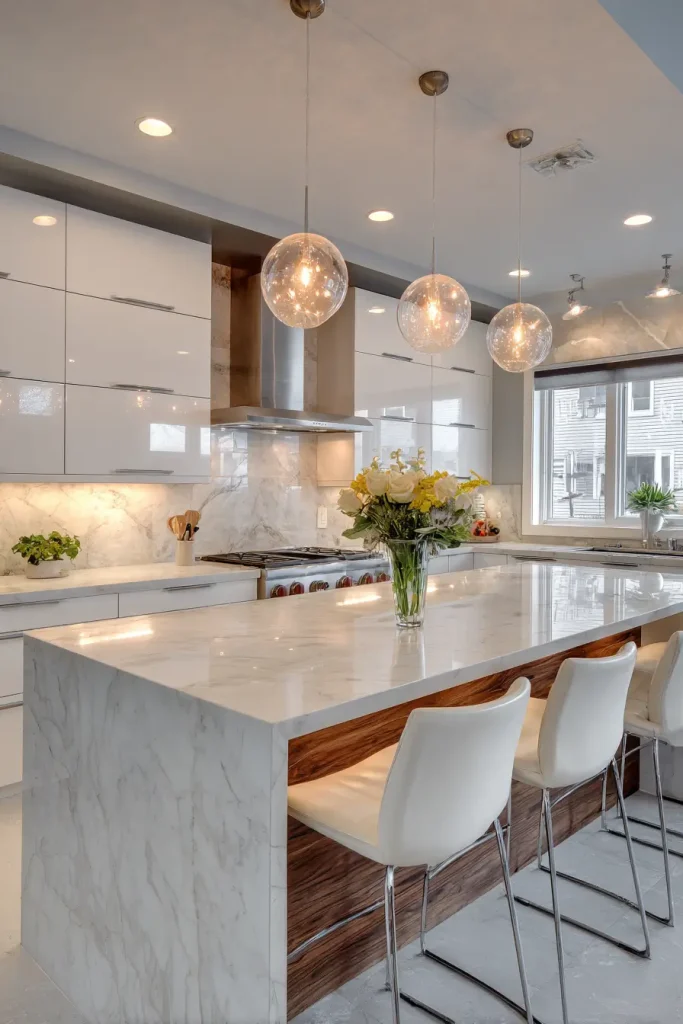
6. Pick Countertops for Real Life, Not Just Photos
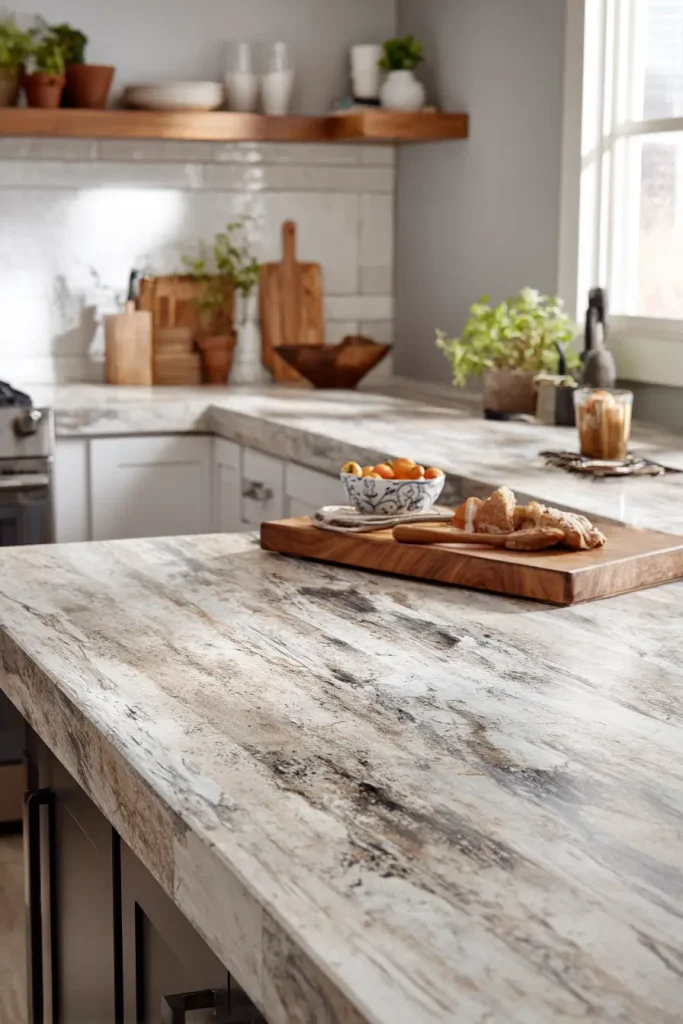
You’ve seen the gorgeous white marble kitchens on Instagram. They look perfect. Here’s what those photos don’t show: the stains, the etching from lemon juice, and the constant resealing.
Pick countertops based on how you actually cook. Not how you wish you cooked.
Here’s a quick comparison of the four most popular options in 2026:
Quartz — Best all-around choice. Non-porous so it doesn’t stain. Scratch resistant. No sealing needed. Costs $75 to $150 per square foot installed. Worth it if budget allows.
Laminate — Best budget option. Modern laminate looks surprisingly realistic. Costs $20 to $50 per square foot installed. Not heat resistant, so use trivets. Gets the job done for years.
Butcher Block — Warm, beautiful look. Good for prep areas. Needs regular oiling. Can warp near the sink if not sealed well. Costs $40 to $100 per square foot installed.
Granite — Classic look. Very durable. Needs annual sealing. Costs $60 to $140 per square foot installed.
What to skip if you cook often: Marble. It looks incredible. But it etches easily from acidic foods like tomatoes, lemon juice, and vinegar. Coffee can stain it in minutes. Great for a bathroom. Risky for a busy kitchen.
According to Houzz research, quartz is the number one chosen countertop material for new kitchen setups, picked by 42% of homeowners surveyed in 2024.
Quick Win: Go to a kitchen showroom and actually cook on a sample surface. Most showrooms have demo areas. Bring a lemon. Drip some juice on each surface. See what happens.
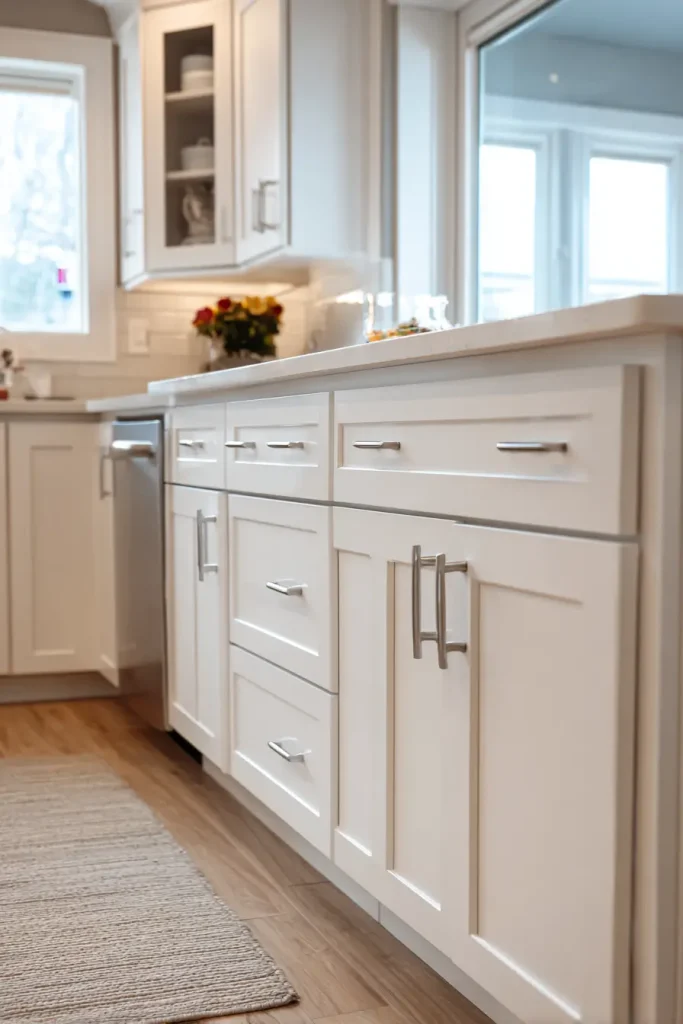
7. Choose Cabinets That Stretch Your Budget
Cabinets are the biggest visual element in your kitchen. They also eat up the biggest chunk of your budget if you’re not careful.
You have three main options:
Stock cabinets — Pre-built, limited sizes, lowest cost. Available at Home Depot and IKEA. Good for most standard kitchens. IKEA’s SEKTION line is one of the most popular choices for new homeowners. It’s modular, easy to customize, and replaceable if one piece breaks.
Semi-custom cabinets — More size options and finishes. Mid-range price. Good middle ground if your kitchen has non-standard dimensions.
Custom cabinets — Built to exact specifications. Highest quality. Also highest cost, often two to three times the price of stock. Only worth it for very unusual layouts or premium finishes.
For most first-time homeowners, stock or semi-custom is the right call. IKEA SEKTION cabinets in particular have a strong reputation for value. You can plan your whole cabinet layout for free using IKEA’s online kitchen planner.
One easy upgrade worth doing from day one: soft-close hinges. They stop cabinet doors from slamming. They extend the life of the cabinet. And they make the kitchen feel more premium. You can add them to any cabinet for about $3 to $5 per hinge.
Cabinet hardware, meaning the knobs and pulls, is the easiest and cheapest way to change the look of your kitchen later. Don’t stress about hardware choices right now. Pick something simple and neutral. You can swap them in an afternoon for under $100 whenever you want a change.
Quick Win: Use the free IKEA kitchen planner at ikea.com before buying a single cabinet. You can map out your full kitchen and see the total cost before spending anything.
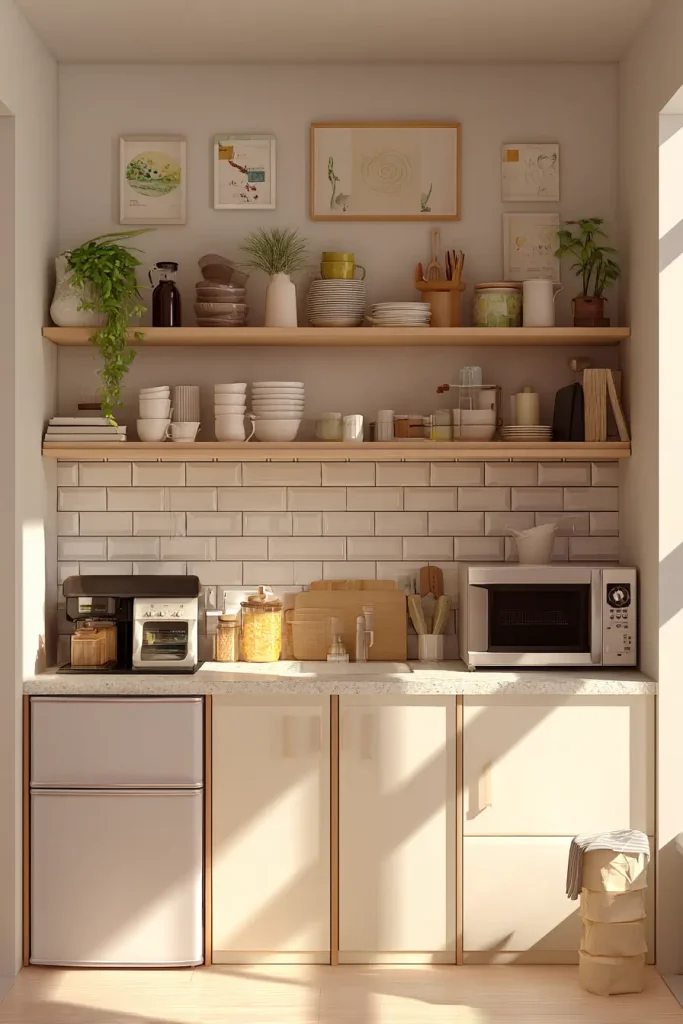
8. Add Three Layers of Lighting (Most Kitchens Only Have One)
Most kitchens have one light in the ceiling. That’s it. And it makes the kitchen feel flat, dark in the wrong spots, and clinical.
Good kitchen lighting has three layers. Each one does a different job.
Ambient lighting — The main overhead light. Illuminates the whole room. This is what most kitchens already have.
Task lighting — Focused light for work areas. Under-cabinet LED strips are the most common form. They light up your counter directly so you’re not working in your own shadow. You can install them yourself in about an hour. They cost $30 to $80 for a full run of cabinets.
Accent lighting — Decorative light that adds warmth. This can be pendant lights over an island, lights above cabinets, or small lights inside glass-front cabinet doors.
The DOE reports that LED lighting uses 75% less energy than old incandescent bulbs and lasts about 25 times longer. Swap every bulb in your kitchen to LED from day one. It costs more upfront and saves money every month.
If you have an island and want pendant lights, use this sizing formula. Divide your island’s width in inches by 4. That’s the ideal diameter for your pendant lights in inches.
Smart bulbs from Philips Hue or GE Cync let you adjust brightness and color temperature. Bright cool light for cooking. Warm dim light for eating. Not essential, but useful if you spend a lot of time in the kitchen.
Quick Win: Buy one set of LED under-cabinet lights this week. Install them under one section of cabinets. You’ll immediately see why this upgrade matters
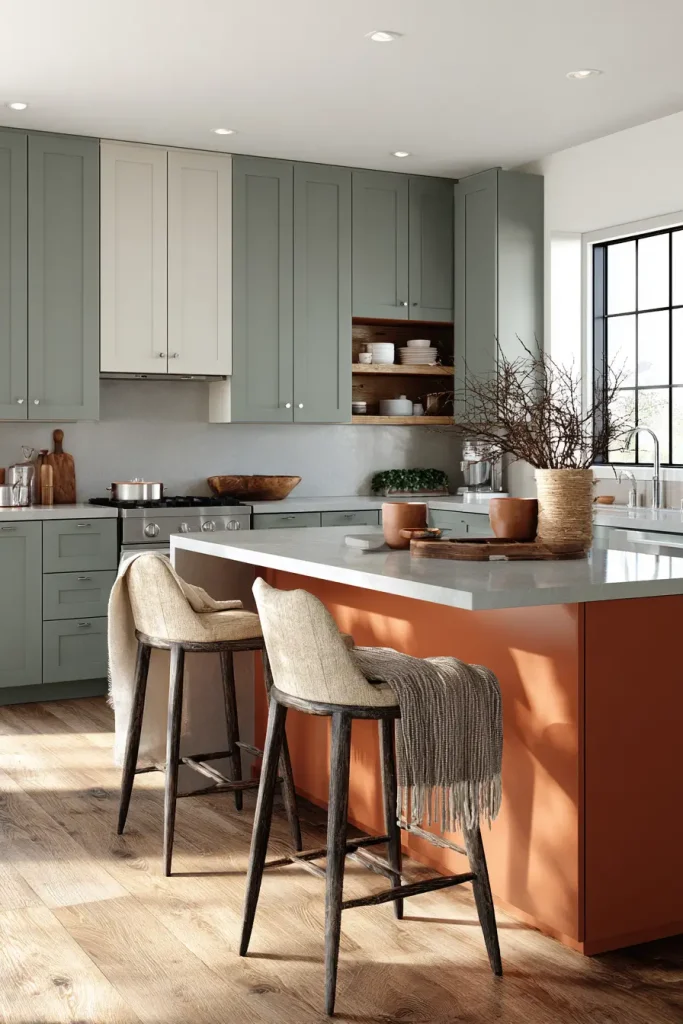
9. Pick Colors That Won’t Look Dated Fast
Color is personal. But some colors date faster than others.
The all-gray kitchen peaked around 2018 to 2022. It’s already starting to feel tired. All-white kitchens are timeless but show every fingerprint and grease splatter.
Here’s what’s working in 2026:
- Warm whites — Cream, linen, off-white. These feel clean without being harsh.
- Sage green — Soft, earthy, calming. Works with wood tones and brass hardware.
- Slate blue — Deeper and more modern. Works well on lower cabinets.
- Terracotta accents — In small doses through textiles or decor. Not for walls or cabinets.
The safest long-term approach is the 60-30-10 rule. Use your dominant color on 60% of the space. Your secondary color on 30%. Your accent color on just 10%. This creates balance without overwhelming the room.
A smart move for new homeowners: paint only the lower cabinets in a bolder color. Keep upper cabinets white or neutral. This two-tone look is modern, flexible, and easy to change later.
Before you paint anything, order samples. Samplize sells peel-and-stick samples of real paint so you can see exactly how a color looks in your specific kitchen light. Don’t pick a color from a small chip under store lighting.
Check Sherwin-Williams’ free online visualizer tool to see colors applied to kitchen photos before committing.
Quick Win: Order three Samplize samples this week. Stick them on your kitchen wall. Live with them for 48 hours. Look at them in the morning, afternoon, and at night. Then decide.
10. Choose Flooring That Handles Daily Punishment
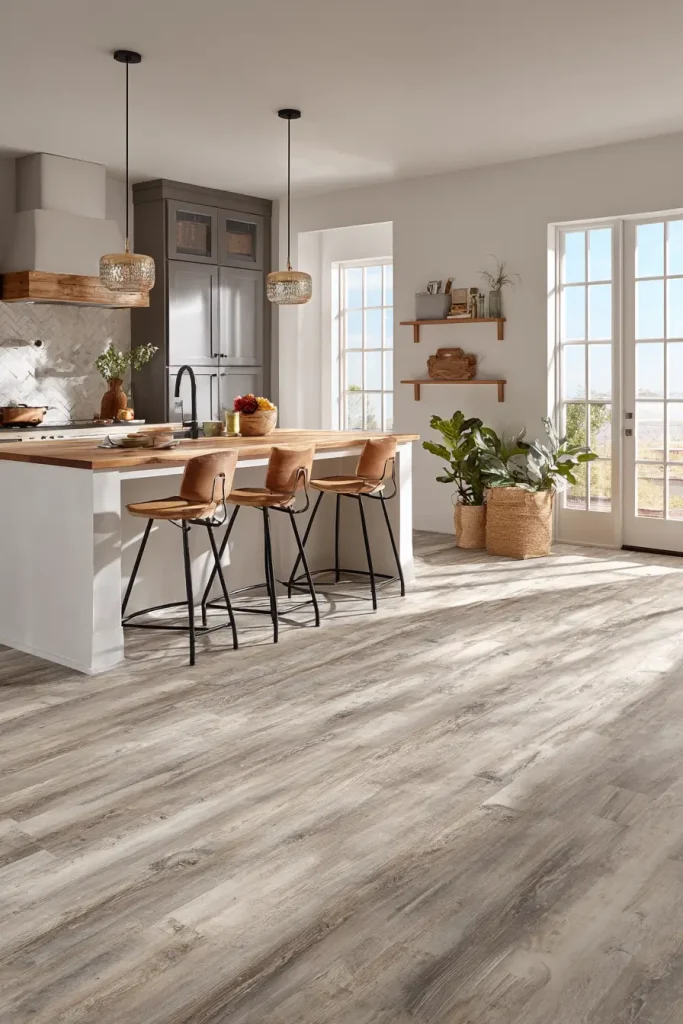
Your kitchen floor takes more punishment than any other floor in your home. Spills, dropped pots, dragged chairs, wet shoes. It needs to handle all of it.
Here are the four main options in 2026:
Luxury Vinyl Plank (LVP) — The top recommendation for most first-time homeowners. It’s 100% waterproof. It’s scratch resistant. It’s comfortable underfoot. It comes in realistic wood and stone looks. And it clicks together without glue, which means you can install it yourself. Cost: $3 to $7 per square foot for materials.
Porcelain tile — Extremely durable and fully waterproof. The most permanent option. Grout can be harder to keep clean, though darker grout helps. Professional installation recommended. Cost: $5 to $15 per square foot installed.
Hardwood — Beautiful. Classic. But risky in a kitchen. Real wood and moisture don’t mix well long-term. It can warp, swell, and stain. If you love the look, engineered hardwood handles moisture better than solid hardwood.
Laminate — Budget-friendly and easy to install yourself. Not waterproof, though. A standing puddle can warp the planks. Fine for low-moisture kitchens where spills get wiped up fast.
Floor and Decor reports that LVP has been their top-selling flooring category for five years straight. That’s not a coincidence.
Quick Win: Go to a flooring store and walk on LVP and porcelain tile samples. Feel the difference. LVP is warmer and softer underfoot. Tile is harder and colder, especially in the morning. Your feet will help you decide.
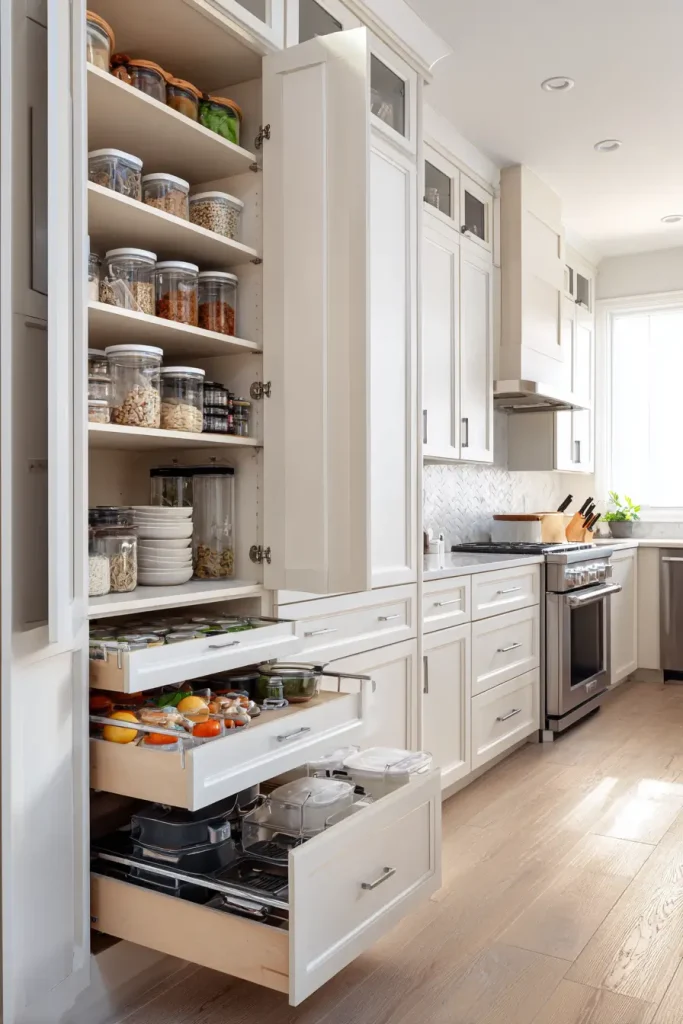
11. Build a Pantry System Even Without a Walk-In
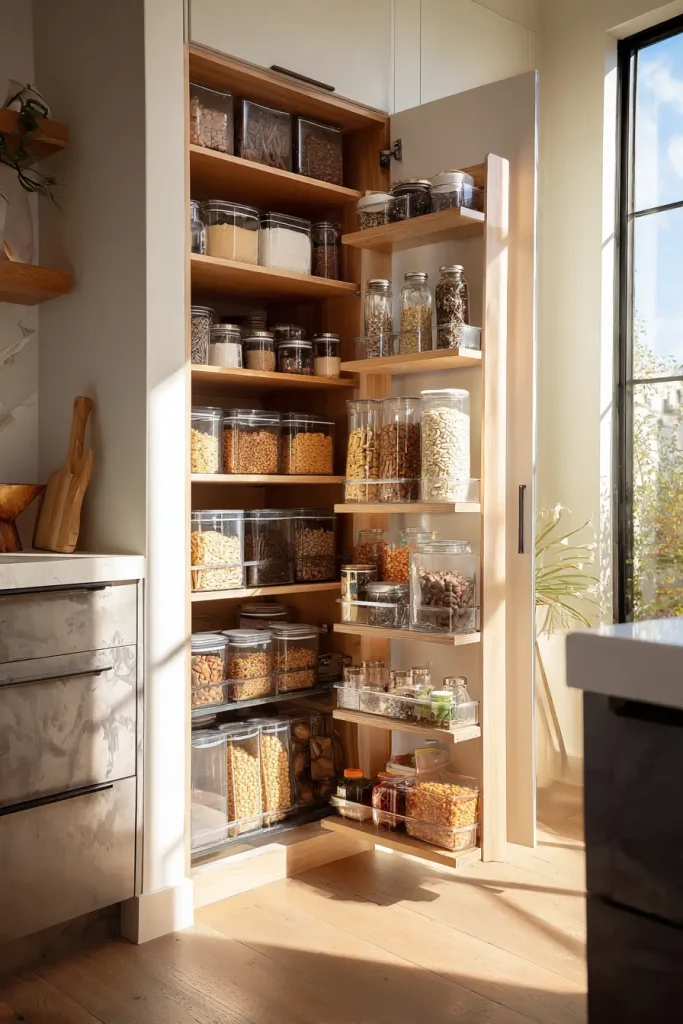
You don’t need a walk-in pantry to stay organized. You just need a system.
Most standard kitchens have at least one deep cabinet that gets used as a pantry. The problem is deep cabinets eat things. Items get pushed to the back and forgotten for months.
Here’s how to fix that:
Use pull-out shelves inside deep cabinets. These let you see everything at once and pull sections toward you. IKEA and The Container Store both sell affordable versions.
If you have a narrow wall or gap between appliances, a pull-out pantry tower is one of the smartest space uses in a small kitchen. These are typically 6 to 9 inches wide and pull out like a drawer to reveal rows of shelves.
Set up categories inside your pantry from the start:
- Baking supplies together
- Canned goods together
- Snacks together
- Breakfast items together
- Spices in their own dedicated area
Clear containers make a visible difference. When you can see what you have, you stop buying duplicates. Buying duplicates is the single biggest pantry waste habit. OXO Pop containers are a reliable choice. They’re airtight, stackable, and available in a range of sizes.
The Home Edit’s pantry organization method is widely followed and shown in detail on their Instagram at @thehomeedit with nearly five million followers. Their approach is visual and practical.
Quick Win: Do a pantry audit before buying any containers. Pull everything out of your existing pantry space. Throw out expired items. See what you actually have. Then buy containers to fit your real needs, not an imaginary perfect pantry.
12. Buy 5 Essential Tools Before Any Gadgets
Walk into any kitchen store and you’ll want to buy everything. Don’t.
Start with five tools. Master them. Add more only once you’ve used these enough to know your cooking habits.
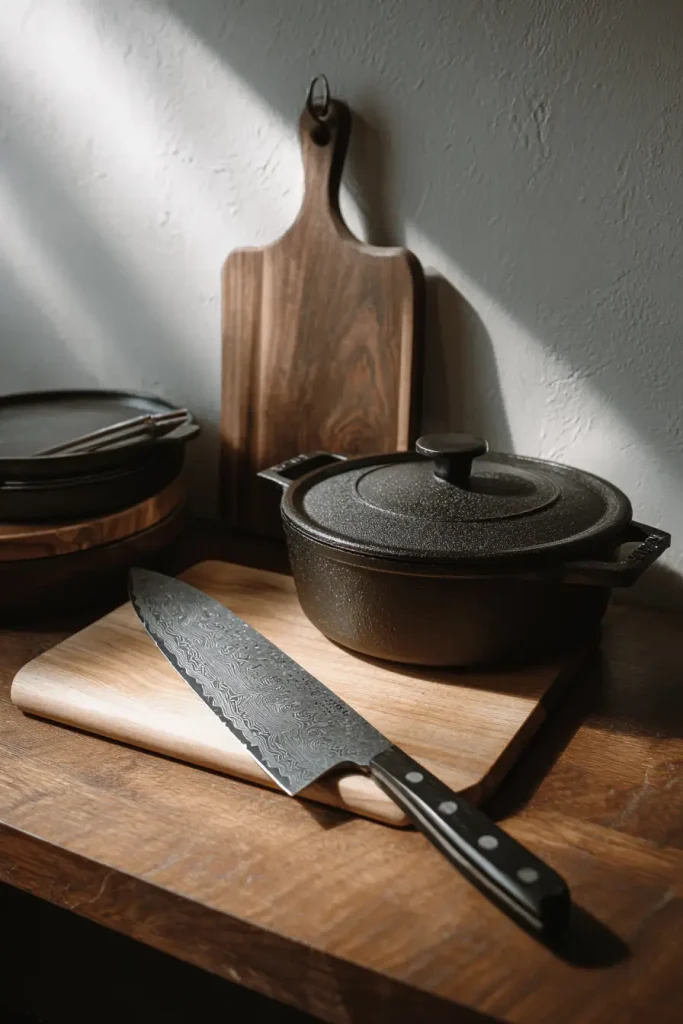
1. A good chef’s knife — This is the most important kitchen tool you’ll own. A sharp 8-inch chef’s knife does 80% of all kitchen cutting tasks. Budget option: Victorinox Fibrox ($45). Mid-range: Made In 8-inch ($99). These outperform $300 knives in independent tests by Wirecutter and Serious Eats.
2. A solid cutting board — Get one large wooden or plastic board. At least 12 by 18 inches. Small boards cause accidents. Larger boards give you room to work.
3. A cast iron skillet — Lodge makes a 10-inch cast iron skillet for about $30. It lasts a lifetime. It goes from stovetop to oven. It sears, fries, and bakes. Nothing matches it for value.
4. A sheet pan — A half-sheet pan (18 by 13 inches) is one of the most versatile tools in any kitchen. Roasting vegetables, baking cookies, sheet pan dinners. Get a heavy aluminum one, not a thin one that warps.
5. A Dutch oven — Great for soups, stews, braised meats, pasta sauces, and even bread. Lodge and Cuisinart make affordable versions in the $60 to $80 range.
Skip for now: mandoline slicers, spiralizers, pasta machines, single-use gadgets. Buy these only after you’ve cooked in your kitchen long enough to know you’ll actually use them.
Serious Eats and Wirecutter both publish regularly updated gear reviews based on real hands-on testing. Check both before buying anything.
Quick Win: If you only buy one thing this week, make it the Victorinox Fibrox chef’s knife. It’s under $50 and will immediately make cooking easier and safer.
13. Set Up Your Sink Area Like a Pro
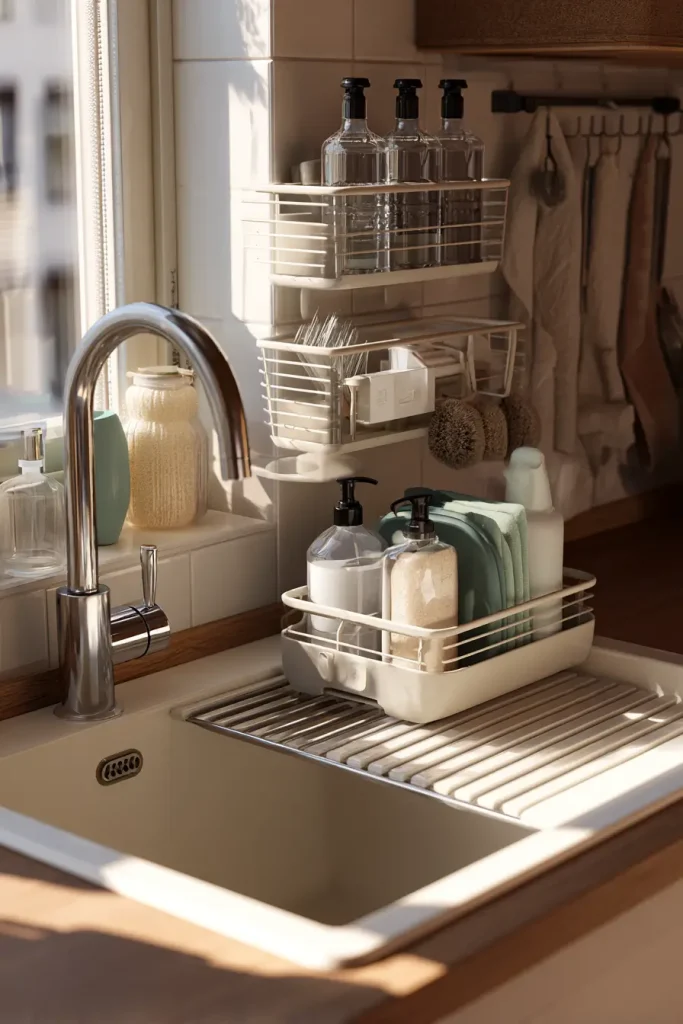
Most people think the stove is the center of the kitchen. It’s not. Studies on kitchen use patterns consistently show the sink is where people spend the most time. Washing hands, rinsing produce, doing dishes, filling pots.
Set this area up well from day one.
Under the sink: This space is usually wasted. Fix that with a tension rod across the inside of the cabinet. Hang spray bottles from it. Put a tiered pull-out shelf below for cleaning supplies. This doubles your usable under-sink storage.
Dish drying: A compact over-the-sink drying rack is the best option for small kitchens. It uses counter space you weren’t using anyway. If you prefer a countertop mat, get a microfiber one that dries quickly and doesn’t mildew.
Sink essentials: A good dish soap dispenser, a sponge holder that drains, and a separate brush for pots. These are small things. But having them set up properly makes a visible daily difference.
Water filtration: You have two main options. A filtered faucet attachment costs $30 to $50 and filters right at the tap. A countertop Brita pitcher costs about $30 but takes up counter space. Both work well. The faucet attachment is more convenient long-term.
Quick Win: Clear everything out from under your sink today. Wipe it down. Buy one tiered pull-out shelf organizer ($15 to $25 on Amazon). Then put things back in a logical order.
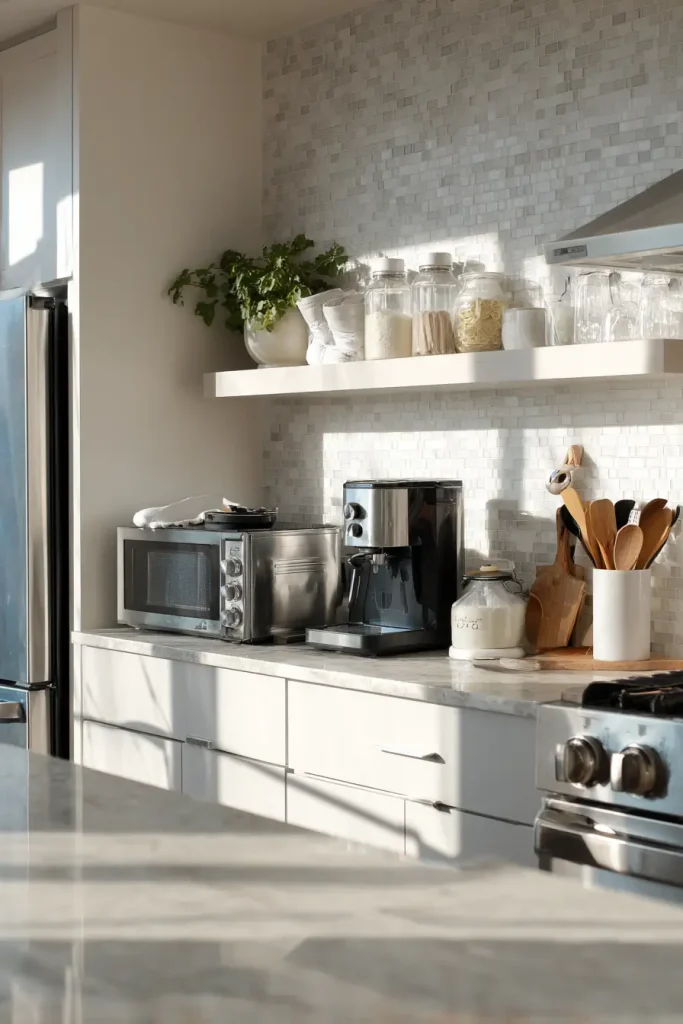
14. Don’t Skip Ventilation
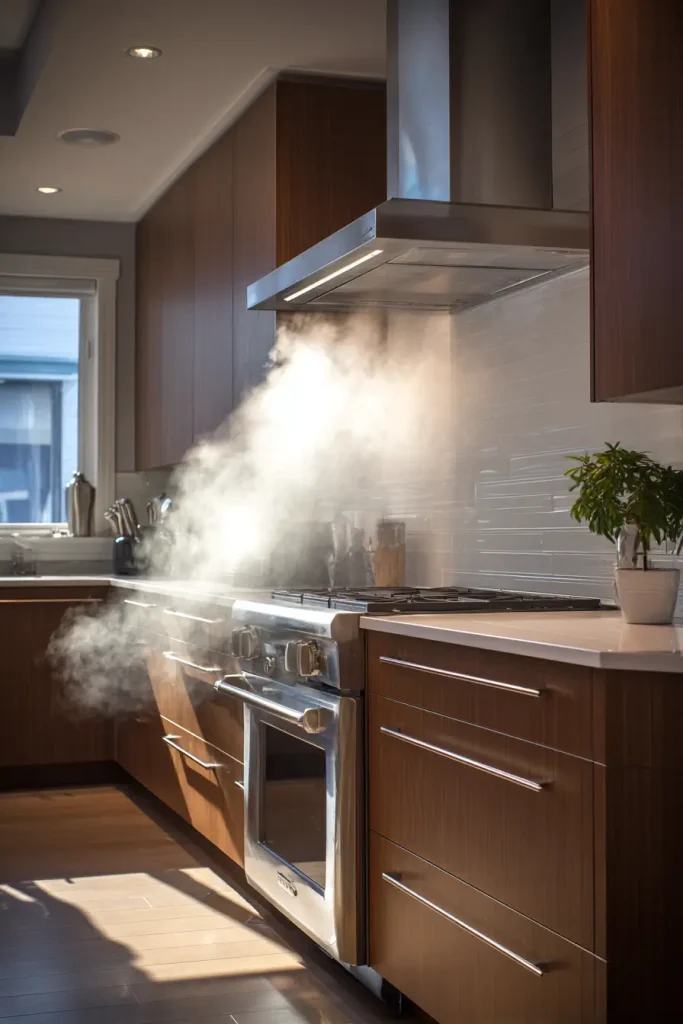
This is the most overlooked idea on this entire list.
Poor kitchen ventilation does three things you don’t want. It fills your home with cooking odors. It coats your cabinets and surfaces in a layer of grease over time. And it creates indoor air quality issues the EPA has specifically flagged in their research on home pollutants.
You have two main ventilation options:
Range hood — A dedicated hood over your stove that captures and exhausts smoke, steam, and grease either outside (ducted) or through a filter back into the room (recirculating). A ducted hood is always more effective. A recirculating hood works when you can’t add ductwork.
Over-the-range microwave — These often have a fan built in. But most of them recirculate air rather than exhaust it outside. They’re convenient and save space, but they’re genuinely less effective at actual ventilation.
For everyday home cooking, you want at least 400 to 600 CFM (cubic feet per minute) of airflow. The National Kitchen and Bath Association recommends 1 CFM per 100 BTU of your range’s output as a minimum standard.
If you’re cooking with gas, proper ventilation matters even more. Gas burners produce combustion byproducts that need to get out of your kitchen.
Quick Win: Turn on your current ventilation right now and hold a paper towel near it. If it barely moves, your ventilation is not doing its job. Research range hood options before your next big cooking session.
15. Add a Backsplash Without Calling a Contractor
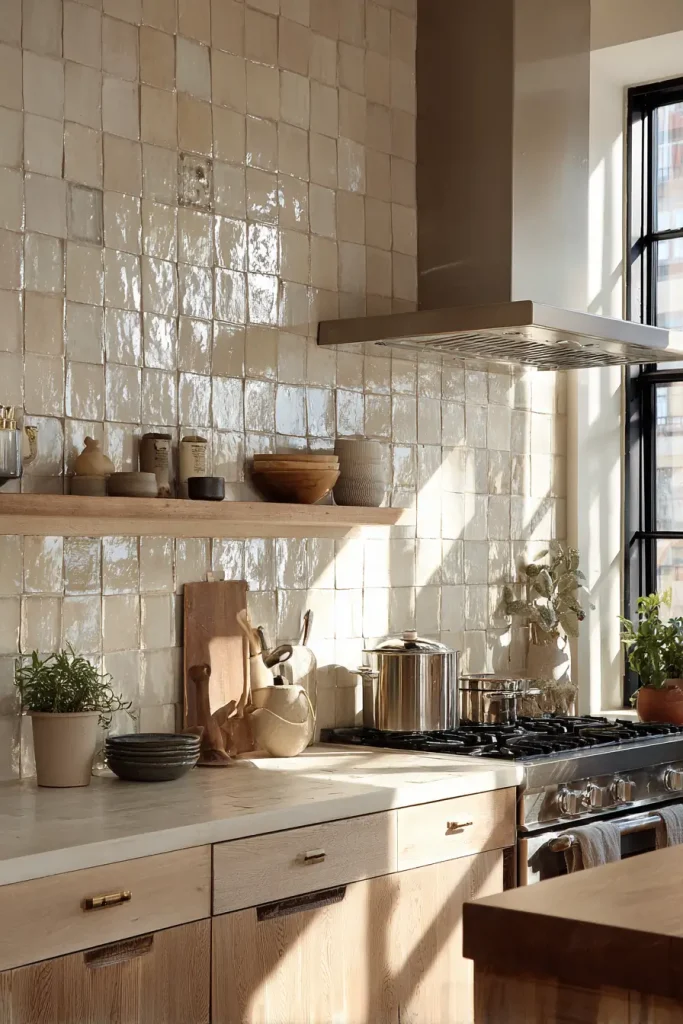
A backsplash does two things. It protects your wall from cooking splatter. And it changes the entire feel of your kitchen.
You don’t need a contractor or a big budget to get a good backsplash.
Peel-and-stick tiles are the easiest starting point. SmartTiles is the best-known brand. They’re used in over a million kitchens. They look realistic, clean up easily, and can be removed without damaging the wall. Perfect if you’re not ready to commit to permanent tile yet. Cost: $15 to $30 per square foot.
Subway tile is the most cost-effective permanent option. It costs $2 to $5 per square foot for the tile. You’ll pay more for grout, mortar, and installation. But subway tile never fully goes out of style and holds up well.
One honest note on grout: light grout gets dirty fast. If you’re doing permanent tile, choose medium or dark grout. It hides everyday staining without constant scrubbing.
The most popular backsplash styles in 2026 are Zellige-style handmade tiles with an uneven, textured surface, warm neutral tones, and textured ceramic. The all-white subway tile look is still clean and functional, but it’s no longer a standout design choice.
The Home Repair Tutor on YouTube has straightforward tile installation tutorials for complete beginners.
Quick Win: Order a sample pack from SmartTiles and stick one tile to your wall. See how it looks in your space. No commitment, no mess
16. Fix Your Outlet and Charging Setup Before You Need It
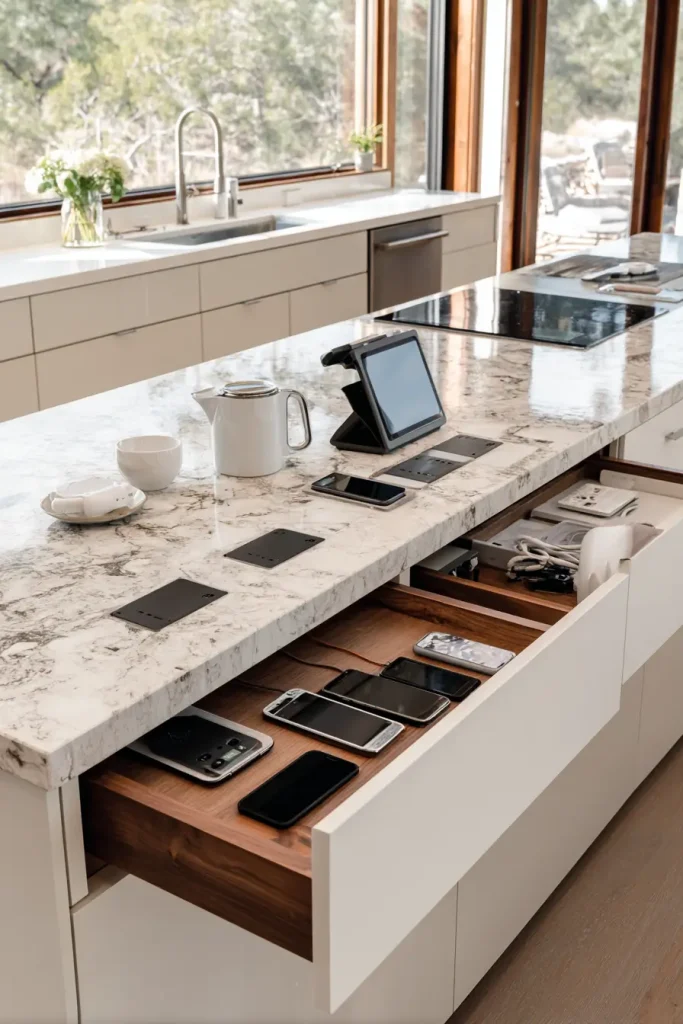
You’ll realize your kitchen needs more outlets about three days after moving in.
Here’s what you should know:
The National Electrical Code requires outlets every 4 feet along kitchen counters. If your kitchen doesn’t have that, it was likely built under older code. A licensed electrician can add outlets. Plan for this in your budget early.
Pop-up countertop outlets are great for islands. They sit flush when not in use and pop up when you need them. Clean look. Very functional.
USB outlets are worth installing where you have the chance. Leviton and Hubbell both make combo outlets with USB-A and USB-C ports built in. You replace a standard outlet with these. They cost $15 to $25 per outlet and can be a DIY project if you’re comfortable with basic electrical work.
The kitchen charging drawer is a growing trend. You dedicate one drawer near the counter’s edge to phone and tablet charging. Run a USB hub or outlet inside the drawer. Devices charge out of sight and out of the way.
Important note: For any new outlet installation or wiring work, check your local permit requirements first. Some electrical work legally requires a licensed electrician and a permit. Don’t skip this step.
Quick Win: Count the outlets in your kitchen right now. Write down how many you have and where each one is. Then think about where you most often wish you had one. That’s where to start.
17. Start a Weekly Reset Habit From Day One
The kitchens that stay organized don’t stay that way by accident. They stay that way because someone does a short reset on a regular schedule.
If you build this habit from your first week, it costs almost no effort. If you wait six months, you’ll be cleaning an actual disaster.
The 15-minute Sunday reset:
- Clear all surfaces. Put everything back where it belongs.
- Wipe down counters, stovetop, and the front of appliances.
- Check the fridge for anything expired or forgotten.
- Restock what’s running low so you start the week ready.
That’s it. 15 minutes. Every Sunday.
The one-touch rule: Every time you use something, put it back immediately. Not later. Not after you eat. Right then. This sounds small. But it’s what separates kitchens that stay clean from kitchens that constantly need a deep clean.
Monthly deeper tasks:
- Clean inside the fridge
- Wipe down cabinet doors
- Clean the stovetop grates or burners properly
- Clean the area behind and under appliances
The “mise en place” concept comes from professional cooking. It means setting up everything you need before you start cooking. Translated to a home kitchen: prep your ingredients, get out your tools, and clear your workspace before you turn on the stove. This habit alone makes cooking faster and less stressful.
Apps like Tody or OurHome help you track cleaning schedules and remind you when tasks are due.
Quick Win: Set a calendar reminder for this Sunday. Label it “Kitchen Reset.” Set a 15-minute timer. Do it. See how much better your kitchen feels on Monday morning.
18. Make It Yours Without Spending a Lot
Your kitchen should feel like yours. But you don’t need to spend thousands to make that happen.
Here are the highest-impact low-cost changes:
Swap the cabinet hardware. This is the single easiest upgrade in any kitchen. New knobs and pulls cost between $2 and $10 each. A full set of 20 pieces runs $40 to $200. It changes the personality of your cabinets completely. And it takes about an hour with a screwdriver.
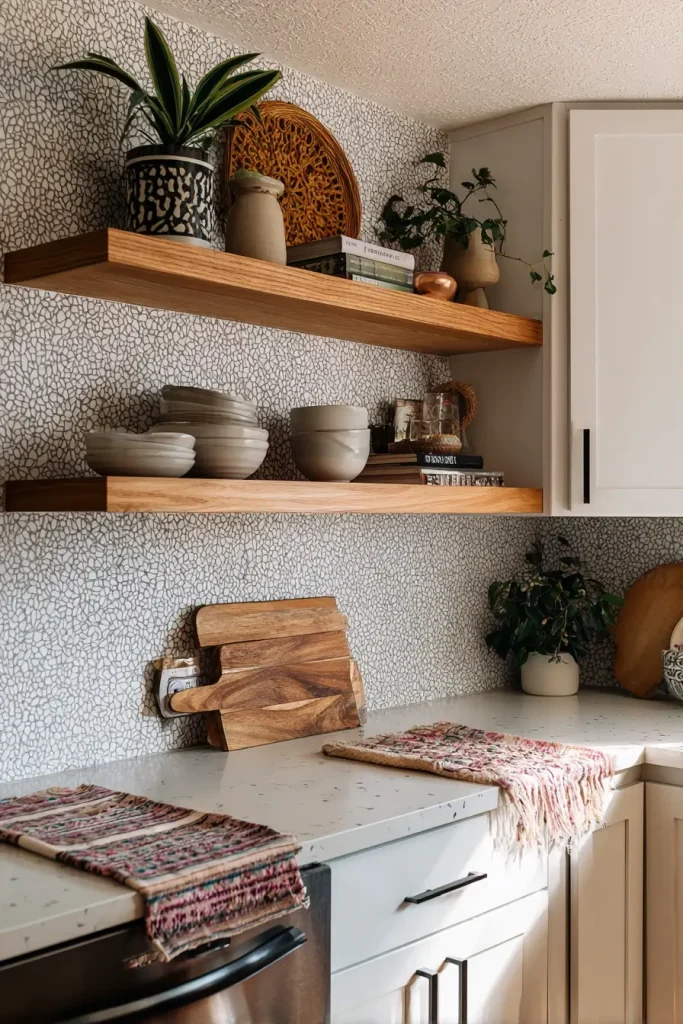
Style open shelves with the three-item rule. On each shelf, place one functional item, one plant or greenery, and one decorative piece. This avoids the cluttered look that open shelves often end up with.
Rotate your kitchen textiles. Tea towels, oven mitts, a kitchen mat. These are cheap and easy to swap seasonally. They add color and personality without any permanent commitment.
Try removable wallpaper. A single accent wall behind open shelves or at the end of a galley kitchen can completely change the feel of the space. Removable wallpaper peels off without damaging walls. Spoonflower and Chasing Paper both have good options.
Add a plant or two. Pothos does well in low-light kitchens and is nearly impossible to kill. Fresh herbs like basil or mint on a sunny windowsill are both decorative and useful.
Etsy is a good source for handmade and personalized kitchen decor. Search for ceramic canisters, custom signs, or handmade dish towels. These feel personal in a way that mass-produced items don’t.
Quick Win: Order two or three hardware samples from Rejuvenation or Hardware Hut. Hold them up against your cabinets. Pick the one that makes you smile. Then order the full set.
Where to Go From Here
Your kitchen doesn’t need to be perfect on day one. It just needs to work.
Start with idea number one this week. Build your priorities list. Figure out what you actually need before you buy anything.
Then work through the list in order. Some of these ideas will take one afternoon. Some will take a few months and a bigger budget. That’s fine.
The kitchens that end up looking great and working well aren’t the ones where someone spent the most money fastest. They’re the ones where someone made smart decisions in the right order.
These 18 kitchen ideas for new homeowners are built to grow with you. Start where you are. Use what you have. Build from there.
Your kitchen will get there. Give it time.

- 17 Classy Living Room Ideas for a Cozy Elegant Look - April 23, 2026
- 16 Dark Moody Living Room Ideas That Feel Rich and Warm - April 22, 2026
- 14 Elegant Bedroom Trends for 2026 You’ll Love - April 22, 2026