If your kitchen has no pantry, food ends up everywhere. Cereal boxes on the counter. Canned goods stuffed into whatever cabinet still has space. Bags falling out every time you open a door.
You are not alone. Most apartments and older homes were built without a dedicated pantry room. Open floor plans looked great in magazines but left nowhere to store food. And now you are dealing with the mess every single day.
The good news is you do not need to knock down walls or spend thousands on a renovation. You just need the right cabinet setup for your space.
This guide gives you 16 real, specific, budget-friendly ideas. Each one tells you what to buy, where to put it, and how much it costs. Some take five minutes to set up. Others take a weekend. All of them actually work.
Why Your Kitchen Has No Pantry (And Why It Is Such a Big Problem)
Pantries started disappearing from American homes after World War II. Builders wanted to save money and square footage. Open concept kitchens became trendy in the 1980s and 1990s. The pantry room got cut to make space for bigger living areas.
Today, the average U.S. kitchen is around 103 square feet, according to the National Kitchen and Bath Association. That is not a lot of room. And most of that space goes to appliances, counters, and existing cabinets.
Here is why this matters beyond just clutter. The USDA estimates that the average American household wastes around $1,500 worth of food every year. A big reason is poor storage. When you cannot see what you have, you buy duplicates. Food gets pushed to the back and expires. Things get lost.
A proper pantry system fixes that. And you do not need a pantry room to build one.
Tall Freestanding Pantry Cabinets
Idea 1: A Floor to Ceiling Freestanding Cabinet
This is the simplest solution for renters. You buy a tall cabinet, put it in a corner or against a wall, and you instantly have pantry storage. No drilling into studs. No permanent changes.
Look for units that are at least 72 inches tall. That height gives you five to six shelves of usable space. The IKEA HAVSTA cabinet is a popular choice and runs around $279 to $349. The Prepac Elite Storage Cabinet is another solid option that costs less and ships from Amazon.
One thing people miss: anchor the cabinet to the wall. Most tall units come with a wall strap. Use it. It takes two minutes and keeps the cabinet from tipping, especially if you have kids or pets.
Want it to look like it belongs in your kitchen? Paint the cabinet the same color as your walls. Add a strip of crown molding along the top. It will look like a built-in.
Cost: $150 to $350. Effort: Low. Renter friendly: Yes.
Idea 2: A Repurposed Armoire or Wardrobe
Walk through any thrift store or scroll Facebook Marketplace for ten minutes. You will find armoires for $40 to $150. Most people use them for clothes. But they work perfectly as kitchen pantry storage.
The interior is already designed to hold heavy things. You just swap out the hanging rod for shelves. Add two or three fixed wood shelves and you have a pantry cabinet for almost nothing.
This works especially well if you have a dining room next to your kitchen. Park the armoire there and use it for dry goods, snacks, and bulk items.
One practical note: coat the interior shelves with food-safe paint or shelf liner before you load food onto them. It keeps things clean and easy to wipe down.
Cost: $40 to $200 total. Effort: Low to medium. Renter friendly: Yes.
Pull Out and Rollout Cabinet Systems
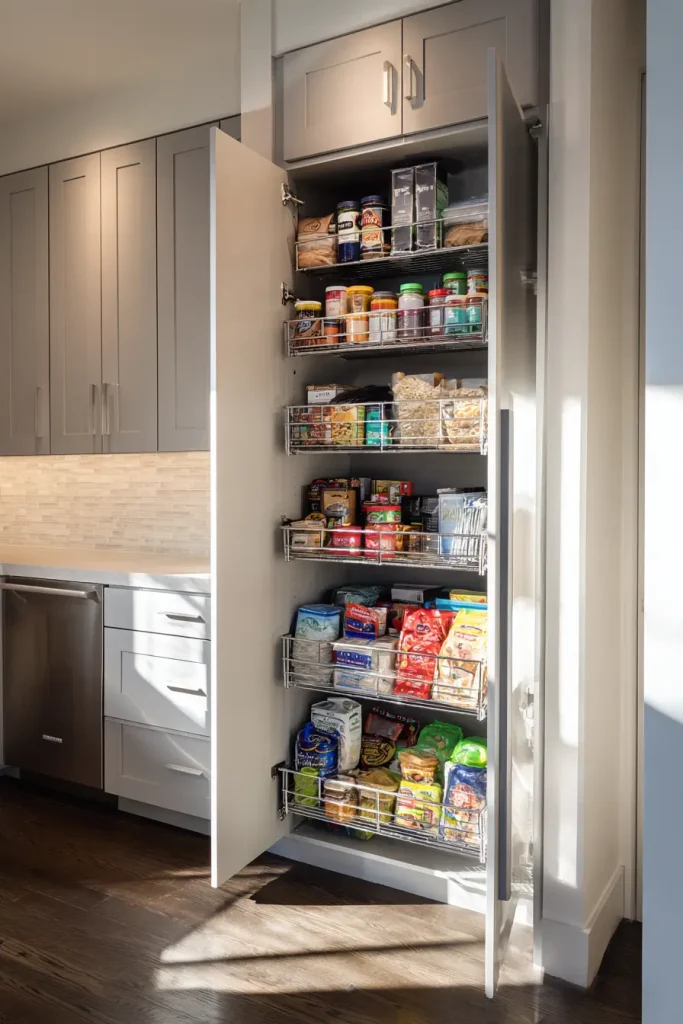
Idea 3: A Slim Pull Out Pantry Tower
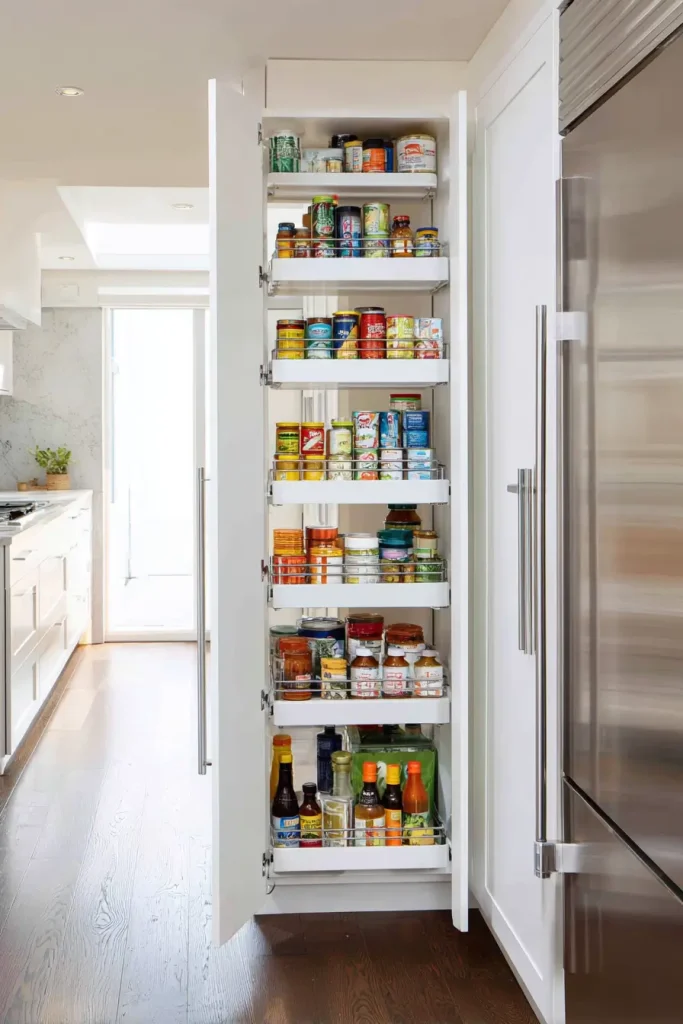
Look at the gap between your refrigerator and the wall. Or the space between two cabinets. If that gap is six inches or wider, you can put a pull out pantry tower there.
These are narrow rolling units with multiple shelves or baskets. You slide them out when you need something and push them back in when you do not. Rev-A-Shelf makes some of the best ones. Their 4SR-18 model runs around $150 to $250 and holds canned goods, spice jars, and bottles vertically.
If that price is too high, the IKEA Raskog cart costs under $35. It is not as polished, but it does the same job and fits in tight spaces.
Cost: $35 to $250. Effort: Very low. Renter friendly: Yes.
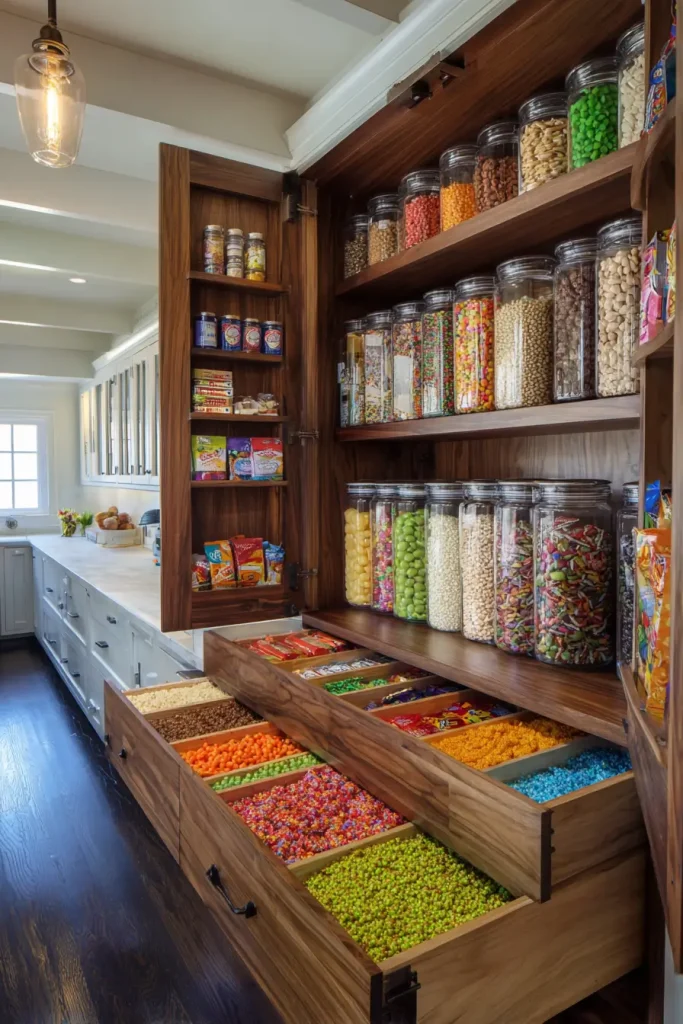
Idea 4: Deep Drawer Pull Outs for Lower Cabinets
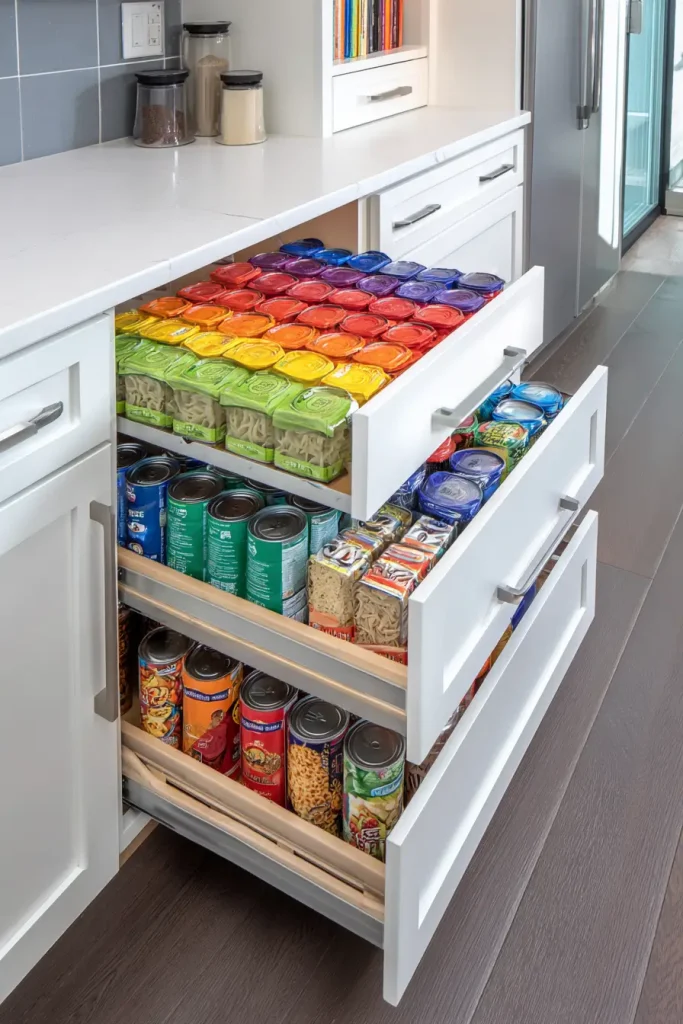
Open your lower cabinets right now. There is probably a fixed shelf with stuff pushed all the way to the back that you forgot you owned.
Pull out drawer inserts fix this completely. You slide the drawer out and everything is visible. No more digging. No more expired pasta hiding behind the rice.
Blum Tandembox and Rev-A-Shelf drawer inserts are the two most trusted brands. Each drawer insert costs around $80 to $200 depending on the size and brand. These fit into your existing cabinet openings. You are not replacing the cabinet, just adding a sliding drawer inside it.
This is one of the highest impact changes you can make to a kitchen. It turns dead storage into organized, accessible storage.
Cost: $80 to $200 per drawer. Effort: Medium. Renter friendly: With care, yes.
Over the Door and Door Mounted Solutions
Idea 5: Over the Door Organizers for Cabinet Doors
The back of your cabinet door is storage you are not using. A simple over the door organizer hooks onto the top of the door and adds two to four rows of pockets or shelves.
SimpleHouseware makes a popular version that costs around $20 to $30 on Amazon. Lynk Professional makes a heavier duty version with wire shelves. Most of these hold 20 to 50 pounds without a problem.
Use them for spices, snack pouches, foil and wrap boxes, and small jars. Before you buy, measure your door clearance. The organizer needs room to swing open without hitting the shelf inside.
Cost: $20 to $60. Effort: Very low. Renter friendly: Yes.
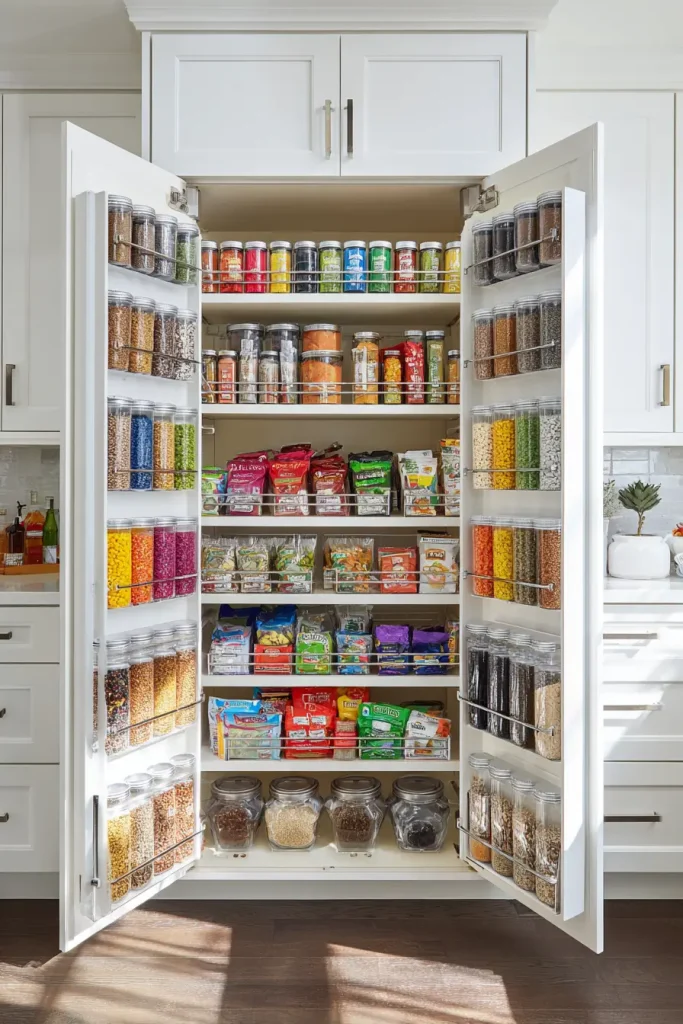
Idea 6: A Full Door Rack System Inside a Tall Cabinet
If you already have a tall cabinet or a broom closet near your kitchen, this is a big upgrade. A full door rack system mounts to the inside of the door and creates a column of storage from top to bottom.
Elfa from The Container Store makes a customizable version with wire pockets and bins. You can configure it to hold whatever you store most. The full setup runs $50 to $200 depending on how many shelves you add.
One real example: a cottage kitchen with almost no cabinet space. The owner installed a full Elfa door rack on the inside of a 24 inch cabinet door. It added storage for 40 plus items without taking up an inch of floor space.
Cost: $50 to $200. Effort: Low. Renter friendly: Yes, if you patch screw holes when you leave.
Corner and Awkward Space Cabinets
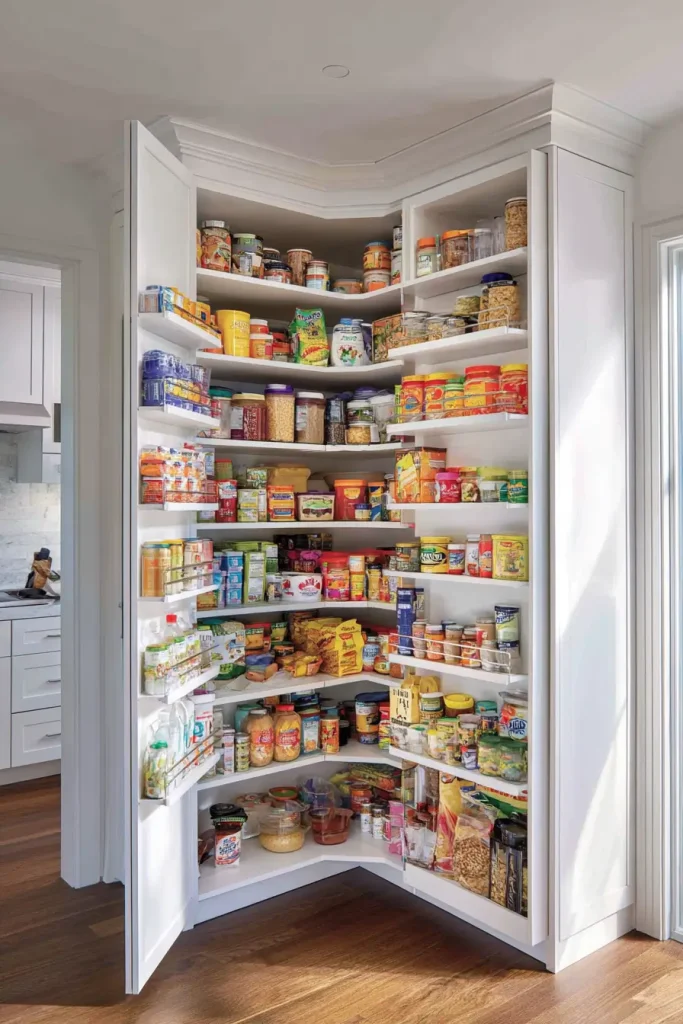
Idea 7: A Lazy Susan Corner Cabinet Conversion
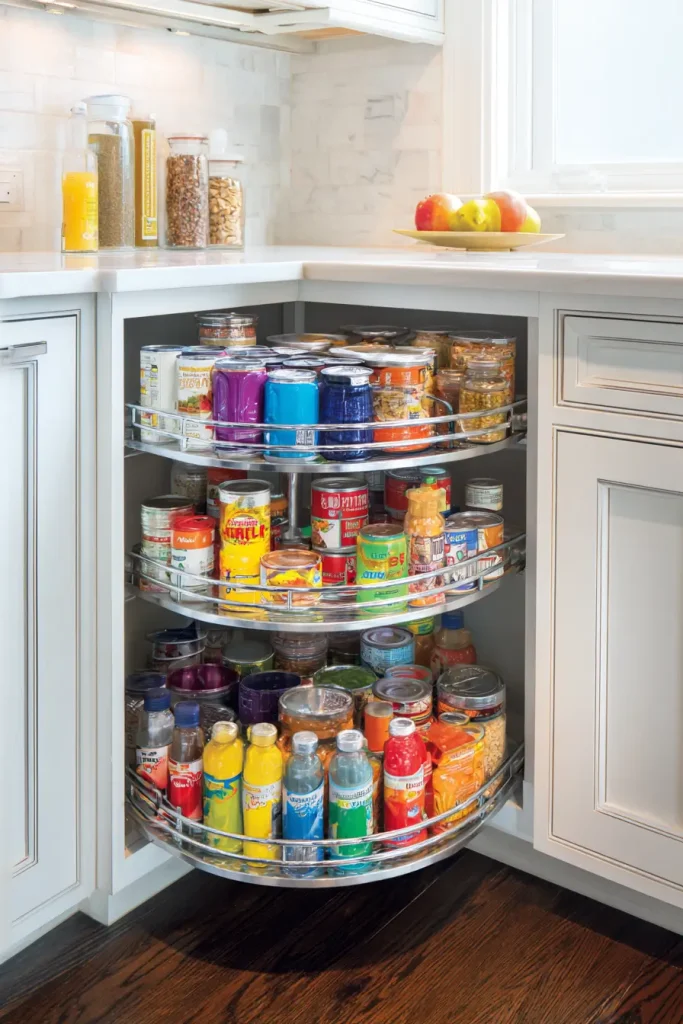
Corner cabinets are the most annoying cabinets in any kitchen. You can never reach what is in the back. Food gets lost. You end up buying duplicates.
A tiered turntable fixes this. Put one or two OXO or mDesign Lazy Susan turntables inside your corner cabinet and suddenly everything rotates to the front. You can find what you need in seconds.
These cost $15 to $40 each and require zero installation. You just set them inside the cabinet and put your cans and jars on them.
For upper corner cabinets, a single flat turntable works best. For lower blind corner cabinets, a two tier version gives you more room.
Cost: $15 to $40. Effort: Zero. Renter friendly: Yes.
Idea 8: A Pull Out Corner Carousel System
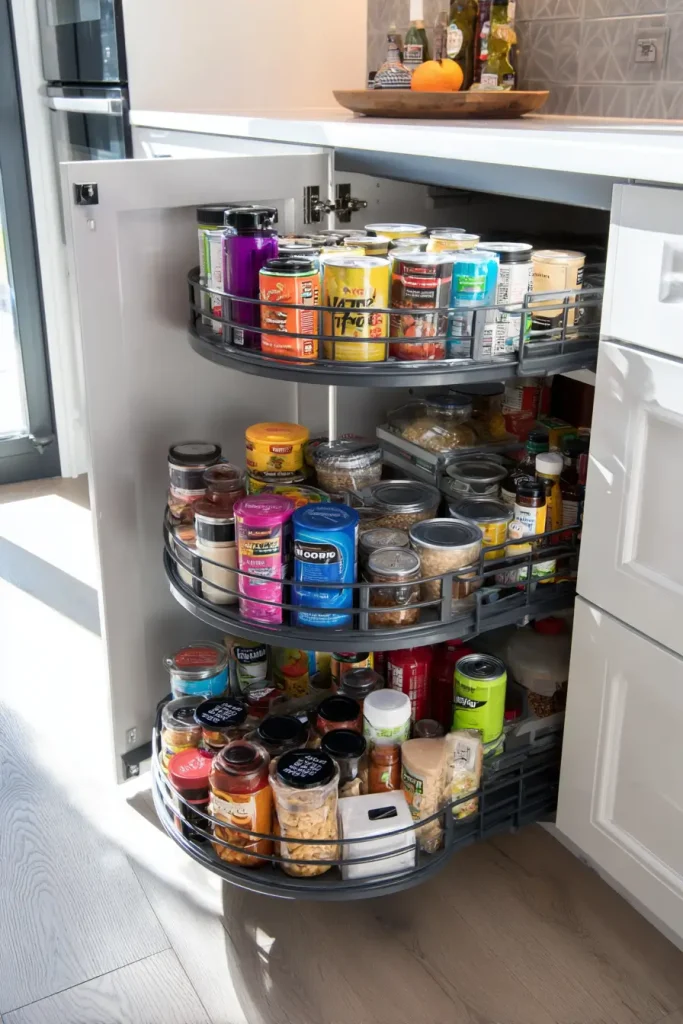
This is a step up from the Lazy Susan. A pull out corner carousel, sometimes called a Magic Corner system, pulls the entire back section of a corner cabinet forward toward you.
Hafele Magic Corner and Rev-A-Shelf blind corner optimizer are the two main options. You pull the front basket out and the back basket automatically swings forward. Nothing gets stuck in the back anymore.
This costs $200 to $600 and requires some cabinet modification to install. It is worth it for homeowners who cook often and want a long term fix.
Cost: $200 to $600. Effort: High. Renter friendly: No, this is a permanent upgrade.
Vertical Wall Mounted Storage
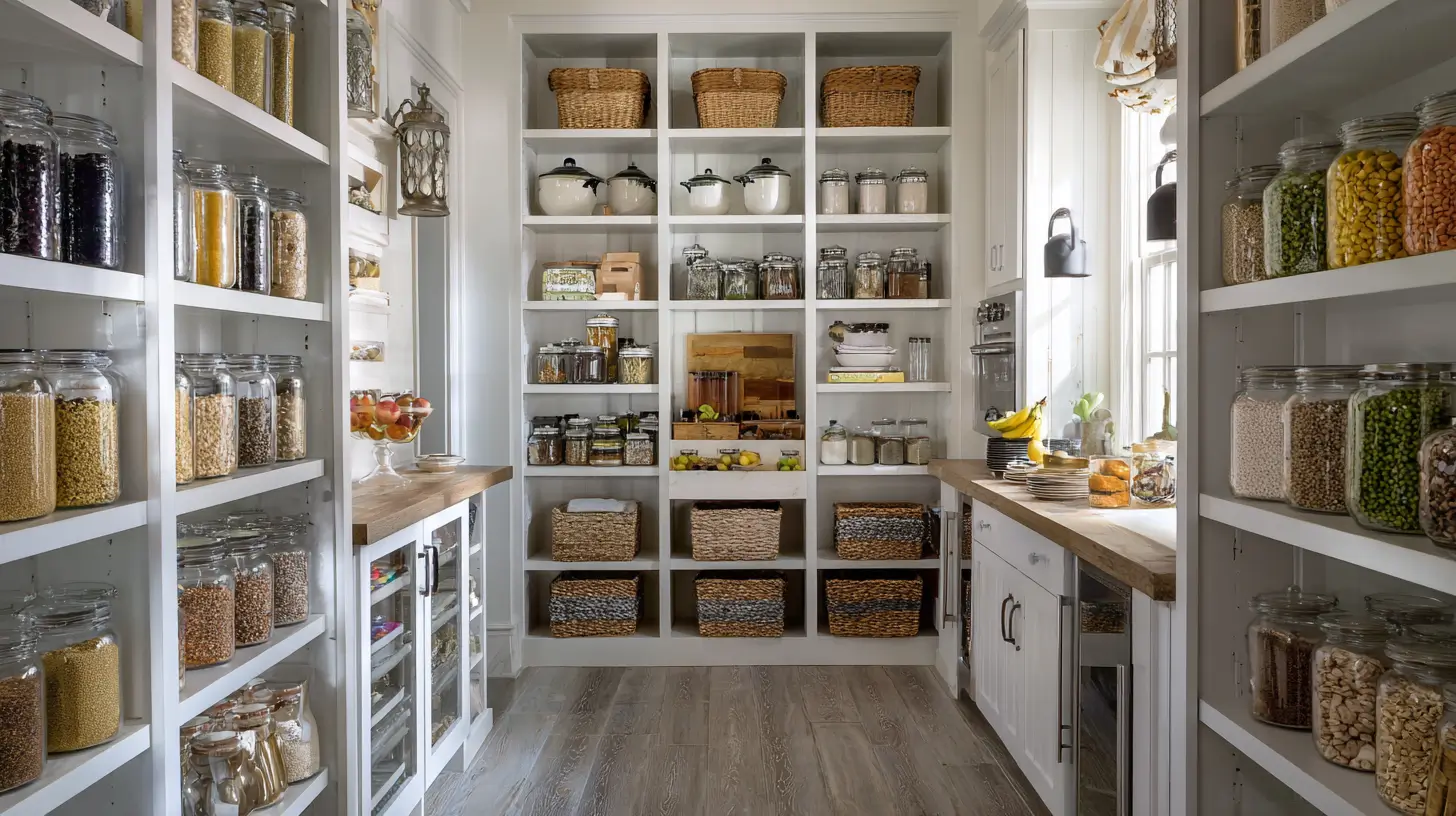
Idea 9: An Open Shelving Wall Unit as a Pantry
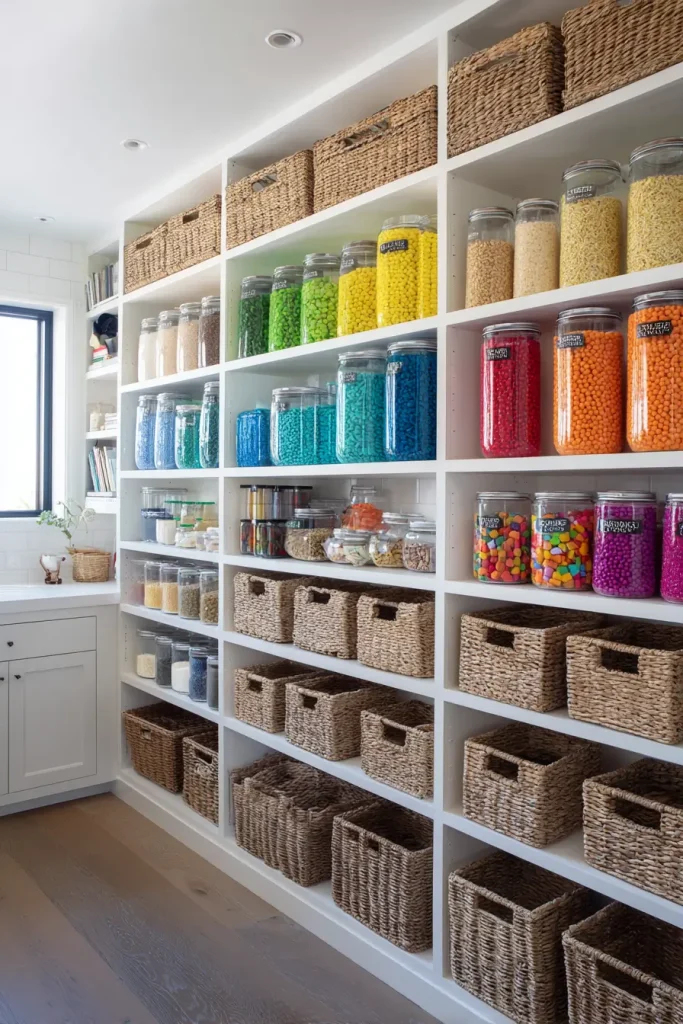
Pick one wall in or near your kitchen. That wall becomes your pantry.
Mount floating shelves or place a freestanding bookcase unit against it. Use it only for food storage. The IKEA Billy bookcase is a favorite for this because it is deep enough to hold pantry items, costs around $79, and comes in multiple heights.
The key to making open shelving look organized is using matching containers. Pour pasta, rice, oats, and flour into uniform canisters. Use baskets for snacks and bags. Label everything. When things are contained and labeled, open shelving looks intentional instead of messy.
OXO Pop Containers are airtight and stackable. A starter set costs around $40 to $60 and makes a big difference.
Cost: $79 to $200. Effort: Low. Renter friendly: Yes.
Idea 10: A Pegboard Pantry Wall
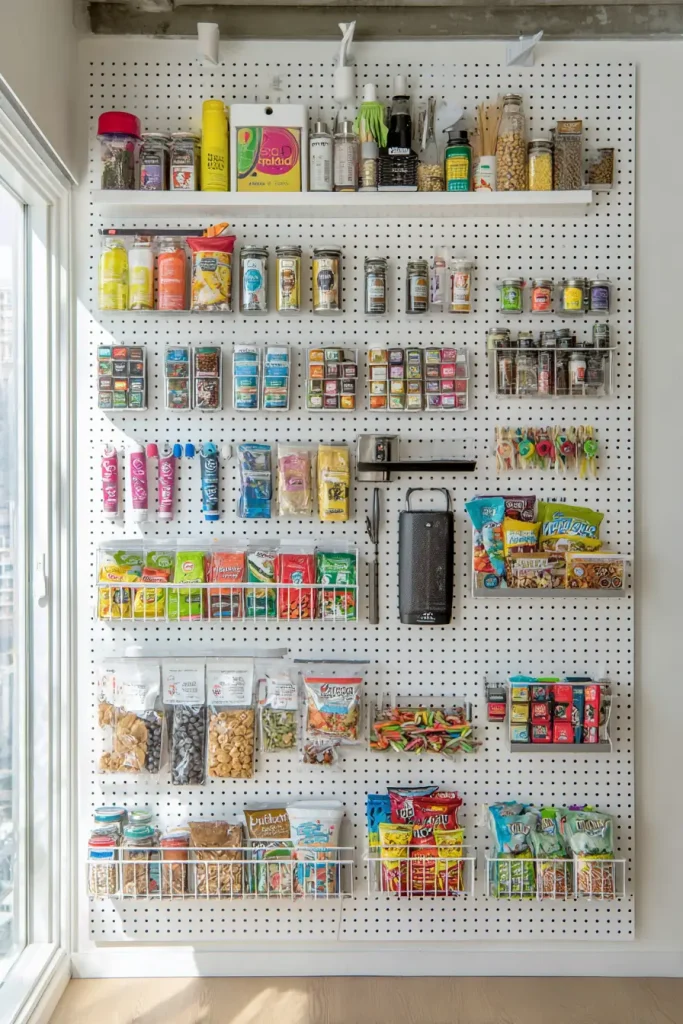
Pegboard is cheap, flexible, and useful. You mount it on a wall and then hang bins, hooks, and shelves wherever you need them. If your storage needs change, you move things around.
IKEA Skadis is a polished version that comes in white and fits well in modern kitchens. It costs around $20 to $40 per panel. You can also buy plain pegboard from Home Depot for under $15 and paint it any color.
Add magnetic spice tins for herbs. Add small wire bins for snack packets. Add a hook for your shopping list pad. A full pegboard setup costs under $75 and adds more usable storage than most people expect.
Cost: $20 to $75. Effort: Low. Renter friendly: Yes, with proper wall anchors.
Dining Room and Adjacent Space Ideas
Idea 11: A Buffet Sideboard as Pantry Storage
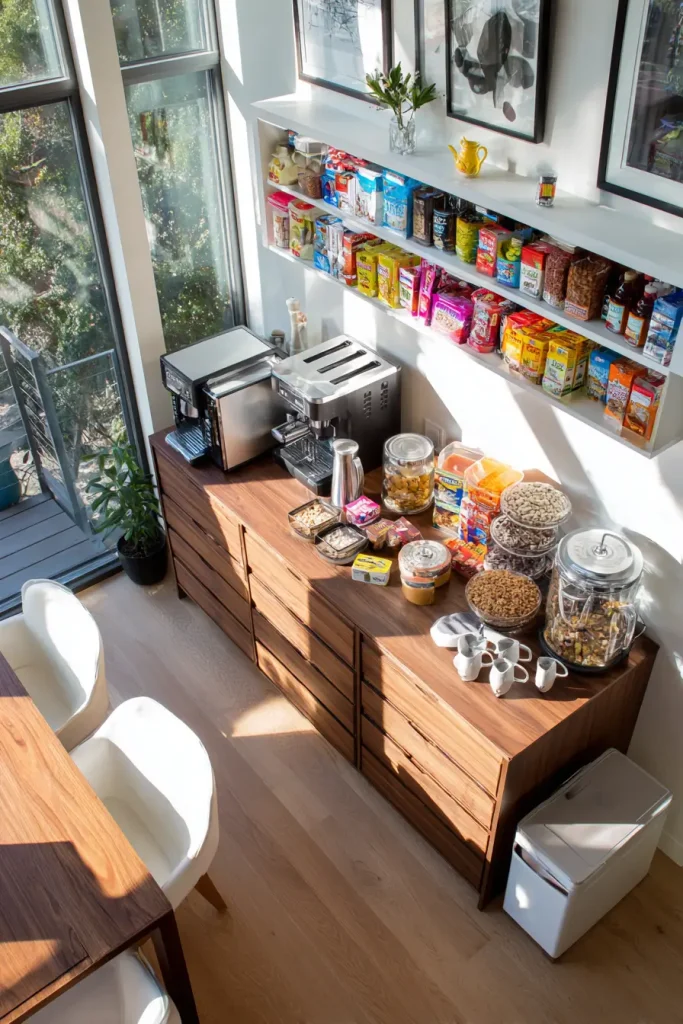
If your dining room is next to your kitchen, a buffet sideboard is one of the smartest furniture pieces you can own. It has cabinets below, drawers in the middle, and a flat surface on top.
Use the cabinets for dry goods, snacks, and overflow food items. Use the drawers for baking supplies or kitchen tools. Use the top for a toaster, coffee maker, or serving pieces.
New sideboards range from $150 to $800 depending on quality. Thrift stores regularly have them for $50 to $100. Look for units with adjustable interior shelves so you can fit taller bottles and boxes.
Cost: $50 to $800. Effort: Zero setup needed. Renter friendly: Yes.
Idea 12: A Rolling Kitchen Island with Cabinet Storage
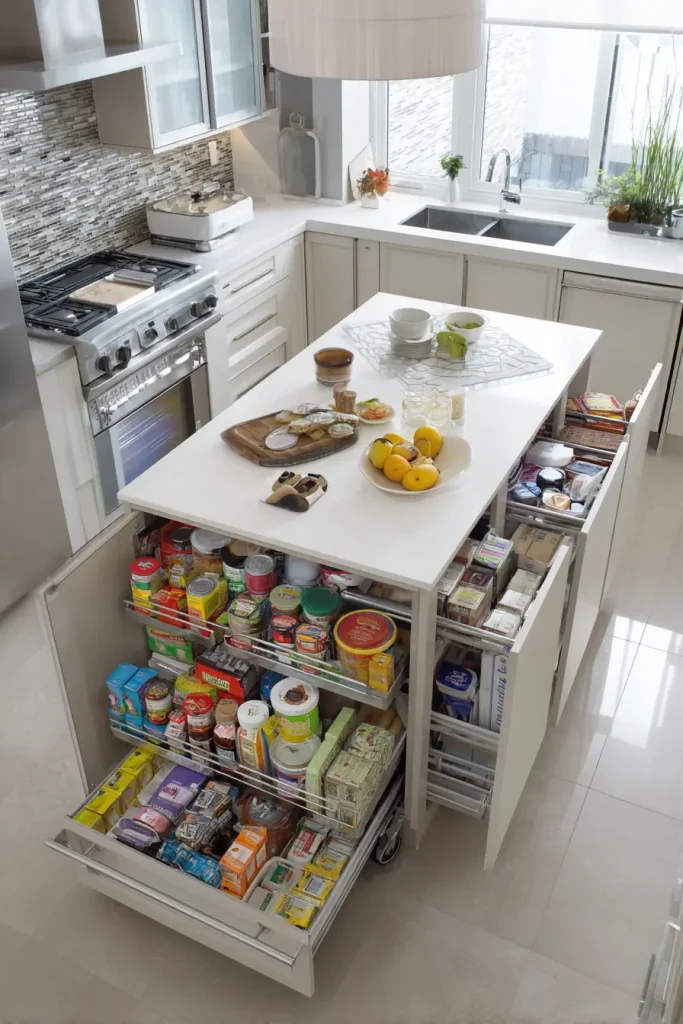
A rolling island does two things at once. It gives you extra counter space for prep. And the cabinet below it gives you extra storage.
Winsome Wood and Catskill Craftsmen make solid rolling islands with enclosed cabinet storage for $100 to $300. When you need the floor space back, you roll it out of the way.
This is one of the best options for studio apartments or small rentals where every square foot counts. You get storage only when you need it, and you reclaim your floor when you do not.
Cost: $100 to $300. Effort: Low. Renter friendly: Yes.
Low Renovation Conversion Ideas
Idea 13: Convert a Coat Closet Into a Pantry Cabinet
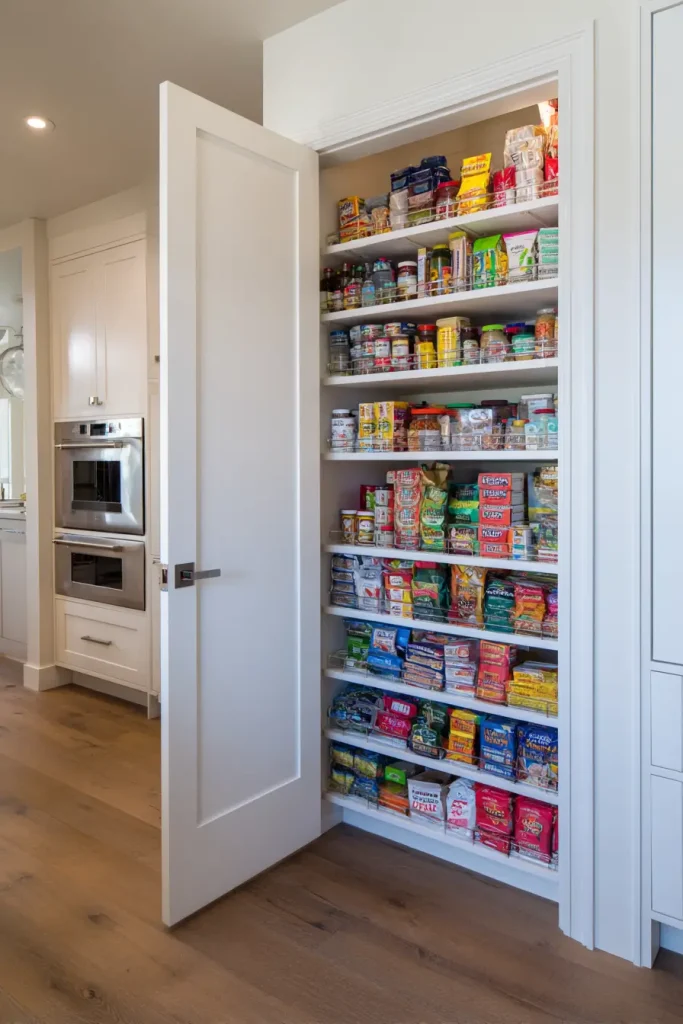
If there is a coat closet anywhere near your kitchen, stop putting coats in it. That space is worth more as a pantry.
Move the coats to a wall mounted rack or a wardrobe in another room. Then line the closet with adjustable shelves from ClosetMaid or Elfa. Add an over the door organizer inside. Install a simple light if the closet is dark.
You end up with more storage than most dedicated pantry rooms. And the total cost is usually $100 to $400 for a DIY install.
One practical tip: line the shelves with a food safe liner before you load anything onto them. It protects the wood and makes cleanup much easier.
Before you start, search YouTube for “closet to pantry conversion.” There are dozens of real walkthroughs with exact product lists and steps.
Cost: $100 to $400 DIY. Effort: Medium. Renter friendly: Possibly, with landlord approval.
Idea 14: Recessed Niche Shelving Between Wall Studs
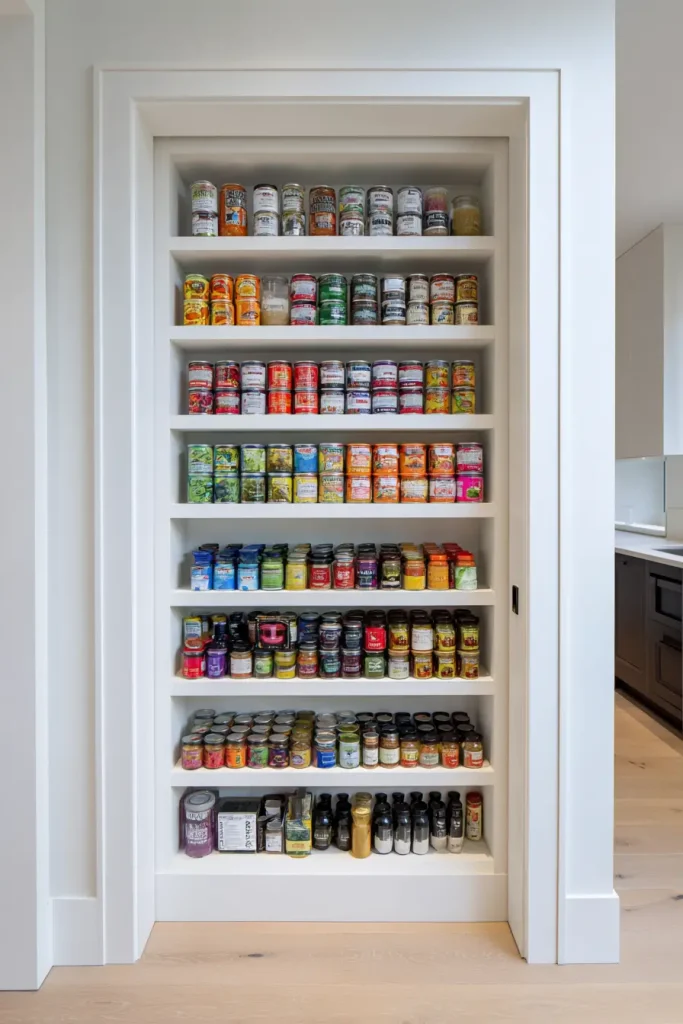
Every interior wall in your home has studs spaced 16 inches apart. Between those studs is empty space. You can cut into the drywall and build shelves inside that empty space.
The shelves end up about 3.5 inches deep. That is enough for canned goods, spice jars, and small bottles. And the shelves take up zero floor space because they sit inside the wall.
A handyman can build a simple recessed niche for $200 to $600 depending on your area. A confident DIYer can do it for $50 to $100 in materials.
This is a permanent change and best for homeowners. But it is one of the cleanest looking solutions on this list.
Cost: $50 to $600 depending on DIY or hired. Effort: High. Renter friendly: No.
Garage and Under Stair Options
Idea 15: A Garage Wall Shelving System as Overflow Pantry
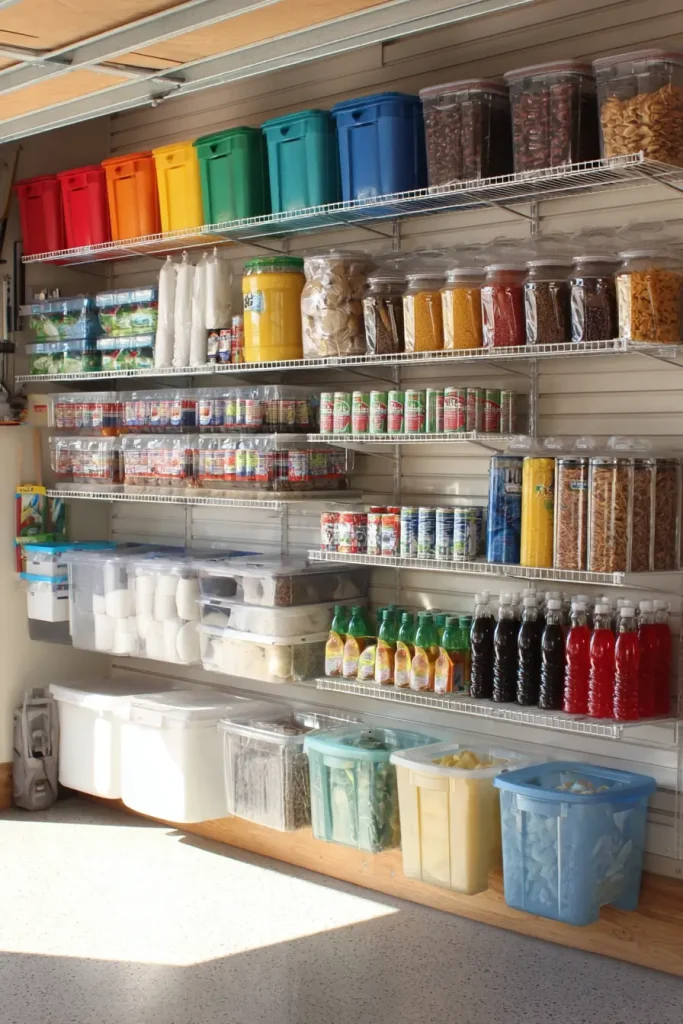
If you have an attached garage, you already have overflow pantry space. You are just not using it yet.
Install a Rubbermaid FastTrack wire shelving system on one garage wall. It takes about two hours and costs $100 to $200. Use it to store bulk paper goods, backup canned goods, beverages, and Costco sized items that do not fit in the kitchen.
One thing to keep in mind: temperature. Do not store perishables or chocolate or anything heat sensitive in a garage that gets very hot in summer. Canned goods, paper products, and beverages handle temperature changes better.
Use clear bins with labels so you can see what is stored and find it fast.
Cost: $100 to $200. Effort: Medium. Renter friendly: Check your lease.
Idea 16: An Under Stair Cabinet Pantry
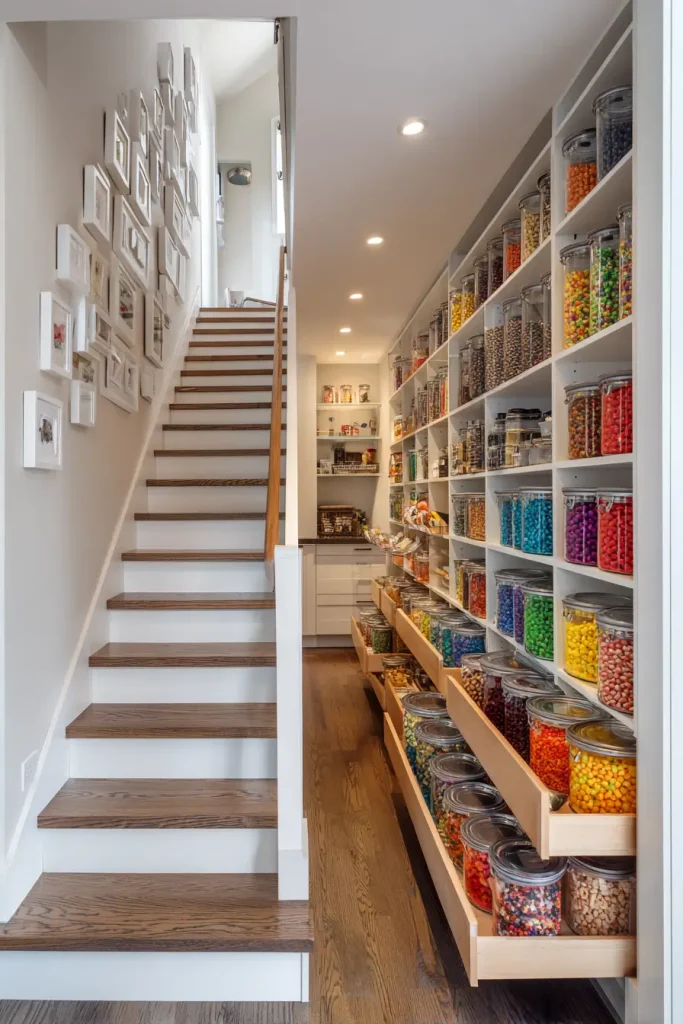
The space under a staircase is almost always wasted. It is oddly shaped and hard to use. But it is also one of the most spacious hidden storage zones in any home.
Pull out drawer units are perfect here because they work with the sloped ceiling. You pull them out flat and everything is visible. Custom built-ins give you the most space, but ready-made cabinet inserts work too and cost much less.
Basic setups cost $300 to $600 using off the shelf cabinets and pull out inserts. Custom built-ins can run $1,000 to $2,000. For homeowners who cook a lot and want something that looks finished, this is one of the best long term investments on this list.
Search YouTube for “under stairs pantry” and you will find dozens of real before and after projects with step by step explanations.
Cost: $300 to $2,000. Effort: High. Renter friendly: No.
How to Pick the Right Idea for Your Kitchen
Do not try to do all 16. Pick one or two that match your space, your budget, and whether you rent or own.
If you rent: Start with Ideas 1, 3, 5, 9, 10, 11, or 12. These require no permanent changes.
If you own: Ideas 13, 14, and 16 give you the most storage long term.
If your budget is under $100: Ideas 5, 7, 9, and 10 all cost less than $75.
If you want the biggest impact fastest: Idea 13 (closet conversion) gives you the most storage with the least cost. Idea 4 (pull out drawer inserts) fixes the most annoying daily problem in any kitchen.
Start this week. Pick one idea. Set it up. You will immediately feel the difference, and it will cost far less than you expect.
You do not need a pantry room. You just need to use the space you already have better.

- 17 Classy Living Room Ideas for a Cozy Elegant Look - April 23, 2026
- 16 Dark Moody Living Room Ideas That Feel Rich and Warm - April 22, 2026
- 14 Elegant Bedroom Trends for 2026 You’ll Love - April 22, 2026