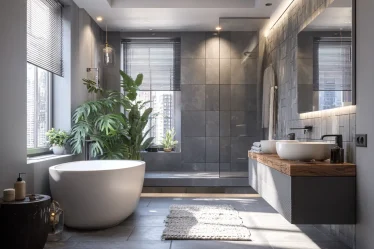
The bathroom is the smallest room in the house, but it’s also the most dangerous one for seniors. The good news is you don’t need to knock down walls or spend a fortune to make it safe. You can keep the style you like while adding smart features that help you or your loved one stay independent.
This guide gives you 17 specific ideas. Each one is made for tight spaces. You’ll learn how to remove trip hazards, add support where it matters, and use lighting and color to make everything easier to see. Whether you’re planning a full remodel or just want to make a few changes, these ideas work.
Let’s get started.
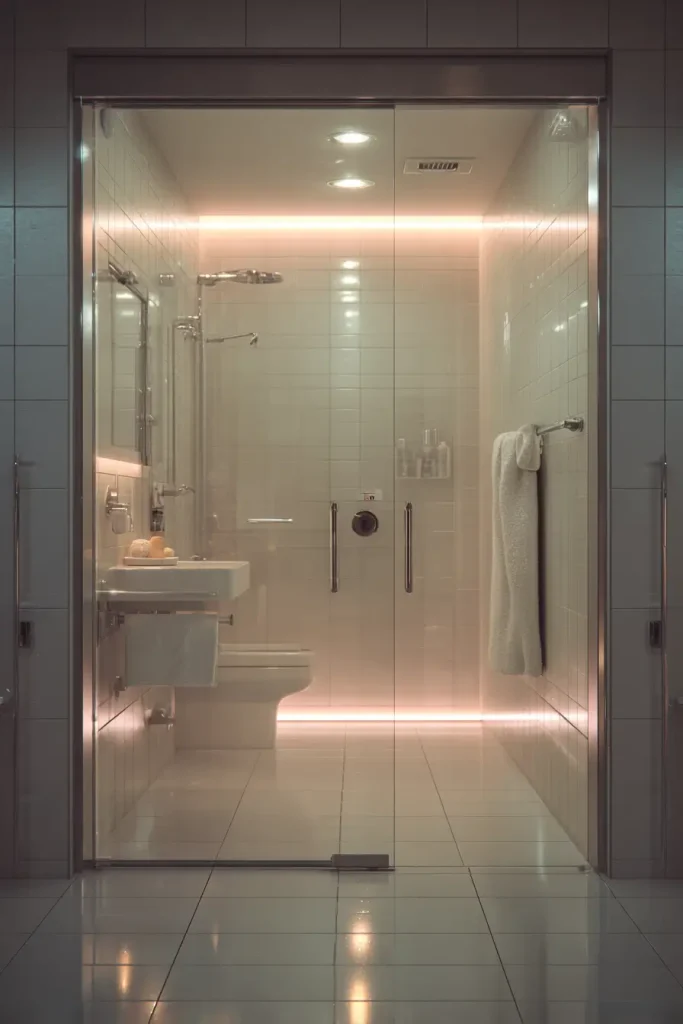
1. Replace the Tub with a Curbless (Zero-Threshold) Shower

A tub with a high wall is a fall waiting to happen. Stepping over a 9‑inch edge takes balance and strength. If you or someone in your home has weak legs or uses a walker, that step becomes a real risk.
A curbless shower solves that. The floor is flat, so you walk right in. No lip. No step. That makes it safe for wheelchairs, walkers, or anyone who has trouble lifting their feet.
And here’s a bonus: getting rid of a bulky tub makes a small bathroom feel bigger. Your eye sees one continuous floor, so the space opens up.
Pro Tip: The CDC says 1 in 4 Americans over 65 falls each year, and 80% of those falls happen in the bathroom. Lowering the threshold by even half an inch removes a major trip hazard.
2. Install a Low-Profile or Fold-Down Shower Seat

Standing in the shower gets harder with age. Legs get tired. Blood pressure can drop. A fall often happens when someone tries to rush because they’re dizzy.
A shower seat lets you sit down and rest. You don’t need a big plastic chair that takes up space. Instead, look for a fold-down bench. It mounts to the wall and flips up when you don’t need it. Teak wood or heavy plastic options hold up to 400 pounds and look good too.
Occupational therapists say the seat should be 17 to 19 inches from the floor. That’s the same height as a regular chair, so sitting down and standing back up feels natural.
Pro Tip: Brands like Moen and Delta make folding seats that match their shower systems. You can have a clean, built‑in look that doesn’t scream “hospital bathroom.”
3. Opt for a Handheld Showerhead with a Slide Bar
A fixed showerhead forces you to stand right under the water. If you’re seated, it’s useless. A handheld showerhead fixes that.
With a slide bar, you can adjust the height for anyone using it. A tall caregiver can set it high. A seated senior can bring it down low. The best models have a pause button, so you can stop the water while you soap up without getting blasted when you turn it back on.
A 2026 trend is smart showers. You can control the temperature with your voice or an app. That means you never have to reach across the water stream and risk slipping.
Pro Tip: Look for a showerhead with a long hose—at least 60 inches—so it reaches everywhere without stretching.
4. Widen Doorways and Use Pocket Doors

A standard doorway is 24 to 28 inches wide. That’s too tight for a walker or wheelchair. You need at least 32 inches of clear space to roll through.
If you can’t widen the door frame, think about the door itself. A traditional door swings into the room and takes up floor space. A pocket door slides into the wall. It doesn’t eat up any of your walking path. That’s a huge help in a small bathroom.
And while you’re at it, swap round doorknobs for lever handles. Round knobs require gripping and twisting—hard on arthritic hands. A lever works with a push of your fist or elbow.
Pro Tip: The ADA says 32 inches is the minimum clear width for a doorway. If you’re hiring a contractor, ask them to measure the finished opening, not just the frame.
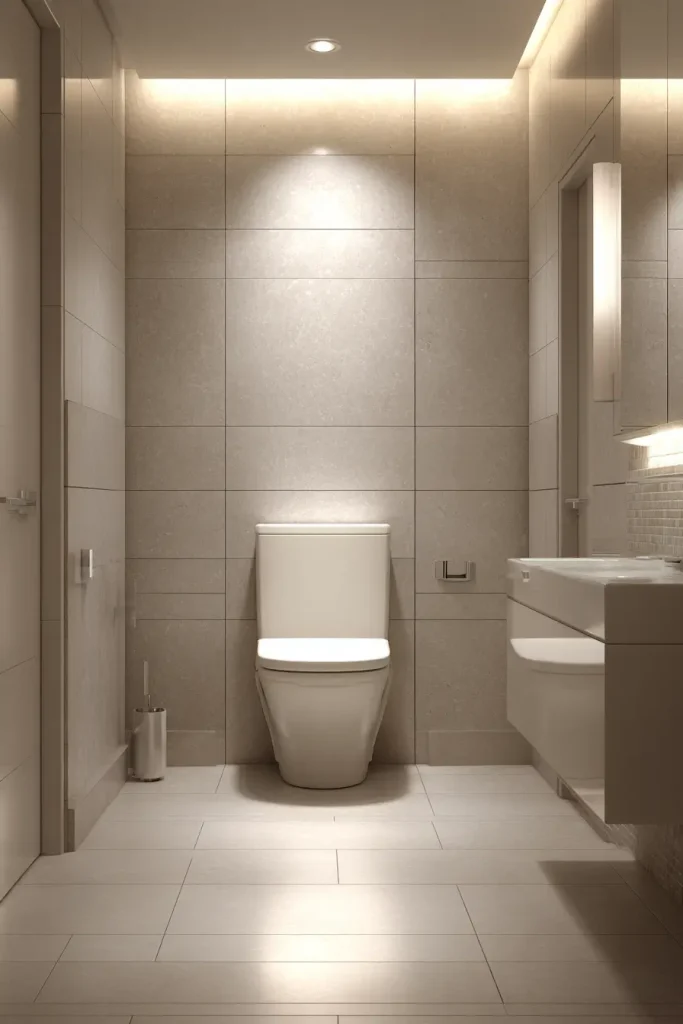
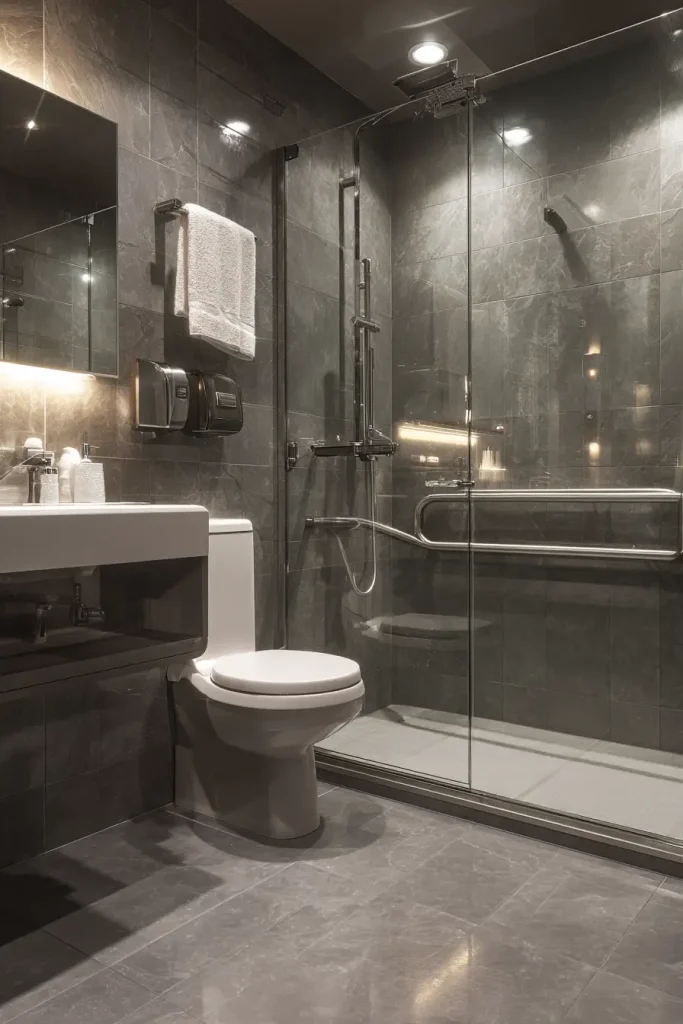
5. Upgrade to a Comfort-Height (ADA) Toilet

Standard toilets sit low—14 to 15 inches from the floor. For someone with bad knees or hips, getting up from that height is painful.
A comfort‑height toilet is 17 to 19 inches tall. That’s the same height as a dining chair. You don’t have to squat down and struggle to stand back up. It’s a simple change that makes a daily task much safer.
If you want to go a step further, consider a wall‑hung toilet. It mounts to the wall, leaving the floor completely open. Cleaning is easier, and you can set the exact height that works best for you.
Pro Tip: The National Kitchen & Bath Association (NKBA) now lists comfort‑height toilets as a standard for aging‑in‑place homes.
6. Install Grab Bars Disguised as Luxury Hardware

Old‑style grab bars look like they belong in a hospital. But you don’t have to live with that look. Today you can buy grab bars that look like sleek towel bars or modern handrails. They come in finishes like brushed nickel, matte black, and even brass.
Place them where you need support:
- A vertical bar at the shower entry to hold while stepping in.
- A horizontal bar next to the toilet for sitting and standing.
- An angled bar inside the shower for stability.
The key is that these bars must be screwed into wall studs or reinforced blocking. Suction cups and adhesive strips are not safe for weight support.
Pro Tip: Never use a regular towel bar as a grab bar. It’s not designed to hold body weight. It will pull right out of the wall.
7. Choose Non-Slip Flooring with Minimal Grout Lines
Wet floors are slippery. That’s obvious. But some flooring materials are much more dangerous than others. Polished marble or glossy porcelain tile becomes an ice rink when wet.
Instead, pick flooring with grip. Textured porcelain tiles, luxury vinyl plank (LVP), or small mosaic tiles all provide good traction. LVP is also softer underfoot, so if someone does fall, the impact is less severe.
Ask your supplier for the DCOF rating. In wet areas, you want a rating of 0.42 or higher. That’s the industry standard from the Tile Council of North America (TCNA).
Also, keep the floor continuous from room to room. No raised thresholds. A walker or wheelchair should roll smoothly without bumping over edges.
Pro Tip: If you keep your existing tile, you can add a non‑slip coating. It’s a clear liquid that you roll on to add grip without changing the look.
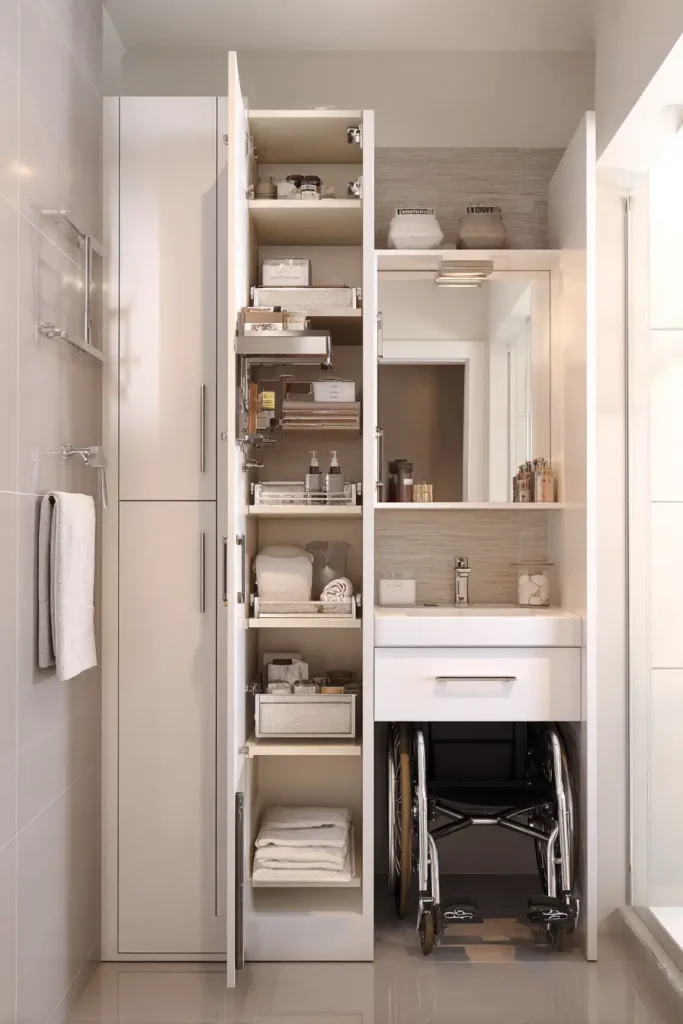
8. Maximize Vertical Storage to Clear the Floor

Clutter on the floor is a trip hazard. Every bottle, scale, or hamper left on the ground is something you could catch your foot on.
The fix is to move storage up. A tall, narrow linen tower takes up little floor space but holds towels, toiletries, and medical supplies. If you have a base cabinet, use pull‑out shelves so you don’t have to bend deep to reach items.
Floating vanities are another good option. They mount on the wall, leaving the floor clear. They also create knee space for a wheelchair user to roll up to the sink.
Pro Tip: A lazy Susan in a corner cabinet makes everything easy to reach. No more getting on your hands and knees to find something in the back.
9. Implement Smart Lighting Solutions
As we age, we need more light. A 60‑year‑old needs about three times more light than a 20‑year‑old to see the same details. Shadows and dim areas make depth perception harder, which increases fall risk.
Start with motion‑sensor night lights. You walk into the bathroom, and the light comes on automatically. No fumbling for a switch in the dark.
Use high‑CRI bulbs. CRI stands for Color Rendering Index. A higher CRI (90+) shows colors accurately, so you can see water on the floor or distinguish a white towel from a white wall.
Rocker switches are easier to use than small toggle switches. You can turn them on with your palm or elbow if your hands are full or sore.
Pro Tip: Connect your bathroom lights to a smart speaker. Saying “Alexa, turn on the bathroom light” means you never have to reach for a switch in the dark.
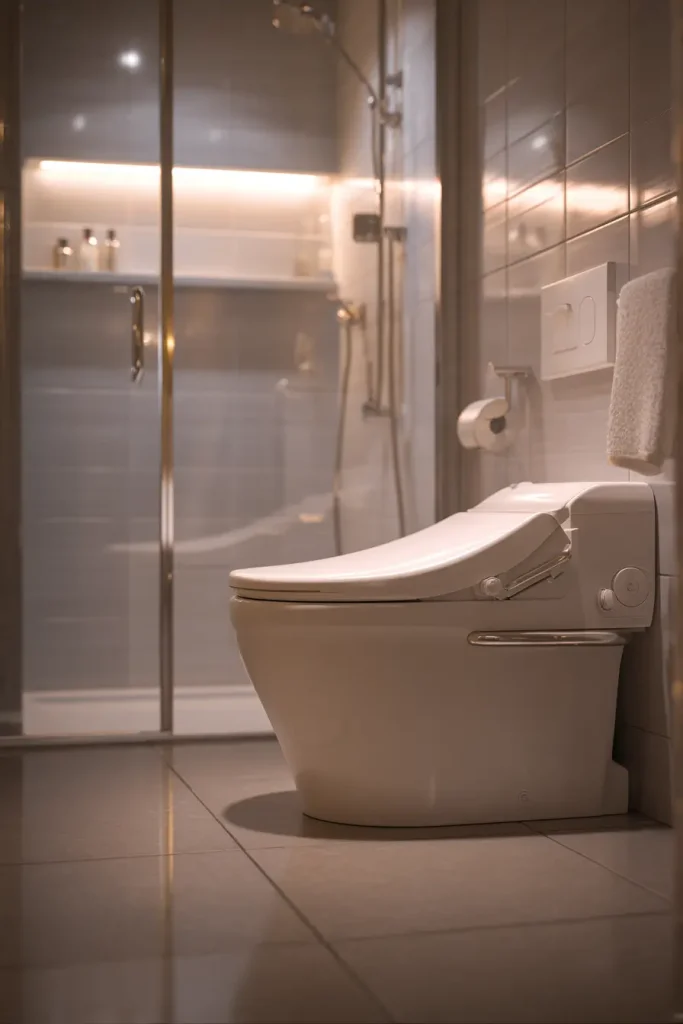
10. Add a Hand-Held Bidet or Washlet

Reaching behind you to clean yourself gets harder with arthritis, back pain, or limited mobility. A bidet seat removes that struggle.
A “washlet” is a toilet seat with built‑in water spray, warm air dryer, and a heated seat. You control it with a remote or a side panel. You stay clean without twisting or straining.
This also helps caregivers. The person can handle their own hygiene privately, which preserves dignity.
Pro Tip: You don’t need a new toilet. Many bidet seats fit standard toilets. You just need a power outlet near the toilet—something to consider during your remodel.
11. Utilize a Wall-Mounted Sink or Console Vanity

A big boxy vanity takes up floor space and blocks a wheelchair from getting close to the sink. A wall‑mounted sink or a console vanity (sink with legs but open underneath) fixes that.
The open space below lets a wheelchair user roll right up to the faucet. It also makes cleaning easy. You can sweep or mop without moving anything.
The ADA recommends at least 27 inches of clearance from the floor to the bottom of the sink. That’s enough room for knees and a wheelchair footrest.
Pro Tip: If you need storage, add a narrow cabinet to the side, not underneath. That keeps the open space where you need it most.
12. Install a Thermostatic Mixing Valve
Hot water scalds happen fast. Older skin is thinner and less sensitive, so you might not feel the heat until it’s already burning. A thermostatic mixing valve stops that.
It controls the water temperature automatically. You set a maximum safe temperature—usually around 105°F—and the valve keeps it there. Even if someone flushes a toilet or starts a dishwasher, the temperature stays steady.
These valves are now required by code in many new homes. If you’re remodeling, it’s a smart addition.
Pro Tip: Scald burns are the second leading cause of injury‑related hospitalization for seniors. A mixing valve costs under $200 but can prevent a life‑changing injury.
13. Use Contrasting Colors for Depth Perception
When everything in a bathroom is the same color, it’s hard to see where one surface ends and another begins. A white toilet against a white floor? You might not see the edge until you trip over it.
Contrast helps. Use dark grout on light floor tiles so you see the pattern. Pick a vanity that’s a different color from the wall. Make sure grab bars stand out—a dark bar on a light wall is visible; a white bar on a white wall is almost invisible.
The Center for Inclusive Design calls this “visual accessibility.” It’s simple, costs nothing extra during a remodel, and makes a huge difference for people with low vision or depth perception issues.
Pro Tip: For shower edges, use a strip of contrasting tile. It marks the transition from dry to wet area without adding a bump.
14. Integrate a Shower Niche at Arm Height

Corner caddies and hanging baskets fall off, and they stick out where you can bump into them. A shower niche is a recess built into the wall. It holds shampoo, soap, and washcloths right at arm height.
Place the niche so it’s reachable from a seated position—about 18 to 30 inches from the shower floor. That way you don’t have to stand up to get your soap.
Make sure the niche has a slight slope so water drains out instead of pooling inside.
Pro Tip: A niche is safer than a shelf that sticks out. You never accidentally grab a shelf for support. With a niche, there’s nothing to grab—and nothing to fall on you.
15. Invest in a Raised Front-Loading Washer/Dryer (If Laundry is in Bath)

In many small homes, the washer and dryer sit right in the bathroom. If that’s your setup, make it safe.
Front‑loading machines on pedestals raise the door opening to waist height. You don’t have to bend way down to load or unload. That saves your back and knees.
The pedestal also gives you storage underneath for detergent or other supplies.
Pro Tip: Compact all‑in‑one washer‑dryer units are becoming popular in 2026. They fit in small spaces and are easier to reach because they’re one unit with controls at the top.
16. Replace Faucets with Single-Lever or Touch-Activated

Two‑handle faucets look nice, but they require gripping and turning. For arthritic hands, that’s painful. A single‑lever faucet lets you control temperature and flow with a simple push or pull.
Touch‑activated faucets are even better. You tap the spout with the back of your hand or your wrist to start the water. No gripping at all. They also help stop the spread of germs because you don’t leave dirty fingerprints on the handles.
Pro Tip: Brands like Kohler and Moen offer motion‑sense faucets. Wave your hand near the sensor, and water runs. Set the temperature once, and it stays there.
17. Install a Pre-Fabricated ADA Compliant Shower Kit

Maybe you can’t afford a full custom bathroom remodel. Or maybe you need the work done fast so you or your loved one doesn’t go without a bathroom for weeks.
Pre‑fabricated ADA shower kits are the answer. They come as single‑piece or modular units. They’re waterproof, have built‑in seats and grab bars, and most have a low or zero threshold.
Installation takes one or two days. The cost is much lower than custom work. A custom curbless shower can run $10,000 to $15,000. An ADA shower kit can be installed for $3,000 to $6,000.
Pro Tip: Look for kits with textured floors built in. That way you don’t have to worry about adding a separate non‑slip surface.
Conclusion
You don’t have to choose between safety and style. Even the smallest bathroom can be made safer with the right changes. Focus on three things: remove trip hazards, add support where you need it, and improve visibility with lighting and color.
Start with a safety audit. Walk through your bathroom and look for the top three risks. Is the step into the tub too high? Are there loose rugs? Do you have to reach too far for the light switch? Fix those first.
Then, when you’re ready, pick one or two of the ideas from this list. You don’t have to do everything at once. Every change you make adds safety and keeps independence longer.
By using these small bathroom accessibility ideas for seniors, you turn a high‑risk room into a place that works for you safely and comfortably.

- 17 Classy Living Room Ideas for a Cozy Elegant Look - April 23, 2026
- 16 Dark Moody Living Room Ideas That Feel Rich and Warm - April 22, 2026
- 14 Elegant Bedroom Trends for 2026 You’ll Love - April 22, 2026