You don’t need a full kitchen to eat like a chef—or to save $2,500 a year on a campus meal plan you barely use.
Maybe you moved into a dorm with a mini‑fridge and a microwave that looks like it’s from the 90s. Or maybe you’re in a studio where the “kitchen” is a countertop you can’t even fit a cutting board on. Whatever the setup, you’ve probably realized that cooking feels impossible when you have zero elbow room, one outlet, and no place to put your groceries.
Here’s the truth: a tiny kitchenette doesn’t mean you’re stuck eating cold ramen or blowing your budget on takeout. It just means you need to think differently. Below are 19 specific, tested ideas that work in 2026. Try one or two, and watch your space—and your meals—transform.
1. Go Vertical with Magnetic Strips & Racks
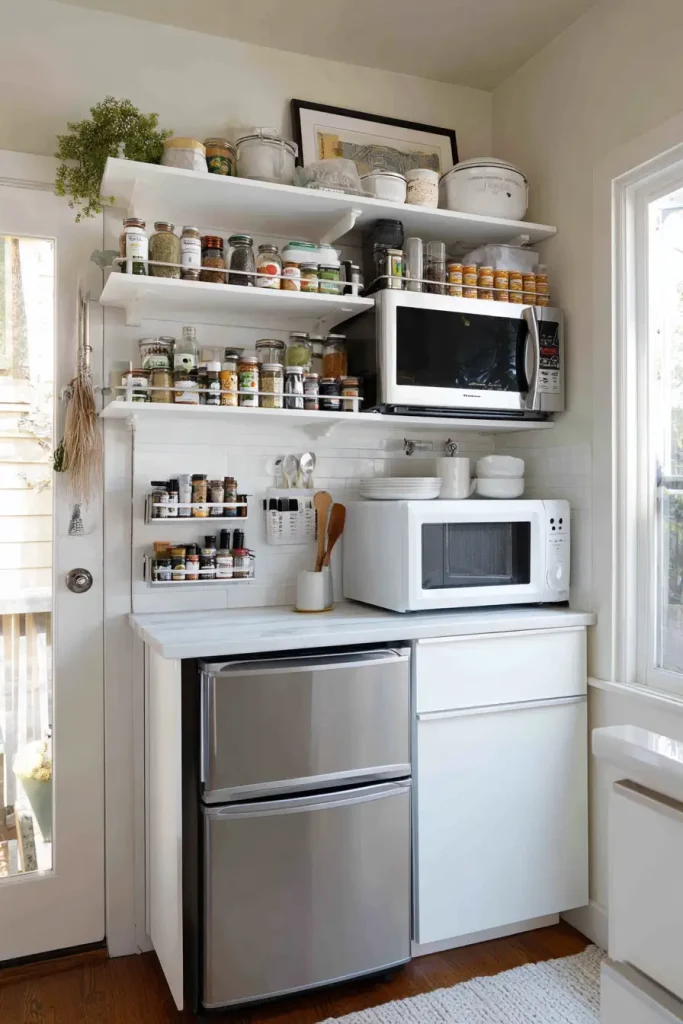
When you have almost no counter space, the only place to go is up. Magnetic strips and racks stick to the side of your mini‑fridge or microwave. Use them for spices, small jars, or even lightweight utensils. No drilling, no damage, and everything stays within arm’s reach.
- Pro tip: A magnetic spice rack holds 12 spices and costs less than one takeout meal.
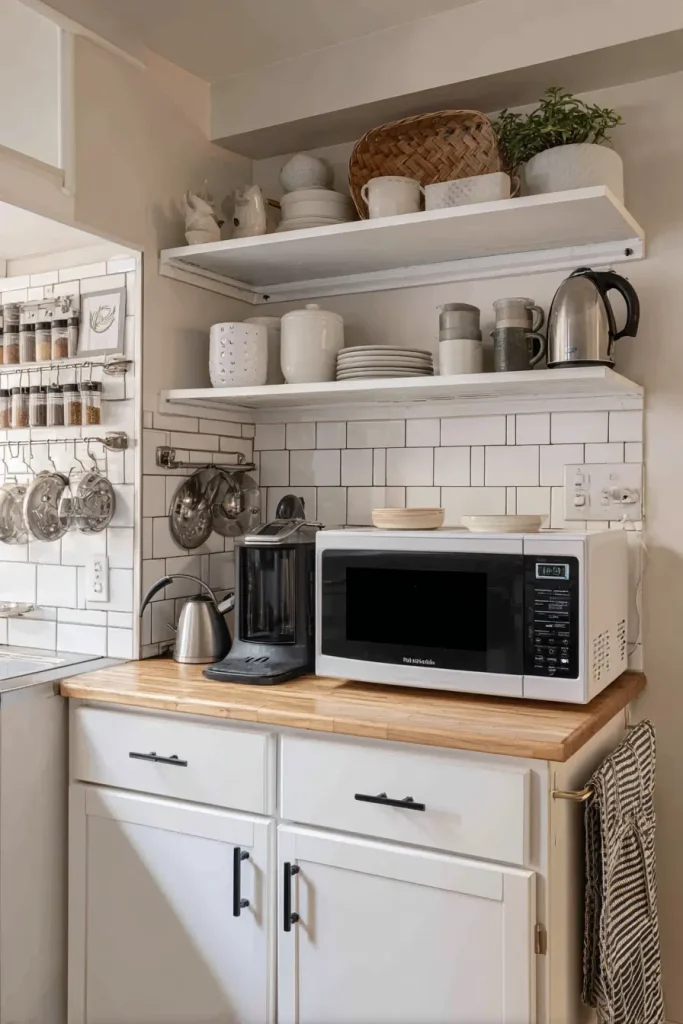
2. Install Over-the-Sink Shelving

The space right above your sink is usually empty. Over‑the‑sink shelves use that dead air. They’re perfect for drying a few dishes or storing lightweight items like plastic containers and paper towels. Some models fold up when you need full sink access.
- Pro tip: Look for tension‑rod styles that don’t require screws—dorm‑friendly.
3. Use Command Hooks for Hanging Storage
Command hooks are your best friend in a rental or dorm. Hang colanders, measuring cups, oven mitts, or even small pots if the hooks are rated for the weight. When you move out, they come off without leaving holes or sticky residue.
- Pro tip: Use two hooks to hang a wire basket—instant extra storage for sponges or snacks.
4. Upgrade to a 3-in-1 Microwave/Air Fryer/Oven

A microwave alone won’t get you far. A 3‑in‑1 combination unit (microwave, air fryer, convection oven) does the job of three appliances in one footprint. Brands like Ninja (Combi model) let you roast veggies, crisp frozen fries, and reheat leftovers without switching machines.
- Pro tip: It takes up the same space as a standard microwave, so it’s an easy swap.
5. Get an Electric Kettle with Temperature Control

An electric kettle boils water faster than a stovetop. A model with temperature control is even better. You can set it to 175°F for green tea, 200°F for pour‑over coffee, or full boil for ramen and instant oatmeal. No more watching a pot on a crowded stove.
- Pro tip: Use it to hard‑boil eggs—just drop eggs in, bring to a boil, and let them sit covered for 10 minutes.
6. Switch to a Portable Induction Cooktop

A portable induction cooktop is the safest “hot plate” you can buy. It only works with magnetic pans, so if you accidentally leave it on, it won’t heat up the wrong cookware. It’s easy to store under the bed and meets most dorm fire safety rules.
- Pro tip: Bring one cast‑iron or induction‑compatible pan, and you can sauté, boil, and even sear steak.
7. Apply the “One Shelf” Rule to Your Mini-Fridge

If you can’t see it, you won’t eat it. The “One Shelf” Rule means organizing by zones. Top shelf: drinks and grab‑and‑go snacks. Middle shelf: leftovers and ingredients for the week. Bottom drawer: vegetables. When everything has a home, you stop buying duplicates and wasting food.
- Pro tip: Use clear bins to group similar items so you don’t lose things in the back.
8. Optimize Your Freezer Space

The freezer compartment in a mini‑fridge is tiny. Don’t waste it on a whole frozen pizza that takes up half the space. Instead, use it for frozen fruit (smoothies), single portions of protein, ice packs, and a bag of mixed veggies. You’ll get more variety without constant trips to the store.
- Pro tip: Freeze leftovers in flat, stackable bags to maximize space.
9. Control Moisture to Prevent Fridge Smells

Mini‑fridges are notorious for mildew smells. Moisture control fixes that. Put an open box of baking soda on a shelf. Drop a silica packet (the kind that comes in shoe boxes) in the vegetable drawer. Wipe down seals weekly with a dry cloth.
- Pro tip: A small, rechargeable dehumidifier cube works wonders if your fridge feels damp.
10. Buy Pre-Prepped Ingredients

Chopping onions in a space where your cutting board hangs over the sink is a pain. Buy pre‑prepped ingredients instead. Frozen diced onions, minced garlic in a tube, bagged shredded veggies, and rotisserie chicken cut the prep time and mess in half.
- Pro tip: The extra cost is often less than what you’d waste on spoiled whole vegetables.
11. Use Kitchen Shears Instead of a Knife

Kitchen shears are safer and easier in a cramped space. Use them to cut pizza, snip herbs, chop cooked chicken, or even cut up green onions directly into a bowl. You don’t need a cutting board, and there’s no risk of a knife slipping in tight quarters.
- Pro tip: Get a pair that comes apart for easy cleaning—they’re dishwasher safe.
12. Master One-Bowl Cooking
The fewer dishes, the better. One‑bowl cooking is your friend. Think rice cooker meals: rice, a protein, frozen veggies, and sauce all cooked together. Mug cakes in the microwave. Sheet pan dinners if you have a toaster oven. You get a full meal with one thing to wash.
- Pro tip: Search “dorm meal prep” on TikTok—you’ll find hundreds of one‑bowl ideas.
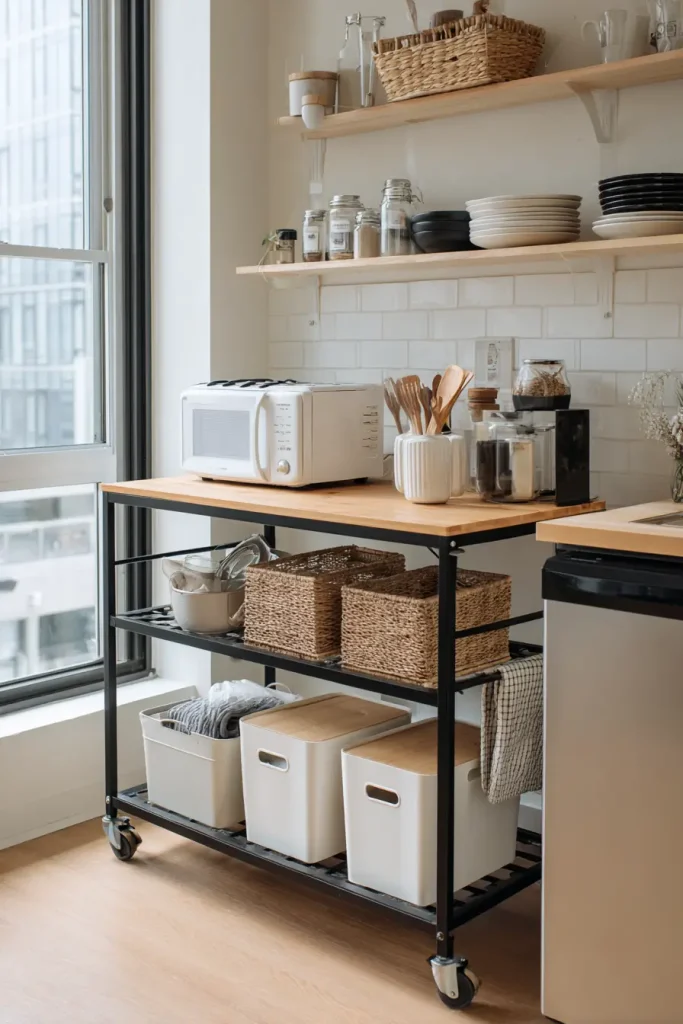
13. Use a Rolling Cart as a Mobile Command Center (and Zone It)

A rolling cart is the single best piece of “furniture” for a kitchenette. It becomes a mobile island, pantry, and appliance garage all in one. Zone it clearly:
- Top shelf: prep area—small cutting board, knife, shears.
- Middle shelf: pantry items like canned beans, pasta, snacks.
- Bottom shelf: small appliances you use less often (kettle, induction cooktop).
- Pro tip: The IKEA Raskog or any dupe fits in tight spaces and rolls wherever you need it.
14. Pick Neutral Colors for a Cleaner Look

In 2026, the trend is moving away from bright plastic bins. Neutral colors—bamboo, matte black, white, or natural wood— make a small space look bigger and less cluttered. Neon plastic screams “dorm room chaos.” A simple color palette tricks your eye into seeing more room.
- Pro tip: Match your cart, bins, and dish towels to a single neutral color for a cohesive look.
15. Use a Collapsible Silicone Tub for Dishes

If your kitchenette doesn’t have a sink—or the sink is too small to wash a bowl—a collapsible silicone tub solves the problem. Fill it in the bathroom sink or communal kitchen, wash your dishes, then collapse it flat to store under the bed. No dripping water across the floor.
- Pro tip: Get one with a built‑in drain plug to make emptying easy.
16. Switch to Swedish Dishcloths

Swedish dishcloths replace paper towels and sponges. They’re biodegradable, absorb 15 times their weight, and—best of all—they don’t get that sour sponge smell. Just rinse, wring, and let them air dry. One cloth lasts months.
- Pro tip: They come in fun patterns, so they double as a small decorative touch.
17. Follow the Daily Reset Rule

In a 4×4 space, dishes pile up fast and make the whole room feel stressful. The daily “reset” rule is non‑negotiable: wash everything right after you eat. If you leave it for “later,” later usually means three days from now. A clean kitchenette makes you want to cook.
- Pro tip: Set a 5‑minute timer after each meal to reset the space before you relax.
18. Use Smart Plugs and AI Recipe Apps

Smart plugs let you control appliances with your voice or phone. Set your coffee maker to turn on five minutes before your alarm. Or start your rice cooker from the library so dinner is ready when you walk in.
AI recipe apps like SuperCook help when you have three random ingredients left in the fridge. List what you have, and the app shows you recipes you can actually make. No more wasted food.
- Pro tip: Fetch is a free app that gives you gift cards for scanning grocery receipts. Use them to buy kitchen gadgets.
19. Manage Moisture with a Fan & Dehumidifier Packs

Steam from cooking can lead to mold on walls or in cabinets. A small rechargeable fan placed in the window—or pointed at the cooking area—keeps smoke from setting off the alarm and pushes humid air outside.
Dehumidifier packs are cheap and effective. Put one under the sink to keep cleaning supplies dry. Toss one in any cabinet where you store food. It stops that musty smell before it starts.
- Pro tip: The CDC notes that proper ventilation is the #1 way to prevent mold. A $15 fan can save you a headache with your RA later.
Conclusion
A small kitchen doesn’t mean a limited diet. These 19 ideas focus on three things: using vertical space, picking tools that do more than one job, and sticking to simple habits.
Start with just one or two that feel doable this week. Try the rolling cart or the induction cooktop first. Once you see how much easier cooking becomes, you’ll wonder why you ever relied on the dining hall.
Ready to upgrade your setup? Pick one idea from this list, try it for a week, and watch your dining budget shrink while your cooking skills grow.

- 17 Classy Living Room Ideas for a Cozy Elegant Look - April 23, 2026
- 16 Dark Moody Living Room Ideas That Feel Rich and Warm - April 22, 2026
- 14 Elegant Bedroom Trends for 2026 You’ll Love - April 22, 2026
