Your Studio Feels Like One Big Messy Room. Here’s How to Fix That.
You wake up and your bed is three feet from your couch. Your work desk is right next to where you eat. You never feel like you’ve “left” work because everything is in the same space.
That’s the real problem with studio apartments. Not the size. The lack of separation.
When every part of your life happens in one open room, your brain never gets a break. You can’t relax on the couch because your bed is right there. You can’t focus at your desk because the TV is in front of you.
The good news? You don’t need to build walls to fix this. You just need to create visual zones — clear signals that tell your brain “this area is for relaxing” or “this area is for sleeping.”
In this guide, you’ll get 16 real, practical ideas to separate your studio apartment living room from the rest of your space. No construction. No permanent changes. Most ideas work for renters. All of them actually work.
Why Visual Zones Matter More Than You Think
Before we get into the ideas, it’s worth knowing why this actually matters for your daily life.
A 2022 study in the Journal of Environmental Psychology found that people who had clearly defined zones in their homes reported 17% lower stress levels than those who didn’t. That’s not small.
When your space has no structure, your brain has to work harder. It keeps scanning the room, picking up signals from every corner at once. That’s exhausting.
The fix isn’t more stuff. It’s smarter placement of what you already have — plus a few key additions.
Over 38 million Americans live in studio or one bedroom apartments under 500 square feet, according to U.S. Census data. So if you feel stuck, you’re not alone. And there are real solutions.
1. Anchor Your Living Room With an Area Rug
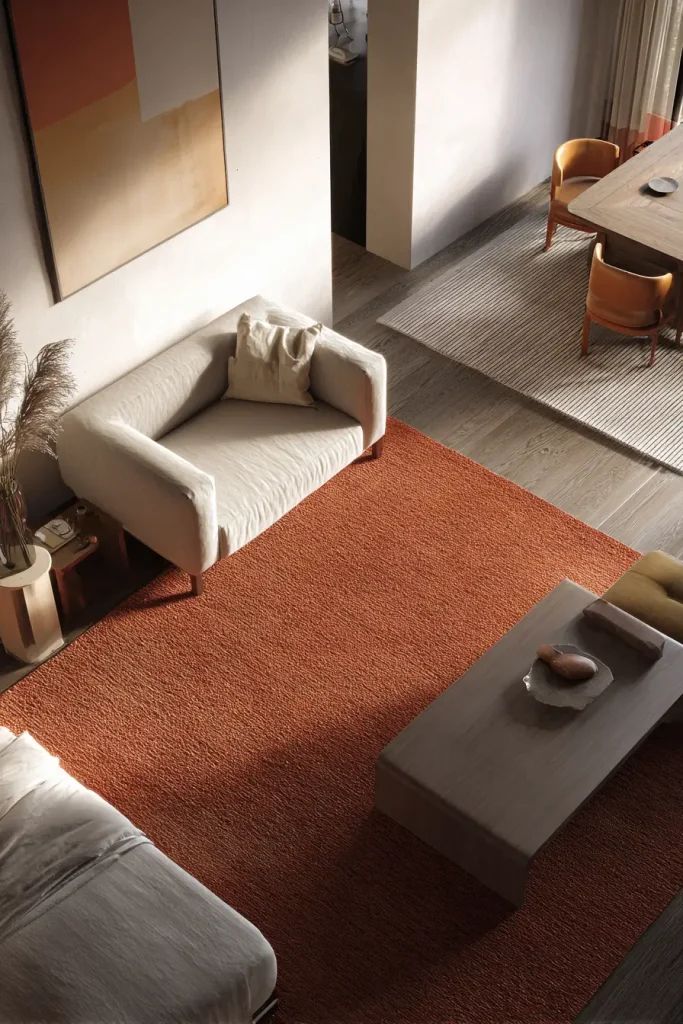
A rug is the fastest way to say “this is the living room.”
Place it under your sofa and coffee table. Make sure the front legs of your chairs and couch all touch the rug. That grouping becomes its own zone. The floor around it stays open — and that contrast is what creates the separation.
The size of the rug matters a lot. Too small and it looks like a bath mat. Too big and it covers the whole floor and loses its effect. For most studio setups, a 6×9 or 8×10 rug works well for the living area.
Color matters too. Use a warmer tone in the living zone — terracotta, warm beige, or rust. Use a cooler neutral near the bed. Your eyes will register the shift even if you don’t consciously notice it.
For renters, Ruggable makes machine washable rugs that start around $180. They’re practical and easy to move. IKEA’s STOENSE and GASER rugs are budget options under $100.
Pro tip: Layer two rugs if your studio has a dining area too. One rug per zone = three defined areas without a single wall.
2. Turn Your Sofa Into a Room Divider
Most people push their sofa flat against a wall. That’s a mistake.
Pull it away from the wall and face it toward the center of the room. Now the back of the sofa acts like a soft wall between your living area and your sleeping area. Your brain registers it as a boundary.
This one move changes how the whole room feels. The living zone now has a clear back edge. The sleeping area feels separate.
Don’t leave the back of the sofa bare. Put a slim console table behind it. Add a small lamp, a plant, and maybe a few books. Now the back of the sofa looks intentional — not like you just shoved furniture around.
How to style it: The console table should be no deeper than 12 to 14 inches. IKEA’s VITTSJÖ shelving unit works well here at around $50. It’s light, open, and doesn’t block light.
Interior designer Alexandra Gater has shown this technique in several of her YouTube studio makeovers. It works even in spaces as small as 350 square feet.
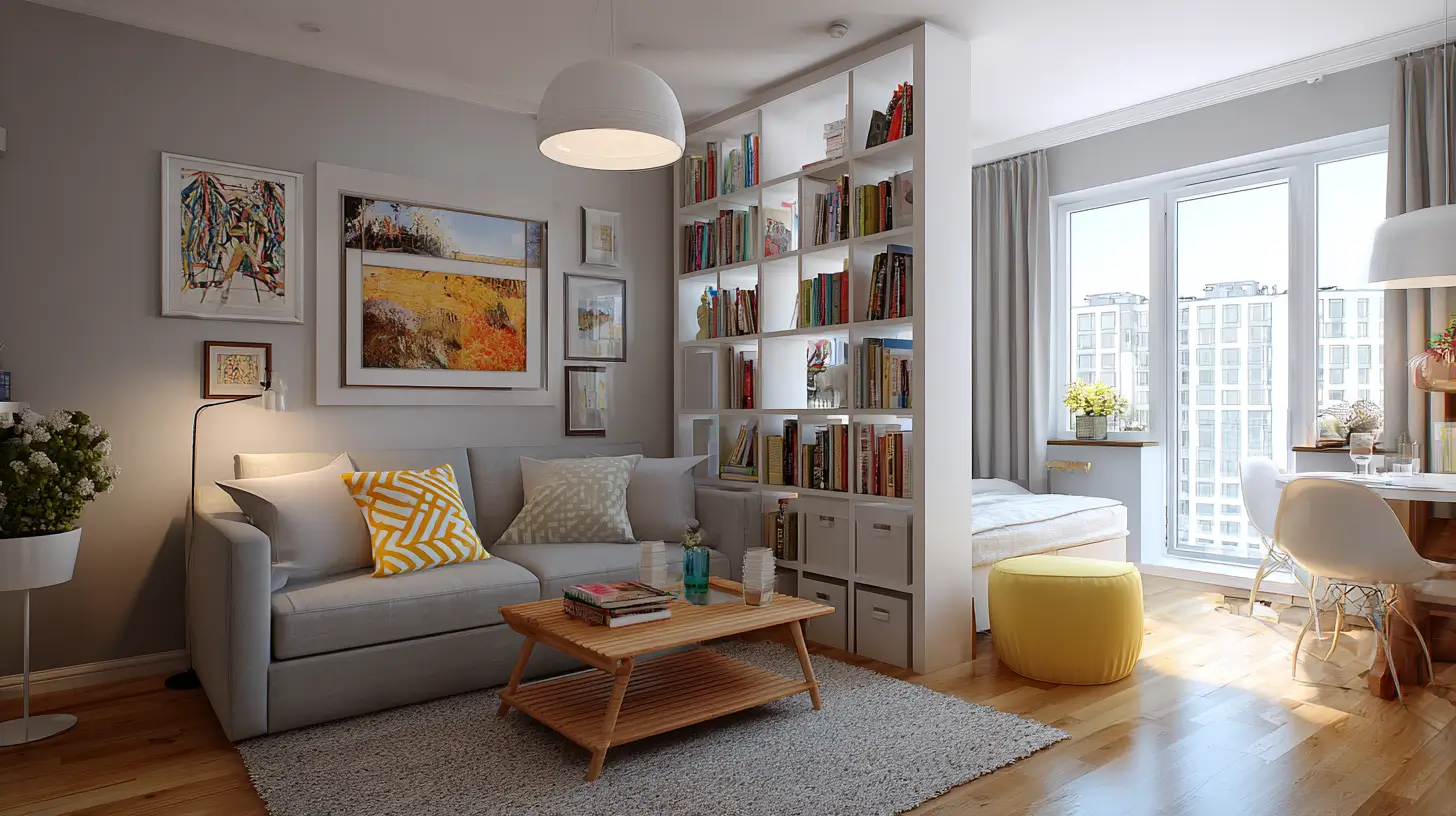
3. Use a Bookshelf as a Wall You Can See Through

A tall open bookshelf placed perpendicular to the room creates a visual wall — without blocking light or making the space feel closed in.
IKEA’s KALLAX unit is the most popular option for this. The 4×4 grid version costs around $200 to $280. You can use it as a divider between your living area and your bed area, and access it from both sides.
The key is how you style it. Don’t pack every shelf full. Leave some open. Mix in plants, small baskets, and a few books. Too much stuff and it becomes a visual mess. The right balance makes it look like a real design feature.
Low vs. tall dividers: A low divider (around waist height) keeps the room feeling open and airy. A tall divider gives more actual privacy. In a smaller studio, lower is usually better.
This works especially well if your studio is long and narrow. Place the shelf roughly in the middle and you’ve just created two rooms.
4. Hang Curtains From the Ceiling to Section Off Areas

Curtains aren’t just for windows.
A floor to ceiling curtain hung between your bed area and your living area creates instant separation. It’s soft. It’s movable. And it makes the ceiling feel taller at the same time.
The renter friendly option: IKEA’s VIDGA ceiling curtain track system costs between $15 and $40. It mounts directly to the ceiling with minimal hardware. You can use it to hang curtains in a straight line across any part of the room.
For sheers, use them between your living and sleeping zones. Light passes through but the visual separation is clear. For the area around your bed, blackout curtains block light and signal “this is a sleep space.”
YouTube channel Lone Fox has a well watched video showing curtain zoning in a 350 square foot studio. It’s worth watching before you buy anything.
Velvet curtains are having a big moment in 2026. They add warmth and texture, and they hang well without much structure.
What not to do: Don’t use short curtains. They look unfinished and actually make ceilings feel lower. Always go floor to ceiling.
5. Use Color or Removable Wallpaper to Mark a Zone
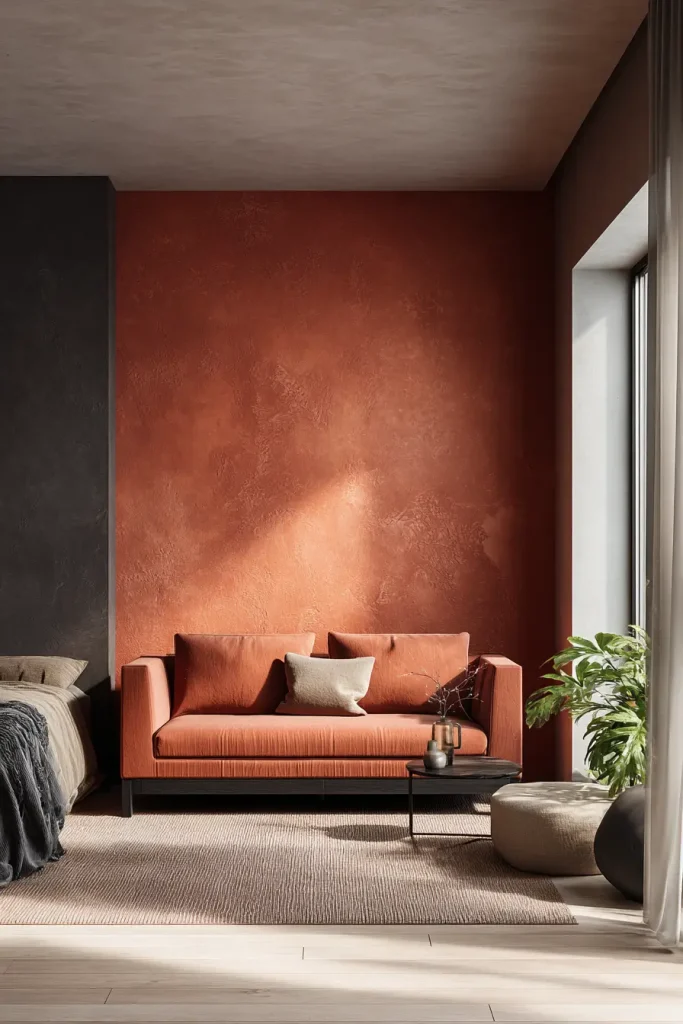
Paint is the cheapest zone marker that exists. One wall behind your sofa in a different color immediately signals “this is the living room.”
You don’t need to paint the whole room. Just one wall. A warm clay, dusty sage, or terracotta creates warmth in the living zone. Keep the rest of the walls neutral. The contrast does the work.
For renters, peel and stick wallpaper is the answer. Chasing Paper makes removable panels that start at around $38 each. They go on clean, come off without damage, and look genuinely good.
NuWallpaper at Target is a cheaper option. It won’t last forever but it works well for rental situations.
One more trick: Paint or tape a stripe on the floor between zones. It sounds odd but it works surprisingly well as a visual boundary, especially in open plan spaces.
Sherwin Williams “Redend Point” has been popular in warm studio setups for the past few years and still works well in 2026. It’s a soft pinkish clay that reads as cozy without being too loud.
6. Use Lighting to Make Each Zone Feel Different
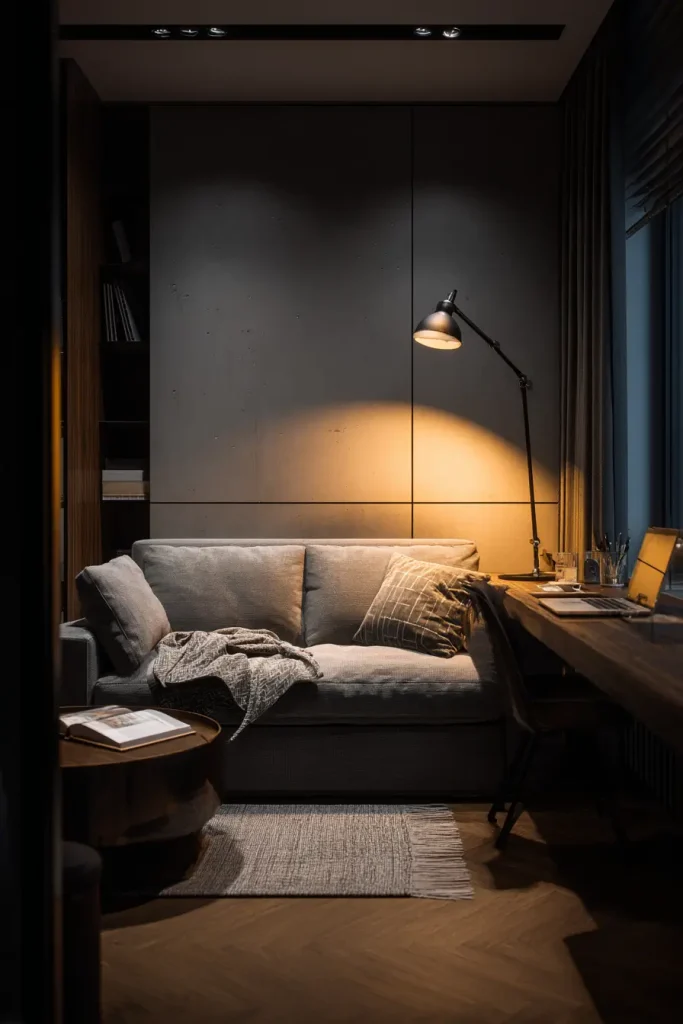
This is the most underused trick on this list.
When you use one overhead light for your whole studio, everything looks the same. There’s no separation. No mood. No zone.
Instead, give each area its own light source. A floor lamp for the living area. A task lamp for your desk. A warm bedside lamp for the sleep zone. Now each area has its own atmosphere.
Turn off the overhead light. Seriously. The overhead light flattens everything. Switch to layered lighting and your whole apartment feels bigger and more intentional.
Smart bulbs make this easy. Philips Hue starter kits cost between $70 and $130. You can set different color temperatures for different zones — warm white for relaxing, cool white for working. IKEA’s TRÅDFRI bulbs are a cheaper option at around $15 each.
IKEA’s RANARP floor lamp at $60 is a solid pick for anchoring the living zone. Place it next to the sofa. Turn it on in the evening. That corner becomes the “living room” the moment the light is on.
Apartment Therapy lists layered lighting as one of the highest impact, lowest cost changes you can make in a studio. They’re right.
7. Raise the Sleeping Area on a Platform Bed

Level changes are powerful zone signals.
When your bed sits higher than your floor level, your brain registers it as a separate area. Even 8 to 12 inches makes a difference. The sleeping zone suddenly has a physical presence.
Platform beds with built in storage are a practical choice here. You get the visual height difference and extra storage underneath. Wayfair sells solid options under $500.
Loft beds go further. A loft bed raises your sleeping area completely off the ground, freeing up the entire floor below for a real living space. This is the most dramatic transformation you can make in a studio. The Sorry Girls on YouTube have a popular video showing a full studio makeover using a loft bed setup.
Murphy beds are worth knowing about if you want to hide the sleeping zone entirely during the day. Resource Furniture and Clei make Murphy bed and sofa combos that are genuinely impressive. They cost between $2,500 and $6,000, which is a lot — but if you’re staying in a studio long term, it can be worth it.
IKEA’s UTÅKER bed works as a stackable platform option at a lower price point.
8. Place a Console Table Behind Your Sofa
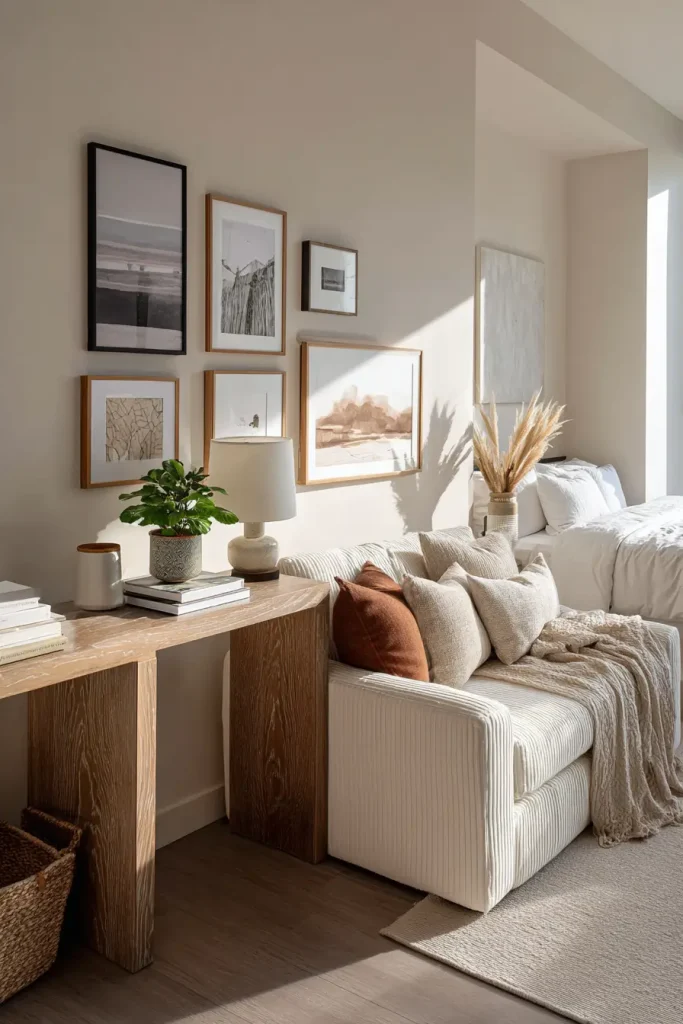
This is a simple trick that most people miss.
A slim console table placed directly behind your sofa creates a visual backstop. Your eye follows the sofa, hits the console, and stops. It doesn’t wander into the sleeping area. That’s the whole point.
It also gives you a functional surface. Put a lamp on it. A plant. Some books. Now the back of your sofa has a finished, intentional look.
The console should be close to the same height as the back of your sofa. Around 30 to 32 inches tall is usually right. Depth should be 12 to 14 inches max so it doesn’t take up much floor space.
IKEA’s LIATORP console works well at around $150. CB2’s Halsted is a nicer option if your budget allows, around $400.
Add a gallery wall above the console. It draws the eye upward and makes the living zone feel like a real, complete room.
9. Treat Your Ceiling to Define a Zone From Above
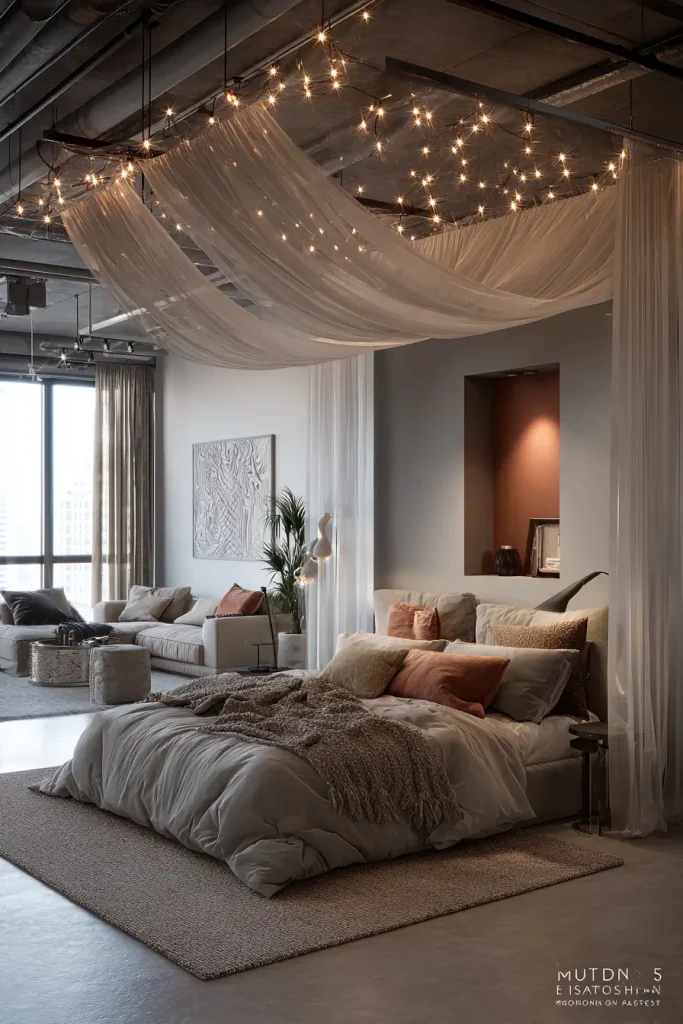
Most people forget about the ceiling. That’s a missed opportunity.
A canopy above your bed is the easiest ceiling treatment you can try. Hang sheer fabric from ceiling hooks or a ceiling mounted rod above the bed. It creates a “room within a room” feeling. The sleeping area feels enclosed and private without any walls.
String lights work too. Hang Edison string lights in a grid pattern above your sleeping zone. The warm light and visual frame say clearly — this area is different.
If you own your place, painting just the ceiling section above one zone in the same color as your accent wall is a powerful move. It pulls the zone together from top to bottom.
Amazon sells basic ceiling hooks for under $10. IKEA’s KURA bed frame has built in canopy support if you want a full setup.
Apartment Therapy’s Instagram account has shown several examples of ceiling painted zones in small NYC apartments. Search “ceiling color zoning studio” for real photos.
10. Use Tall Plants as a Natural Divider

Plants do more than look nice. Placed well, they block sightlines and create a soft boundary between zones.
A tall fiddle leaf fig, bird of paradise, or snake plant placed between your living area and your sleeping area acts like an organic room divider. It’s not a wall but it reads as one.
The cluster approach works better than spreading plants out. Group three to five plants together between zones. Vary the heights. The grouping creates a clear visual break.
Low maintenance picks for 2026: pothos, ZZ plant, and monstera deliciosa are all forgiving if you forget to water. The Sill and Bloomscape both ship live plants directly to your door in the US. A large fiddle leaf fig from The Sill runs about $65 to $95.
IKEA’s HYLLIS shelf at around $15 works as a plant ladder. Stack plants at different heights on it to create a fuller green wall effect.
This approach is great for renters because it’s completely removable and leaves zero damage.
11. Stop Pushing Furniture Against the Walls

This is the most common studio mistake. And it’s easy to fix.
When every piece of furniture is against a wall, you create one big open floor in the middle. That makes the room feel like an empty gym, not a home. There are no zones.
Pull your sofa away from the wall. Float it toward the center of the room. Put a rug under it. Now that sofa and rug form a living room cluster. The space behind the sofa becomes a natural divider.
The rule: Leave 18 to 24 inches of breathing room between major furniture pieces. Not wall to wall — cluster to cluster.
IKEA’s Place app lets you use your phone camera to see what furniture looks like in your actual room before you move anything. It’s free and genuinely useful for planning layouts.
Interior design site Apartment Therapy calls this “furniture islands” — grouping pieces together to form a zone, the way islands sit in water. It’s a good way to think about it.
12. Use Open Shelving as a See Through Wall
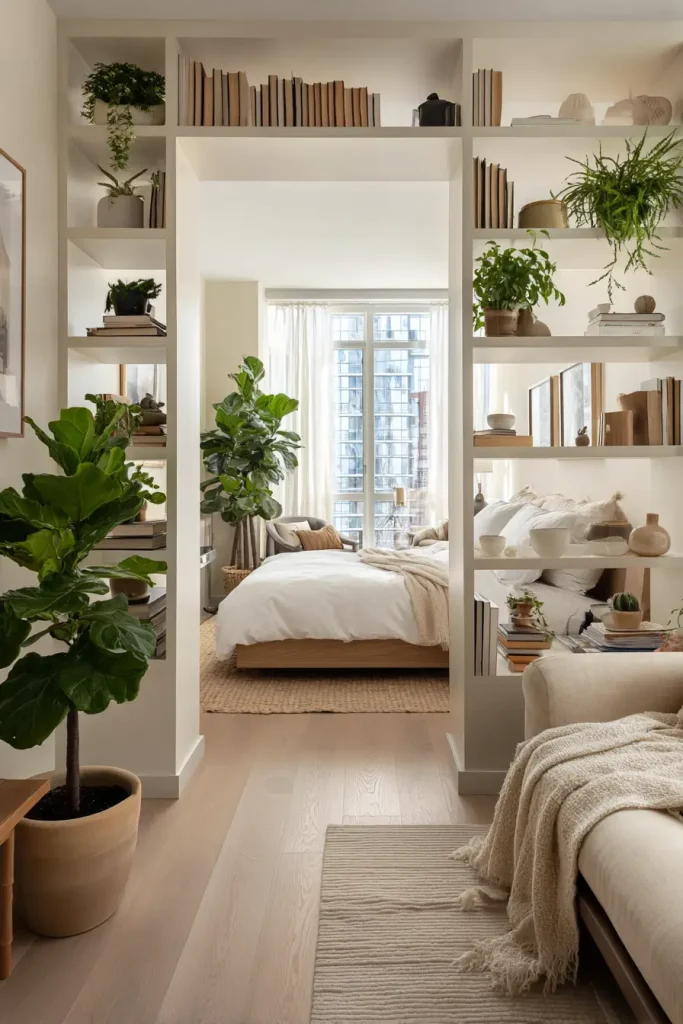
Open shelving used as a room divider gives you the best of both options. It creates separation without making the room feel smaller.
A double sided open bookshelf placed between zones means you can reach it from the living side and the sleeping side. It acts as storage, a display surface, and a visual divider at the same time.
How to style it so it doesn’t look cluttered: Fill about 60% of the shelves. Leave the rest open. Mix sizes — a tall plant next to a small stack of books next to a single object. This creates visual rhythm instead of visual noise.
IKEA KALLAX 8 cube at around $149 is the most practical option. CB2’s Stacked modular shelving is a higher end choice that looks very clean.
Design blog Yellow Brick Home has covered this technique in detail with real photos. It’s a good reference if you want to see what this looks like in an actual apartment.
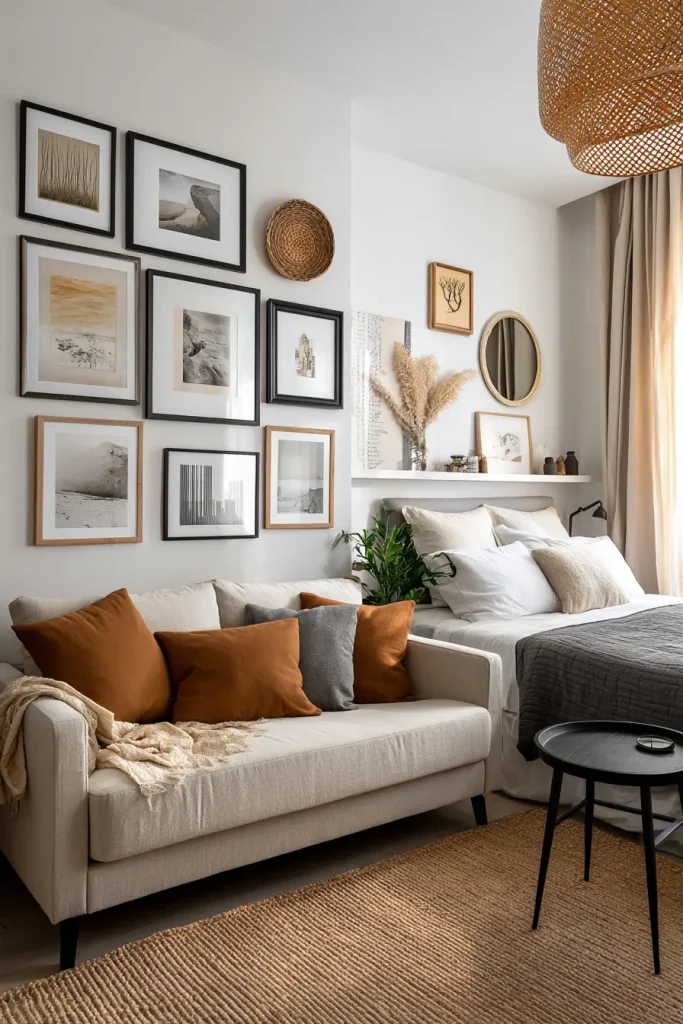
13. Build a Gallery Wall to Anchor the Living Zone

A gallery wall behind your sofa or above your main seating area says very clearly — this is the living room.
It draws the eye to one wall. It gives the seating area a backdrop. And it pulls attention away from whatever is happening on the other side of the room.
Mix frames of different sizes. Include a mirror or two — they reflect light and add depth. Add one or two non frame objects like a small shelf or a woven piece. The mix of shapes is what makes it look real instead of staged.
Renter safe hanging options: Command Large Picture Hanging Strips hold up to 16 pounds per pair and come off without damage. Picture rail hooks work if your apartment has rail molding. Both are available at Target and Amazon.
For art on a budget, Desenio prints start at around $10. Framebridge custom frames photos you already have. Both are solid options.
Gallery wall inspiration accounts worth following: @apartmenttherapy and @ruemag on Instagram both post real apartment examples regularly.
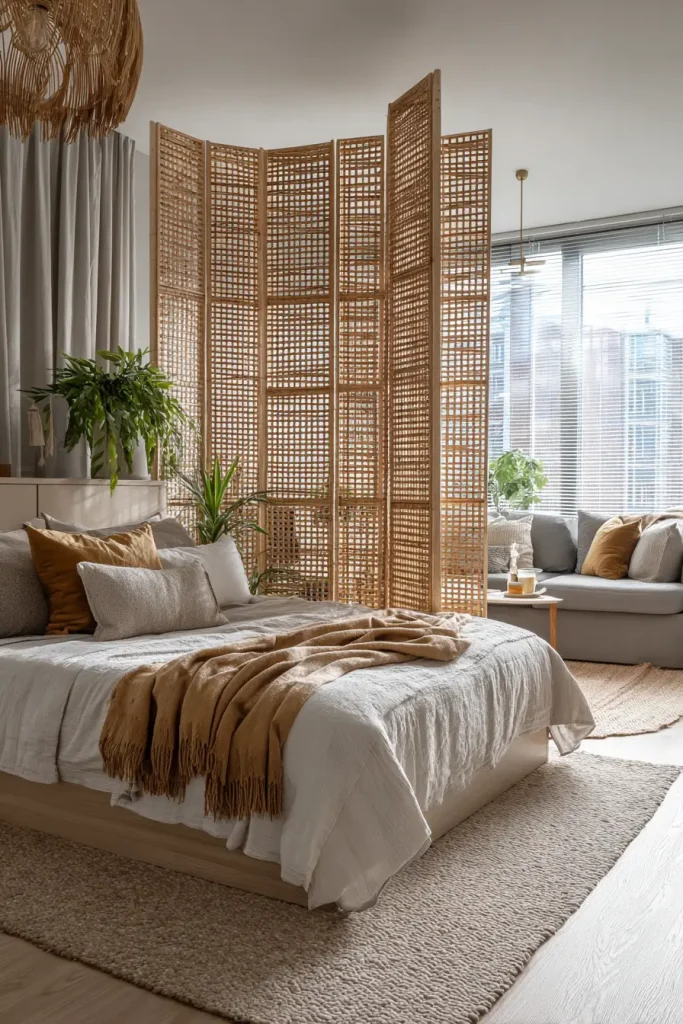
14. Try a Folding Screen Divider
A folding screen is the simplest, most flexible room divider you can buy.
You set it up. You move it. You fold it flat and slide it behind a door when you don’t need it. There’s no drilling, no installation, no landlord permission needed.
Rattan screens are popular in 2026 because they’re light looking and they don’t block light completely. They create separation while keeping the room feeling open. World Market sells a 3 panel rattan screen for around $120.
Mirrored screens are worth considering too. They divide space AND reflect light, which makes the room feel bigger. Two problems solved at once.
Wayfair has a wide selection of folding room dividers from $60 to $250. Filter by height — taller screens (around 6 feet) are more effective zone markers than short ones.
The honest downside: folding screens can look a bit temporary if they don’t match the rest of your space. Choose a material that connects to other textures in your room.
15. Let the Dining Table Draw the Zone Line

In many studios, the dining table sits right next to the kitchen. That’s good positioning. Use it intentionally.
A dining table placed between your kitchen and your living area creates a natural zone line. The kitchen is behind it. The living area is in front of it. The table marks the boundary.
Height helps here. A bar height table with stools sits higher than a regular sofa, creating a clear visual shift. That height difference communicates: this area is different.
Hang a pendant light directly above the table. It doesn’t need to be hardwired — a swag pendant or battery powered pendant works fine in a rental. The light from above claims the zone. Your eye recognizes it as a defined space.
IKEA’s NORDEN gateleg table folds flat when you need the floor space back. It costs around $249 and is one of the most practical options for a small studio. The CB2 Compass Mini round table is a cleaner look for tighter spaces.
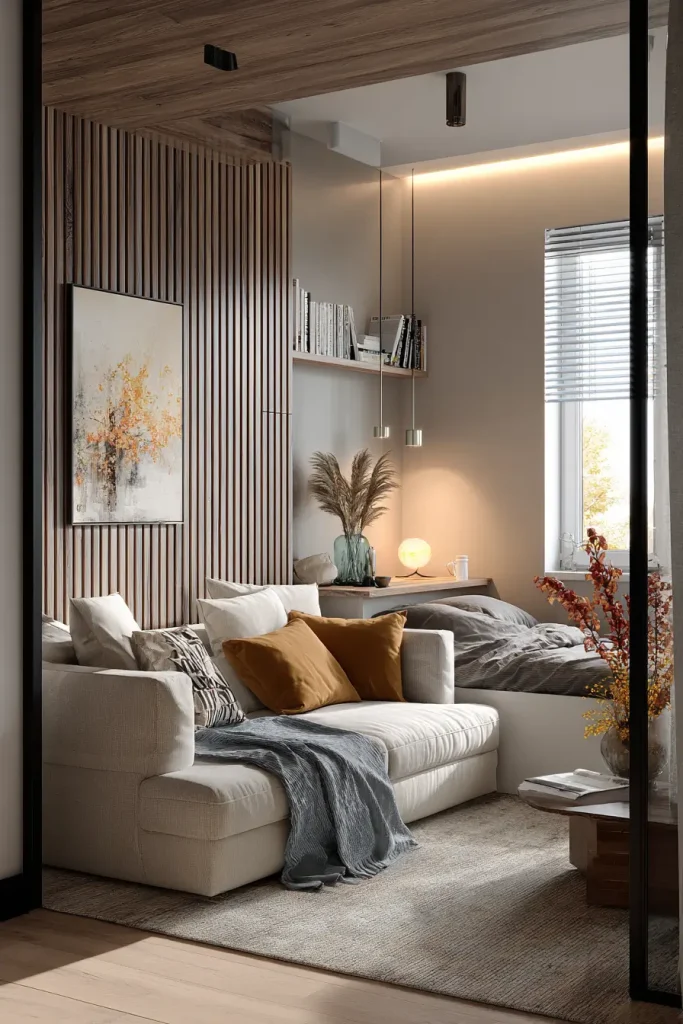
16. Use Different Textures to Signal Different Zones
This one is subtle but powerful.
You don’t need a wall between your living zone and your work zone. You just need them to feel different. Texture does that.
Soft textures say relax. Velvet cushions, a chunky knit throw, a shag rug, a boucle chair — all of these signal comfort. Put them in your living area.
Hard, clean textures say focus. A wood desk surface, a metal lamp, smooth cotton fabric, a sleek chair — these signal work. Keep these in your desk area.
You might not even consciously notice the difference when you sit down. But your brain does. And that’s what makes you actually relax in one spot and actually focus in another.
What’s trending in 2026: Boucle fabric, natural linen, and raw wood are all popular for living zones right now. H&M Home and Anthropologie both carry boucle chairs in the $200 to $400 range. IKEA’s RÅVAROR throw adds texture for under $20.
Dezeen’s 2026 interior trend reports specifically call out tactile contrast in small spaces as a major direction. It’s not just aesthetics — it’s functional design.
You Don’t Need More Space. You Need More Structure.
Every idea in this guide works without building anything permanent. Most work for renters. All of them can be done on a budget if you start with one or two.
The best starting point for most studios: lay down a rug to anchor the living zone, pull the sofa away from the wall, and add a floor lamp. Those three changes together will make the biggest difference fastest.
From there, add a bookshelf divider or curtain to separate the sleeping area. Then layer in lighting, texture, and a gallery wall.
Your studio can feel like a real home with real rooms. It just takes visual structure, not more square footage. These 16 studio apartment living room ideas give you everything you need to build that structure — starting today.

- 17 Classy Living Room Ideas for a Cozy Elegant Look - April 23, 2026
- 16 Dark Moody Living Room Ideas That Feel Rich and Warm - April 22, 2026
- 14 Elegant Bedroom Trends for 2026 You’ll Love - April 22, 2026

